Just like Microsoft Cortana and Amazon’s Alexa, you can also use Google Assistant for PC. However, there is no simple way to start accessing Google Assistant for PC; you can always use it in a slightly indirect way, but it is applicable to Windows 11/10 PCs and Chromebooks. In this post, we will walk you through how to set up Google Assistant on Windows 11/10.

Before you begin, you need first to enable Voice & Audio Activity for your Google Account.
Here’s how:
-
On your Android phone or tablet, open your device’s Settings app
Google
Manage your Google Account.
- At the top, tap Data & personalization.
- Under Activity controls, tap Web & App Activity.
- Check or uncheck the box next to Include audio recordings to turn the setting on or off.
When the audio recording setting is off, voice inputs from interactions with Google Search, Assistant, and Maps won’t be saved to your Google Account, even if you’re signed in. If you turn the audio recordings setting off, previously saved audio is not deleted. You can delete your audio recordings at any time.
Is there Google Assistant for PC?
Yes, Google Assistant is available on Windows PC through an unofficial client. The client lets you use many of the features of Google’s virtual assistant. It is like your personal Google that does everything for you.
Set up Google Assistant on Windows 11/10
To install Google Assistant for Windows 11/10, you need to download and install Python on your Windows PC. Ensure that you checkmark the box next to Add Python 3.8 to PATH.
After installing Python for Windows, continue as follows:
1) Open Windows Explorer, create a New Folder in C: Drive, and name it GoogleAssistant.
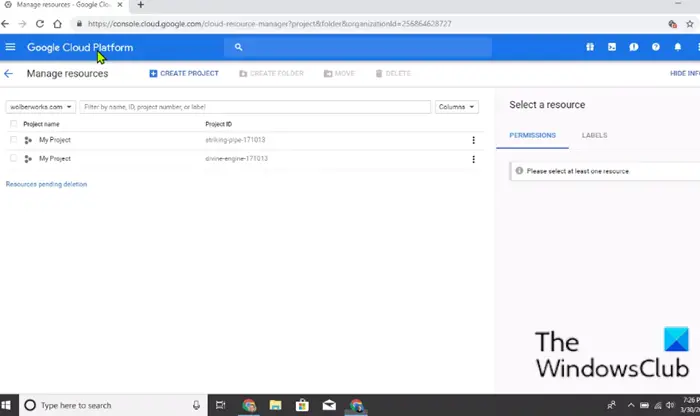
2) Now, in your web browser, open Google Cloud Platform and select Create Project. If it asks you to Sign in, use your Google account credentials and log in.

3) Use WinGoogleAssistant to name your project. You’ll see a Project ID under your project name; note it down somewhere and keep it safe as it will be required later on while using Google Assistant on your Windows PC.
4) Select Create and follow the instructions further.
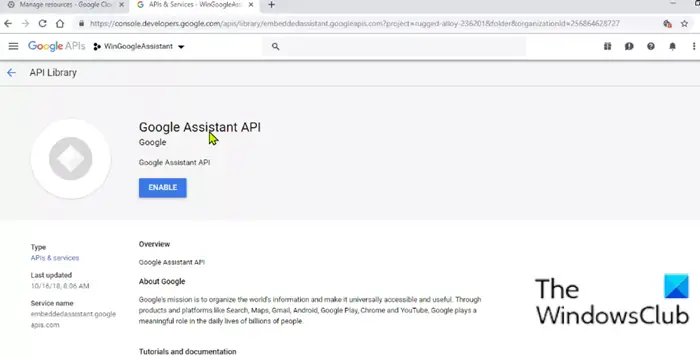
5) Next, open Google Assistant APIs in your browser and select Enable to turn on Google Assistant API for your project. Later select Create Credentials.

6) Next will be the Add credentials to your project screen; choose the below-listed responses.
- Which API are you using?
- Where will you be calling the API from?
- What data will you be accessing?
The responses to be submitted for these questions will be Google Assistant API, Other UI (e.g., Windows, CLI tool), and User data, respectively, for the three questions above.
Click on What credentials do I need? After submitting your responses.
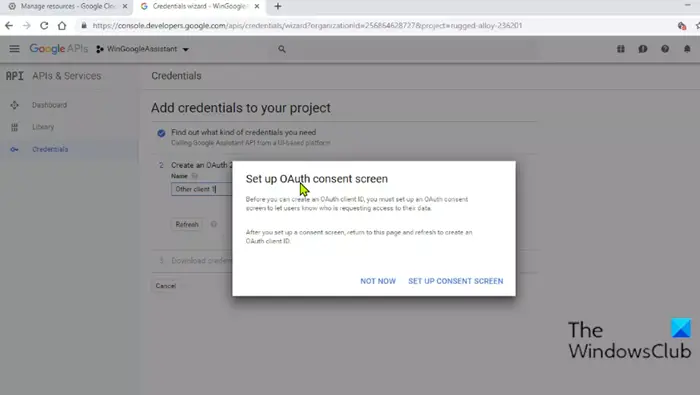
7) Then click on the Setup consent screen and change the Application Type to Internal.

Enter WinGoogleAssistant in the Application name and click Save at the bottom of the screen.
8) Then, Create credentials > Help me choose. Follow the instructions like the Point no 6. And then proceed towards the next step.
9) Type WGAcredentials in the name box and select Create OAuth client ID.
10) Download the credentials and tap Done.
11) Now, select the down arrow to download the JSON file. Save the file in the Google Assistant folder you created in Step 1.
12) Now press Windows key + R and type cmd in the Run dialog box, and hit Enter to open Command Prompt. In the command prompt, copy and paste in the syntax below and hit Enter.
py -m pip install google-assistant-sdk[samples]
13) Wait for the installation and then copy and paste in the syntax below and hit Enter again:
py -m pip install --upgrade google-auth-oauthlib[tool]
14) Open the Google Assistant folder from C: Drive and locate the JSON file you recently saved in Step 11. Right-click on the file and open it.
15) From properties, select the file name and copy it. Now, switch back to Command Prompt and type:
google-oauthlib-tool --client-secrets C:\GoogleAssistant\
and paste the file name you just copied in the step above followed by a Space bar, and then type the syntax below and hit Enter.
--scope https://www.googleapis.com/auth/assistant-sdk-prototype --save --headless
16) You’ll see a command prompt running, and later on, you will see a URL displayed just before a prompt that asks you to Enter the authorization code. Select the entire URL starting with https:// and copy it.
17) Now, open a new browser and paste the URL in the address bar. Use the same Google account credentials to sign in. You’ll see a dialog asking you to Allow access to Win Google Assistant. Tap Allow.
18) In the next window, you’ll see a long string of letters and numbers. Copy those characters using the copy icon at the side.
19) Again, go back to the Command Prompt window and paste the characters you just copied. It is the Authorization code you were asked to enter in Step 16. As soon as you press Enter, you’ll see a ‘credentials saved’
20) That’s it, you have Google Assistant on your Windows 11/10 PC
21) To test, on your CMD prompt window, type:
py -m googlesamples.assistant.grpc.audio_helpers
Your Windows 11/10 computer will record audio of 5 seconds and play it back. If you hear the audio, the Google Assistant setup is done.
22) Now, locate the Project ID you copied and noted in Step 3 and enter it in the CMD prompt window. Then, press Enter.
23) Next, type in:
googlesamples-assistant-devicetool --project-id
followed by space bar, type the Project ID and again press space bar and type in the command below and hit Enter to finish the Google Assistant setup on Windows 11/10.
register-model --manufacturer “Assistant SDK developer” --product-name “Assistant SDK light” --type LIGHT --model “GA4W”
24) If you want Google Assistant with push to talk functionality, enter the command below in the CMD prompt window and hit Enter:
py -m googlesamples.assistant.grpc.pushtotalk --device-model-id “GA4W” --project-id
25) You can now press Enter key while the program is active and speak out about what you want your Google Assistant to do.
That’s it on this tutorial on how to set up Google Assistant on Windows 11/10 PC! Let us know your experience in the comments section below.
Is Google Assistant free to use?
Yes, Google Assistant is completely free to use. It does not cost money. If you happen to see any prompt to pay for Google Assistant, know that it is a scam.
NOTE: PC users can download and install the Google Assistant Unofficial Desktop Client from github.com and then follow the instructions in their Wiki guide to set up the Google Assistant API in Google Cloud.
Is Google Assistant safe to use?
These clients and methods are not official. They are a workaround, and hence no one would say that they are safe. What you can do is use another Google account so your primary account remains secure. While you will not get the same personalization on the phone, you can still use Google Assistant.
Why is there no official Google Assistant client for Windows PC?
Only Google can answer that, but it’s mostly related to their close collaboration. Most PC users don’t use an assistant, and a classic example is Cortana, which did not see much usage.
Leave a Reply