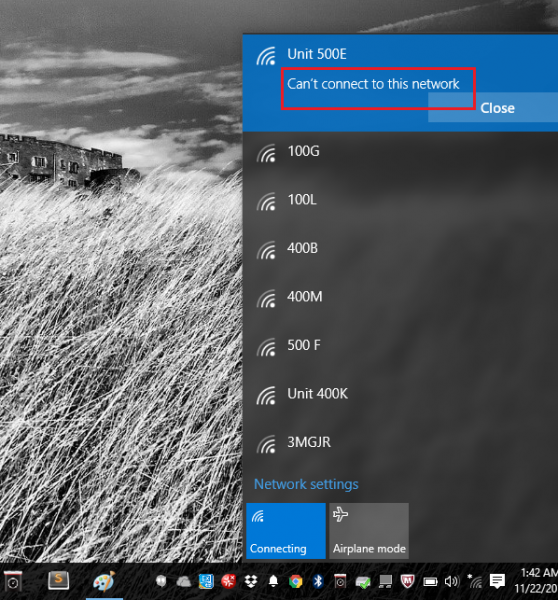
A commonly reported error with Windows is where internet connectivity bothers users with an error message – Can’t connect to this network and they are unable to connect their Windows 11/10/8/7 computers to the internet. Here is how you may fix the issue.

Why is my Wi-Fi saying Can’t connect to this network?
Bad Drivers, poor connectivity or corrupted network settings can make Windows display a message – Can’t connect to this network.
How do I fix Failed to connect to network?
Restarting your computer and your router will in most cases make the Can’t connect to this network message go away. If not, then these suggestions are sure to help you.
Can’t connect to this network error on Windows
Some solutions work for some and some for others, and at times no level of troubleshooting helps resolve it. Nevertheless, here is a list of possible solutions that might help:
- Update wireless drivers
- Power cycle modem-router-computer
- Run Hardware and Devices troubleshooter
- Run the Network related Troubleshooters
- Change wireless security
- Network Reset.
1] Update wireless drivers

Our first approach to the issue should be updating the drivers.
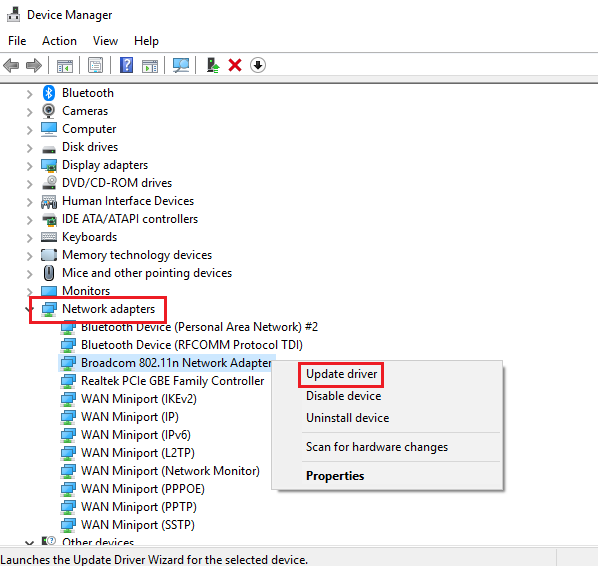
- Press Win + R to open the Run window. Type the command devmgmt.msc and press Enter. This would open the Device Manager, displaying the drivers in alphabetical order.
- Right-click on the network drivers and update them. You might also consider re-installing them and restarting the system.
If the above steps don’t work, try downloading and installing the drivers from the manufacturer’s website.
2] Power cycle modem-router-computer
At times, the system automatically configures an IP address leading to a condition called APIPA. To resolve this, we would need to power cycle the modem-router-computer which is explained as follows:
- Switch off the modem, router, and computer.
- Wait for a minute and then switch on the modem and wait for all its lights to turn up. Then switch on the router and wait for all its lights to turn up. Once done, switch on the system.
Check if the internet connects. If not, move on to the next solution.
3] Run Hardware and Devices troubleshooter
- Click on the Start button and then the gear-like symbol to open the Settings menu.
- Select Updates and Security and then the Troubleshoot tab from the list on the left.
- Scroll down to Hardware and Devices and click on it to run the Hardware Troubleshooter.
4] Run the Network related Troubleshooters
To open Internet Connections Troubleshooter:
msdt.exe -id NetworkDiagnosticsWeb
To open the Incoming Connections Troubleshooter
msdt.exe -id NetworkDiagnosticsInbound
To open the Network Adapter Troubleshooter:
msdt.exe -id NetworkDiagnosticsNetworkAdapter
5] Change wireless security
Ideally, the advice is always to change the security to a higher protocol, but at times it doesn’t allow the network to connect.
Thus we could change the security from WPA to WEP, which allows a 10-digit numerical password. However, it might resolve the network connectivity issue. The settings have to be changed on the router’s settings page.
Related: Security or Firewall might be blocking the connection
6] Network Reset

If nothing else has worked, a Network Reset would probably help.

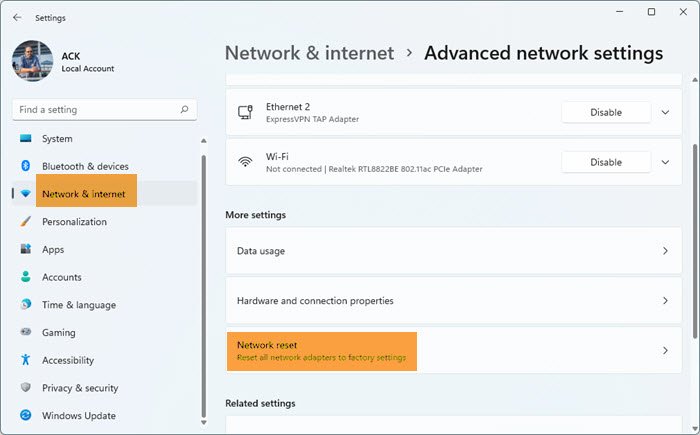
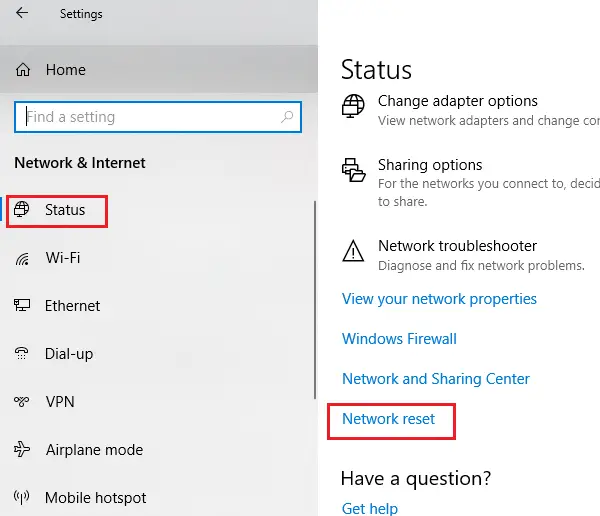
- Click on the Start button and then the gear-like symbol to open the Settings page.
- Select the Network and Internet option and then scroll to the option for Network Reset. Click on it and initiate the reset.
This post offers more suggestions to fix Network & Internet connection problems. Hope something helps you.