The earlier versions of Windows OS had the Mouse Pointer Shadow enabled by default. While some found this feature visually pleasing, others found it of no use – and yet some others wanted to increase performance by saving that bit of resource – and they, therefore, looked for a way to disable the mouse pointer shadow. In the latest versions of Windows OS, like Windows 11/10, this feature is disabled by default. However, if you want, you can enable it. This article shows how to disable or enable the Windows Mouse Pointer Shadow feature on Windows 11/10.
What is pointer shadow in Windows?
A pointer shadow is a faint dark appearance under the mouse pointer that gives it a 3D effect. If this option is enabled, the mouse pointer looks like it is floating above the other items on the computer screen. In Windows 11/10, this feature is disabled by default. However, if you want, you can enable it in Mouse Settings.
Disable or enable Mouse Pointer Shadow feature in Windows 11/10
You can disable or enable the Windows Mouse Pointer Shadow feature on Windows 11/10 by using any of the following methods:
- Through Performance Options
- Via Mouse Properties
We have explained both these methods below:
1] Disable or enable Mouse Pointer Shadow feature through Performance Options
To begin the process, search for ‘Control Panel’ in Start search and open it.
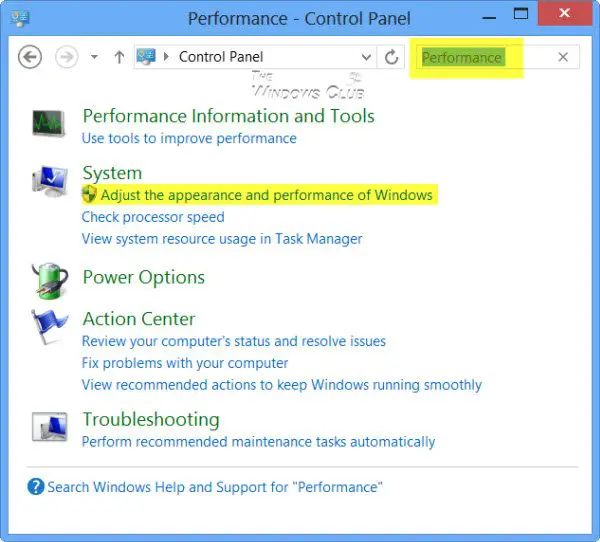
Type Performance in the search bar and from the search results displayed, select Adjust the appearance and performance of Windows.
In the ‘Performance Options’ window which opens, you will be able to select the settings you want to use for the appearance and the performance of your Windows computer.
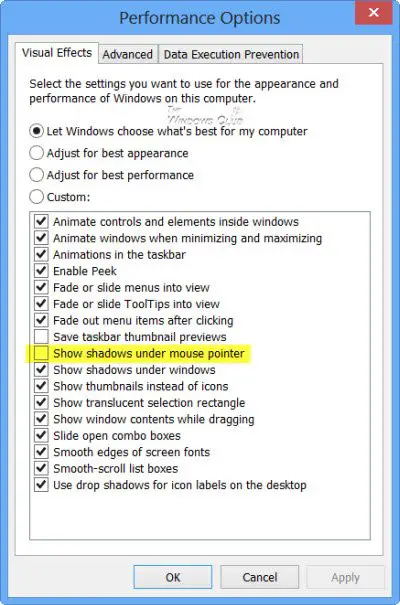
To enable the Windows Mouse Pointer Drop Shadow feature, check the Show shadows under the mouse pointer feature and click Apply/OK. This option is available under the Visual Effects tab in the Performance Options window.
2] Through the Mouse Properties
You can also use Mouse Properties to enable and disable this feature on your Windows 11/10 computer.
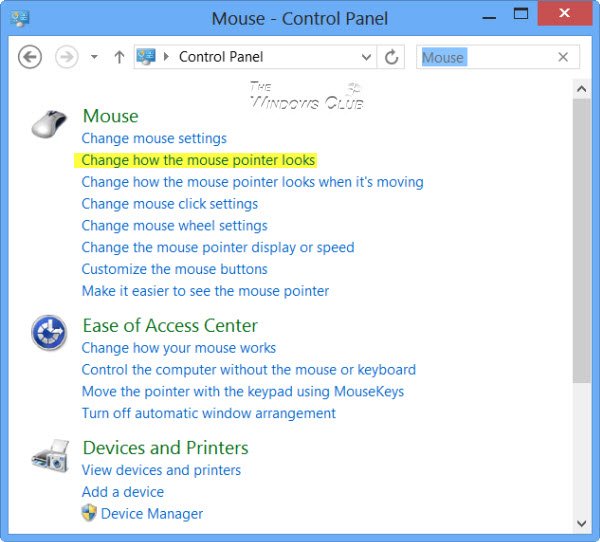
Open the Control Panel, type Mouse in the Control Panel search bar, and hit Enter. Click on Change how the mouse pointer looks.
This will open the Mouse Properties box. Select the Enable pointer shadow checkbox and click on Apply.
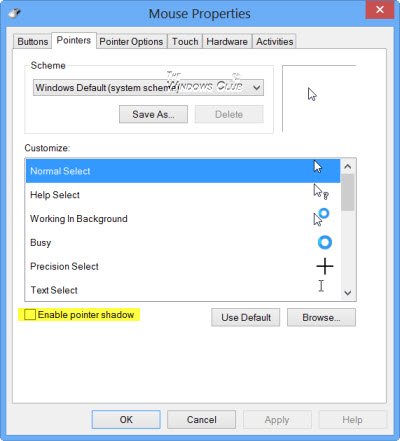
That’s it! You will have now enabled the shadow on the Mouse Pointer of your Windows 11/10 desktop or tablet.
TIP: This post will show you how to remove the shadow effect from Explorer windows and Drop shadows for icon labels.
Why did Microsoft remove the mouse pointer shadow?
While there is no official documentation, Microsoft probably did so probably because, in remote sessions, the responsiveness of the mouse pointer to the user is said to be much higher, without the shadow. I cannot think of any other reason why Microsoft decided to disable just this feature in Windows 11/10. Saving that bit of resource, could not be a reason, in my opinion.
If you have any ideas on this, please do share.
Need more Mouse tips? Read this post on Mouse Tricks For Windows.
