If you want to import, export, repair, or restore default Windows Firewall Policy in Windows 11/10 computer, here is how you can do that. As Windows Defender Firewall with Advanced Security offers in-built options, there is no need to use third-party software to get the job done.
How to import Windows Firewall Policy in Windows 11/10
To import Windows Firewall Policy in Windows 11/10, follow these steps:
- Search for windows firewall in the Taskbar search box.
- Click on the individual search result.
- Click on the Action menu.
- Choose the Import Policy option to import.
- Click on the Yes button.
- Choose the .wfw file.
- Click the Open button.
- Confirm the import.
To learn more about these steps, continue reading.
First, you need to open the Windows Defender Firewall with Advanced Security. For that, search for windows firewall in the Taskbar search box and click on the individual search result.
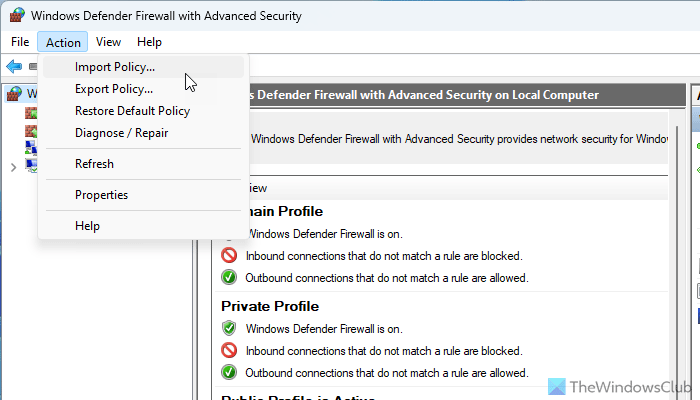
Then, click on the Action menu and choose the Import Policy option.
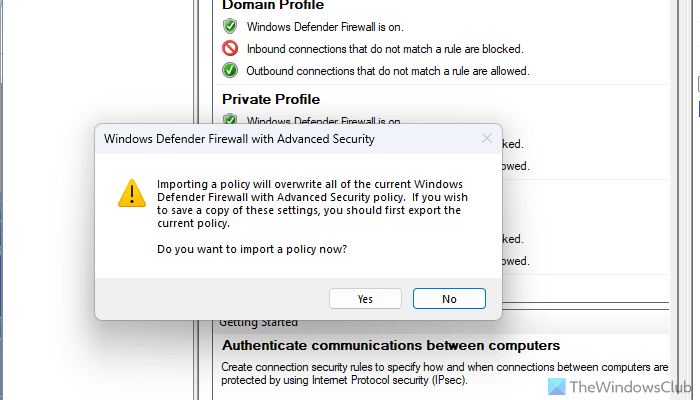
It gives a warning that you are about to override all the existing policies. Click on the Yes button to agree with the terms.
Next, you need to choose the .wfw file and click the Open button.
Finally, click on the OK button to save or confirm the import.
How to export Windows Firewall Policy in Windows 11/10
To export Windows Firewall Policy in Windows 11/10, follow these steps:
- Open Windows Defender Firewall with Advanced Security on your computer.
- Go to Action > Export Policy.
- Choose a location where you want to save the file.
- Enter a name and click the Save button.
To know more about these steps, continue reading.
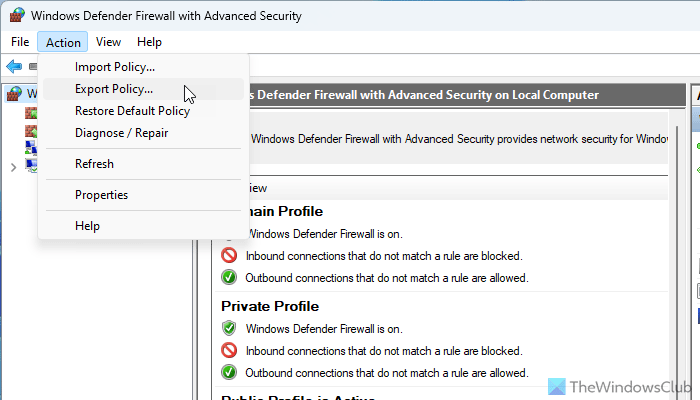
To get started, you need to open the Windows Defender Firewall with Advanced Security on your computer first. Then, go to the Action menu and select the Export Policy option.
Next, you need to find a location where you want to save the file and give it a name.
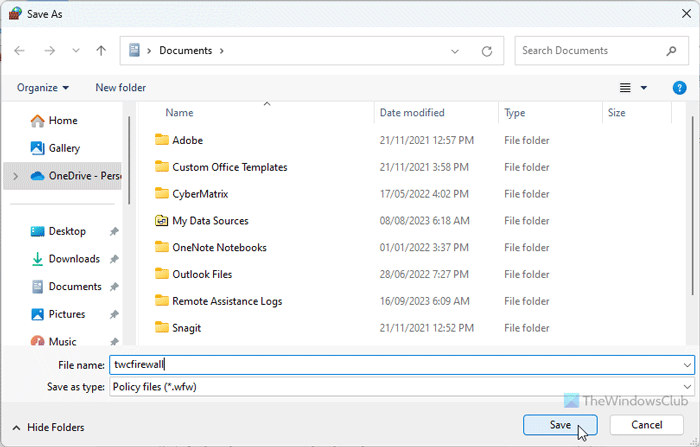
Finally, click on the Save button to save the file on your computer.
How to import or export Windows Firewall Policy in Windows 11/10 using Command Prompt or Terminal
To import or export Windows Firewall Policy in Windows 11/10 using Command Prompt or Terminal, follow these steps:
- Open Command Prompt or Terminal with administrator privilege.
- Enter this command to import: netsh advfirewall import “D:\my-firewall-policies.wfw”
- Enter this command to export: netsh advfirewall export “D:\my-firewall-policies.wfw”
Let’s check out these steps in detail.
First, you need to open the Command Prompt or the Command Prompt instance in Terminal with administrator privilege. Then, you can enter the following command to import policies:
netsh advfirewall import "D:\my-firewall-policies.wfw"
Here, D:\ my-firewall-policies.wfw is the location of the file you already have.
On the other hand, if you want to export Firewall policies, enter this command:
netsh advfirewall export "D:\my-firewall-policies.wfw"
You can change the file path before entering the command.
How to restore default policy in Windows Firewall in Windows 11/10
To restore the default policy in Windows Firewall in Windows 11/10, follow these steps:
- Open the Windows Defender Firewall with Advanced Security.
- Go to Action > Restore Default Policy.
- Click on the Yes button.
Let’s delve into these steps in detail.
To get started, open the Windows Defender Firewall with Advanced Security on your PC and click on the Action menu. Then, choose the Restore Default Policy option.
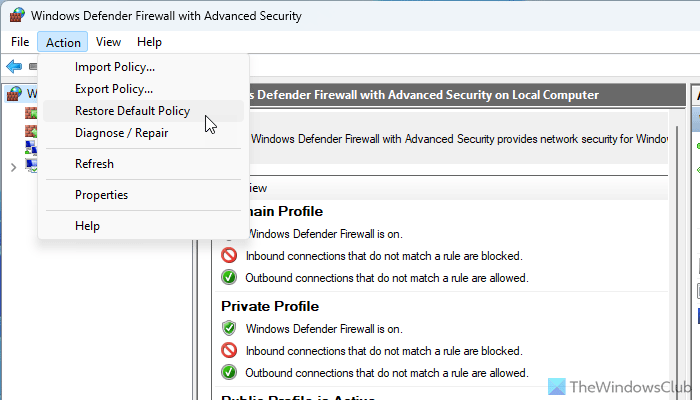
Finally, click on the Yes button. For your information, it takes moments to restore the default policies on your computer.
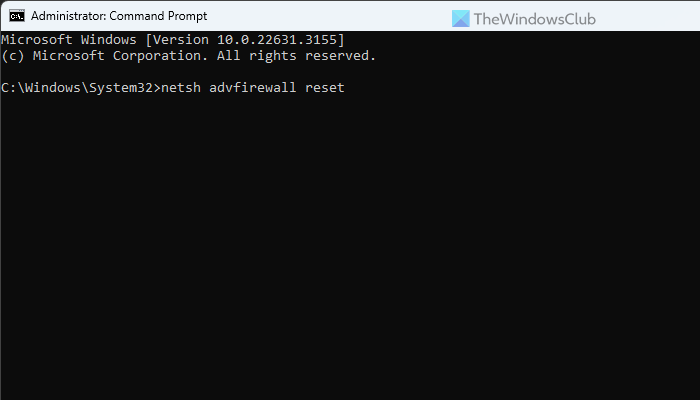
You can use Command Prompt to reset Windows Firewall policies. For that, enter this command:
netsh advfirewall reset
It is possible to restore firewalls to default using Windows Security as well. For that, you need to open the Windows Security first. Then, switch to the Firewall & network protection tab and click on the Restore firewalls to default option.
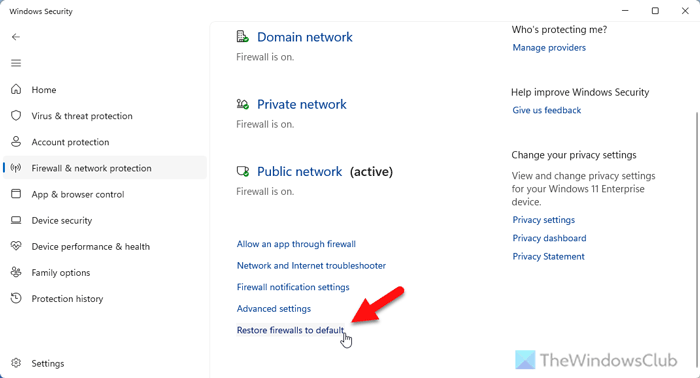
It opens a wizard where you need to click on the Restore defaults button.
How to repair Windows Firewall Policy in Windows 11/10
To repair Windows Firewall Policy in Windows 11/10, follow these steps:
- Open Windows Defender Firewall with Advanced Security.
- Go to Action > Diagnose / Repair.
- Click the Yes button.
To know more about these steps, continue reading.
First, you must open the Windows Defender Firewall with Advanced Security on your Windows 11/10 computer and click on the Action menu.
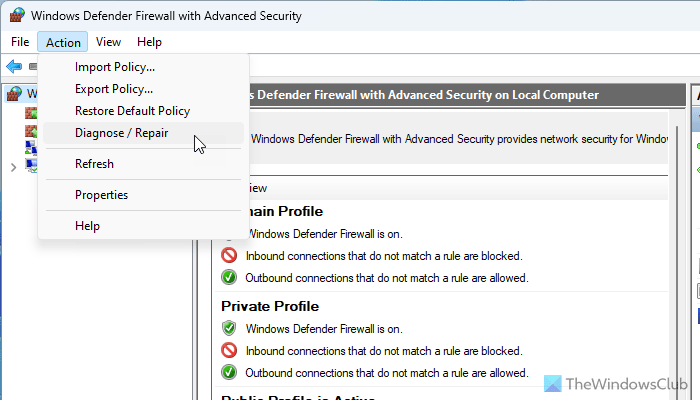
Then, choose the Diagnose / Repair option and click on the Yes button.
However, if this option doesn’t work, you should opt for the Get Help app.
That’s all! I hope this guide helped you.
Read: Unable to change Windows Firewall settings
What happens if you restore firewall to default?
If you restore firewall to default, all the custom made policies gets deleted. Although you can restore them later, the first impression will look like the brand-new version of the Windows Firewall. That being said, if you have allowed or blocked a program through Firewall, set policies for incoming and outgoing traffic, etc., they will be deleted instantly. In that case, we would suggest you to backup your policies first.
How do I reset my firewall settings in Windows 11?
To reset your firewall settings in Windows 11, you need to open the Windows Defender Firewall with Advanced Security first. Then, go to Action > Restore Default Policy and click on the Yes button. Alternatively, you can open Windows Security and go to the Firewall & network protection tab and click on the Restore firewalls to default option. Similarly, you can open the Command Prompt and enter this command: netsh advfirewall reset.
These links may also interest you: