Among the several new features and settings that Windows 11/10 has introduced, one of them is the ability for a user to set the Time Zone automatically in Windows 10. While you can set the time zone manually here, by using the Time zone drop-down options, you can now instead let Windows 10 do so automatically.
Set Time Zone automatically in Windows 11/10
To let Windows 11 select and set the Time Zone automatically, click on the Start Button to open the Start Menu.

Here open Settings > Time & Language.
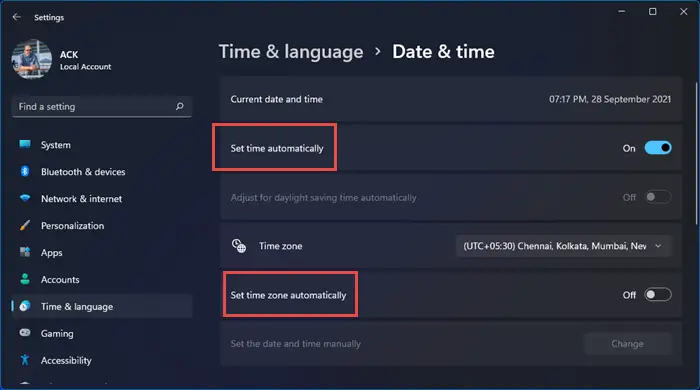
Now in the left pane, select Date & Time. The date & Time settings here are quite simple here as the main overview has it all. You can set the time to adjust automatically or change it manually.
In the right pane, you will see a new setting Set time zone automatically.
Toggle the slider button to the On position.
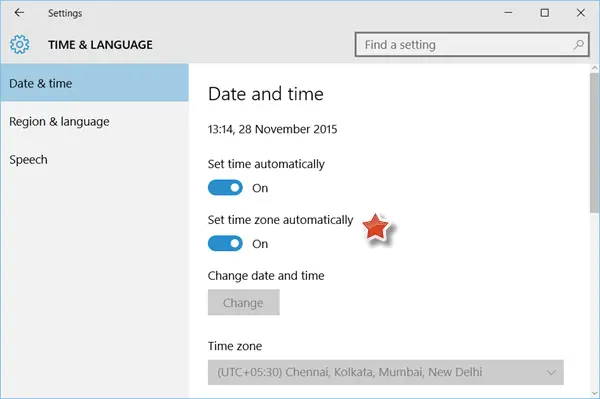
In Windows 10, the settings look like this:

That’s it!
Windows 11/10 will now set the time of your system, depending on the physical location of your device.
If you travel around a lot you may find turning on this setting of great use. Frequent travelers may also find it useful to add new clocks to the Windows Alarms and Clocks app.
You can also change the Time Zone manually with Windows Time Zone or tzutil.exe, a built-in command-line utility.
Why can’t I set time zone automatically in Windows?
There could be various reasons why you can’t set the time zone automatically in Windows 11/10 PC, but it mainly happens due to an incorrect setting. That said, you can check the Registry Editor setting, Group Policy setting, turn on Local Services, etc. If nothing happens, you need to repair Windows files to get the job done.
How do I set Windows time zone automatically?
To set the Windows time zone automatically, you can use the Windows Settings panel. Press Win+I to open Windows Settings, and go to the Time & language tab. Then, click on the Date & time setting and head to the Set time automatically option. Toggle the corresponding button to get it done.