Windows 10 offers an easy option to revert or go back to an earlier build or previous version if the currently installed build or version is not working for you. If after upgrading your Windows 10 to a recent Build, you find that something is broken or that it isn’t working properly, you may go back to your previous build.
Once you upgrade your Windows 10 to a new build, the option to Rollback with disappear and it will be replaced with an option to go back to an earlier build. You cannot then go back from say, Windows 10 Build 1511 to Windows 8.1 or Windows 7. A rollback to only the ‘immediately previous’ installation or Build is allowed.

Go back to Earlier Build or Previous Version of Windows 10
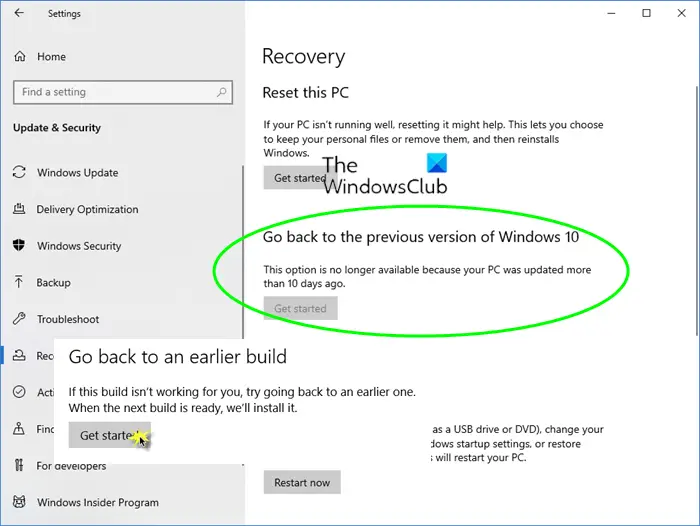
To go back to an earlier build of Windows 10, open Start Menu > Settings > Update & Security > Recovery.
Here you will see Go back to an earlier build section, with a Get started button. Click on it.
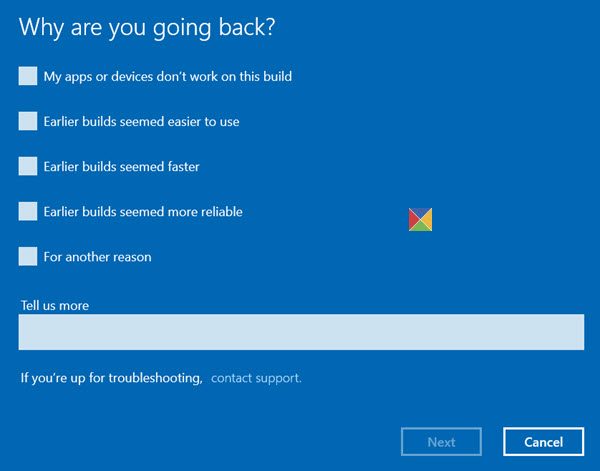
The process to revert your Windows 10 back will commence.

You will see a Getting things ready, This won’t take long screen.
Once the process is completed, your computer will restart, and you will be returned to your old build.
If a period of 30 days has passed after you installed the new build or if you deleted the Windows.old folder, you may not be able to go back. You may instead see a We’re sorry, but you can’t go back, The files we need to take you to a previous version of Windows were removed from this PC message.
If you cannot boot into Windows, you can also go back to the previous build via Windows 10 Advanced Startup options. Boot to Advanced Startup Options > Troubleshoot > Advanced options > See more recovery options > Go back to previous build/previous version.
TIP: This post will show you how to downgrade Windows 11 to the previous version.
I hope this helps.