The Error 0x8007000d is quite an unusual error, in the sense that it appears in different scenarios. You may encounter the error when installing, upgrading, updating or activating Windows 11/10. It can also occur during a System Restore operation. In this post, we will attempt to provide the most suitable solutions that you can try to successfully resolve the issue in relation to the respective error scenarios.

See the sections below for the resolution to the error depending on how you encounter it.
Fix Error 0x8007000d when installing Windows 11/10

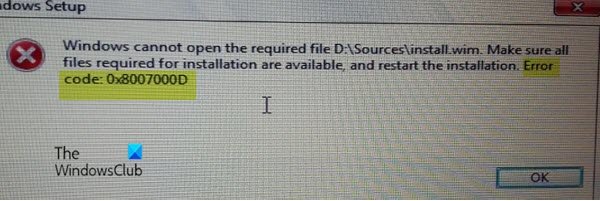
This error indicates the bootable installation media you are using is corrupt – that’s why the Windows installation failed. In this case, you will need to re-create that Installation media and try the Installation process again – it should complete successfully without any errors.
Fix Windows Update or Upgrade Error 0x8007000d

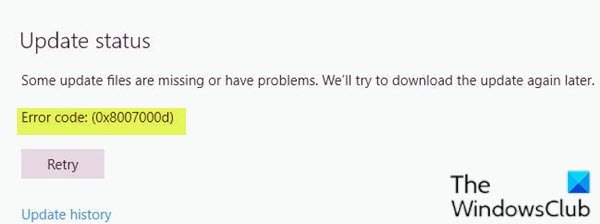
The Windows Update error 0x8007000d occurs mainly due to two reasons – corrupt system files or the Windows update components have become obsolete. This won’t let you install any updates for Windows and it also won’t let you upgrade Windows in case a newer version is available.
When you encounter this error, you won’t be able to apply the monthly security patches on the existing operating system. You may sometimes succeed to initiate the upgrade via Windows Update. However, this will either fail or get stuck at a certain percentage.
So, if you’re faced with this issue, you can try our recommended solutions below in no particular order and see if that helps to resolve the issue.
- Run Windows Update Troubleshooter
- Rename SoftwareDistribution folder
- Run SFC scan
- Run DISM scan
- Reset Windows Update components to the default
- Manually download the update from Microsoft Update Catalog (applies to Cumulative Updates)
- Directly download the Windows ISO or use Media Creation Tool (applies to Feature Updates)
Let’s take a look at the description of the process involved concerning each of the listed solutions.
1] Run Windows Update Troubleshooter
More often than not, running the inbuilt Windows Update Troubleshooter fixes update errors on Windows 10. After you run the troubleshooter and rerun Windows update but still receive the error, you can try the next solution.
2] Rename SoftwareDistribution folder
- Create a system restore point first.
- Stop Windows Update Service using Services.msc
- Rename the C:\Windows\SoftwareDistribution folder to C:\Windows\SoftwareDistributionOld
- Restart the Windows Update Service
- Reboot computer.
3] Run SFC scan
The presence of corrupt/damaged system files can potentially trigger this error on Windows 11/10. In which case, you can run SFC scan. Running this inbuilt command-line utility program scans the entire PC for obsolete or corrupt/damaged files and replaces or repairs such files (if any) as the case maybe.
4] Run DISM scan
Sometimes the SFC scan will fail to fix the underlying causes. In such cases, you should run Deployment Image Servicing and Management (DISM) scan – another in-built tool to repair the corrupt files as well as the Windows system image.
5] Reset Windows Update components to the default
In this solution, you can use the Reset Windows Update Agent Tool and see if it helps you. This PowerShell script will help you Reset Windows Update Client. Also, you may want to manually reset each Windows Update components to default.
6] Manually download the update from Microsoft Update Catalog (applies to Cumulative Updates)
If you’re having this issue installing the cumulative update via Windows Update, you can manually download from the Microsoft Update Catalog, the update that is failing to install and consequently triggering the update error, and then install the update on your Windows PC.
See this post if after you download the update and run the installer, you receive the error message Windows Update Standalone Installer encountered an error 0x8007000d, The data is invalid.
7] Directly download the Windows ISO or use Media Creation Tool (applies to Feature Updates)
If you’re having this issue installing feature updates via Windows Update, you can directly download the latest Windows ISO image file from the Microsoft website. Once you have downloaded the ISO to a location (preferably the desktop) on your device, double-click the ISO image to mount it as a virtual drive then double-click the setup.exe file to start the in-place upgrade process.
Alternatively, you may use the Windows Update Assistant to install the Feature Update.
Fix Windows Activation Error 0x8007000d

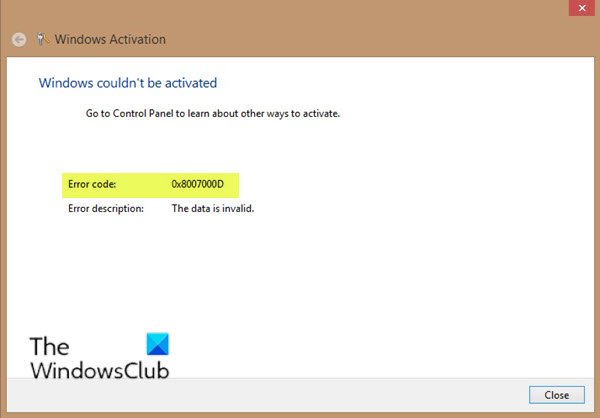
You may encounter this activation error when you try run the slmgr -dlv or slmgr -ato command. This error can be caused because of insufficient permission to the ‘root’ directory. The System account by default has Full Control permissions to the registry path:
HKEY_LOCAL_MACHINE\SYSTEM\CurrentControlSet\Enum\ROOT
and any subkeys. If those permissions have been altered for the ‘Root’ key or any subkey(s), you would see the error code 0x8007000D.
To resolve this issue, you need to assign the minimum permission of “Enumerate Subkeys” to the System account for the registry path HKEY_LOCAL_MACHINE\SYSTEM\CurrentControlSet\Enum\Root and any of its subkeys, says KB2230957.
You can try our recommended solutions below in no particular order and see if that helps to resolve the issue.
- Run Windows Activation Troubleshooter
- Perform a Clean Boot and retry activation
- Assign the minimum permission of “Enumerate Subkeys” to the System account
- Activate by Phone
Let’s take a look at the description of the process involved concerning each of the listed solutions.
Before you try any of the solutions below, you can quickly run an SFC scan, followed by a DISM scan (if necessary) then retry the activation. If that doesn’t resolve your issue, you can then proceed.
1] Run Windows Activation Troubleshooter
The Windows Activation Troubleshooter will help you address the most commonly encountered activation issues on Genuine Windows devices including those caused by hardware changes. This solution requires you to run the inbuilt Windows Activation Troubleshooter and see if that would be of any help. Else, you can try the next solution.
2] Perform a Clean Boot and retry activation
There have been instances where some programs interfered with the activation process. This solution requires you to perform a Clean Boot – this will disable any active security programs or third-party programs running in the background. Once your Windows 11/10 device is running in the clean boot state, you can try to activate Windows 11/10 again.
3] Assign the minimum permission of “Enumerate Subkeys” to the System account
Since this is a registry operation, it is recommended that you back up the registry or create a system restore point as necessary precautionary measures. Once done, you can proceed as follows:
- Press Windows key + R to invoke the Run dialog.
- In the Run dialog box, type
regeditand hit Enter to open Registry Editor. - Navigate or jump to the registry key path below:
HKEY_LOCAL_MACHINE\SYSTEM\CurrentControlSet\Enum\ROOT
- At the location, on the left pane, right-click on the ROOT folder and select Permission.
- Select System under Groups or Usernames and check the permission status. If its changed to only Read then continue to the next step.
- Click on Advanced button.
- Under Permissions tab, select System and click on Edit.
- Select Full Control.
- Click OK to save permission changes. If you’re somehow prevented from saving this change, you may have to take ownership and retry again.
You can now retry activating. If you’re still unable to activate, try the next solution.
4] Activate by Phone
Microsoft phone activation is one of the ways to activate Microsoft Windows or Microsoft Office products. Generally, it requires calling the Microsoft Activation Center and to verbally exchanging activation information.
Fix System Restore error 0x8007000D
If you receive An unspecified error occurred during System Restore, 0x8007000D then you have to try using another restore point. If it does not help, this post will help you Troubleshoot System Restore problems.
I hope you find this post useful!
Leave a Reply