If Acer PredatorSense is not installing, opening, or working on your Windows 11/10 PC, this post will help you. PredatorSense is a utility app that comes pre-installed on Acer Predator gaming computers. It is designed to help users monitor, customize, and enhance their system’s hardware and game settings.
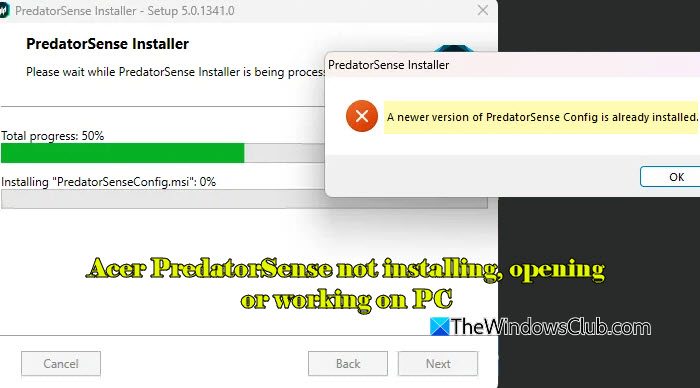
However, many users are facing issues with the app. It either won’t install or run, leaving users unable to use the app. Sometimes it also shows an error message that reads:
A newer version of PredatorSense Config is already installed.
If you’re encountering the same message or not able to use PredatorSense on your Acer PC, read this post for effective troubleshooting steps.
Acer PredatorSense not installing, opening, or working on PC
There could be multiple reasons why Acer PredatorSense is not installing, opening, or working on your Windows 11/10 PC. These include a corrupted installation, missing components or files, outdated drivers, and conflicts with AcerSense (while AcerSense and Acer PredatorSense can technically coexist on a system, they may conflict with each other if running simultaneously).
Update all your PC’s drivers and install the latest Windows version. Then use these solutions to fix the Acer PredatorSense app:
- Restart the Predator Service
- Turn off Fast Startup
- Uninstall and reinstall PredatorSense
- Uninstall AcerSense or any other Acer software
- Install the APPX files
Let us see this in detail.
1] Restart the Predator Service
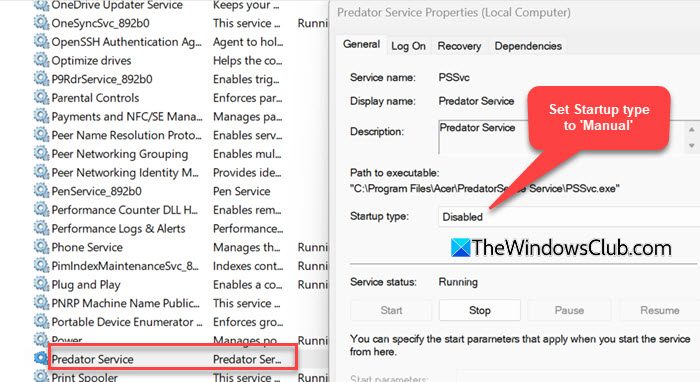
Predator Service (also called PredatorSense Service) is a background system service that enables PredatorSense to function properly. It controls fan speeds, overclocking, RGB lighting, system monitoring, and other features of Acer Predator gaming PCs.
Sometimes, the service fails to start correctly when Windows boots, causing PredatorSense to crash or not respond. In such a case, restarting it manually can fix the issue.
Press Win + R, type services.msc, and press Enter. Find Predator Service in the list. Right-click it and select Start.
If the status of the service remains ‘Stopped’, right-click on it and select Properties. Then set the Startup type to Manual. Click Apply, then OK. Then again try to start the service.
Once the service starts, reopen PredatorSense and check if it works.
3] Turn off Fast Startup
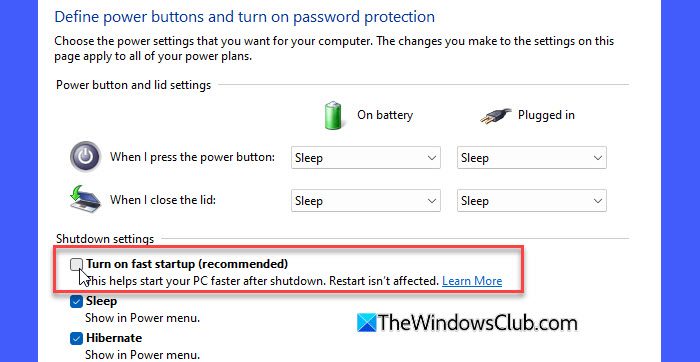
A few users have reported that disabling Fast Startup in Windows solved the issue for them. Fast Startup is a feature that stores kernel and driver states in a hibernation file when you shut down the PC, allowing for a quicker boot. However, it may sometimes cause PredatorSense to malfunction because it doesn’t fully reset hardware drivers on reboot. Disabling Fast Startup forces a proper restart, ensuring PredatorSense loads correctly on startup.
- Press Win + R, type control, and hit Enter.
- In the Control Panel window, go to Hardware and Sound > Power Options.
- On the left panel, click ‘Choose what the power buttons do‘.
- Click ‘Change settings that are currently unavailable‘.
- Uncheck ‘Turn on fast startup (recommended)‘.
- Click Save changes.
Restart your PC and try running PredatorSense again.
3] Uninstall and reinstall PredatorSense
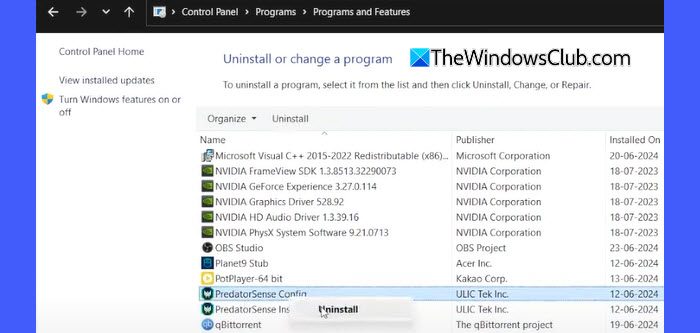
Start by uninstalling and reinstalling PredatorSense. While you may uninstall the program via Windows Settings or the Control Panel, a standard uninstall may leave behind residual files. We recommend using a third-party uninstaller, such as Revo Uninstaller, to ensure a thorough removal of PredatorSense from your system.
Once PredatorSense is uninstalled, reinstall the latest version of the app compatible with your PC. For this, you need to identify your PC’s model or serial number. If the label is no longer legible or missing, use this link to download the Acer System Information tool. Then run the tool to detect your PC’s serial number.
Once you have the serial number, go to Acer’s Support website. Navigate to Drivers and Manuals and enter the serial number in the search bar. Next, locate PredatorSense under Applications. You may see multiple versions of the app. Sort the listing by date and download the latest version.
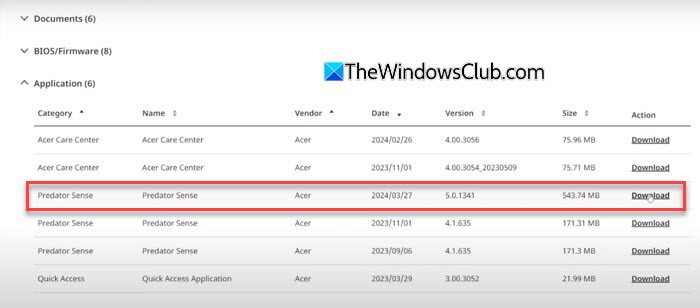
To install PredatorSense, run the setup using administrator rights (if missing permissions were responsible for the issue, running as administrator will help fix things up).
Once the installation is completed, run PredatorSense and see if the issue is gone.
4] Uninstall AcerSense or any other Acer software
If you have installed AcerSense or any other Acer software, it may conflict with PredatorSense, causing it to not open or crash frequently. Check for such software and remove them completely from our system. Then reinstall PredatorSense and see if it works.
5] Install the APPX files
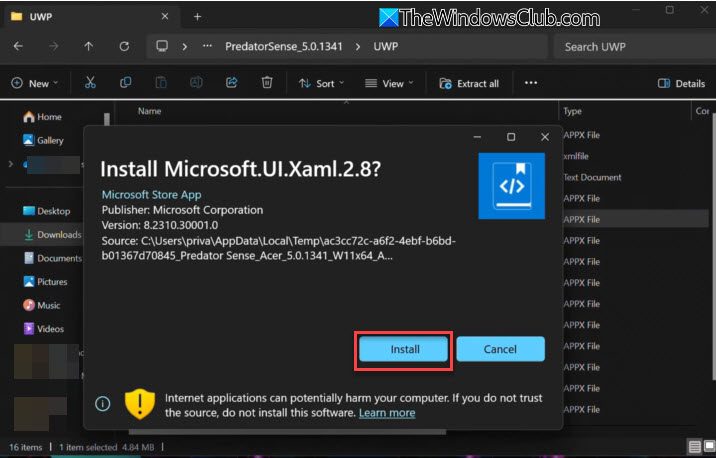
Another fix for the issue is to install the APPX files that come bundled with the app’s setup. For this, uninstall PredatorSense. Then download the correct app version from Acer’s Support website, extract it, and install it, but DO NOT run the application. Rather, open the UWP folder and run the APPX bundles and/or the Microsoft .NET Framework bundles that you see inside the folder.
Once these are installed, run PredatorSense. It should now work without any issues.
I hope this helps.
Read: Acer laptop touchpad not working.
Why can’t I download PredatorSense?
PredatorSense is only available for Acer Predator and some Nitro series laptops & desktops. If your Acer device does not support PredatorSense, it won’t be available for download. Go to Acer’s official support page and enter your PC’s model name or serial number to check if PredatorSense is listed. If not listed, your device does not support PredatorSense.
How to fix Acer PredatorSense not working?
To fix PredatorSense if it is not working on your Windows 11/10 PC, try uninstalling and reinstalling the app. If there are any conflicting software such as AcerSense, consider removing them as well. If PredatorSense is opening but not displaying system stats (CPU/GPU usage, temps, fan speeds, etc.), rebuilding Performance Monitor counters may help.
Read Next: Acer Care Center Service is still initializing.
Leave a Reply