Microsoft PowerPoint is a presentation program that allows the user to create a presentation and has all the tools needed to make a professional Presentation. In Microsoft PowerPoint, people often use decorated text to make their Presentations appealing, but what if the user wants to create a slide with pictures inside the text? In this tutorial, we will explain how to put a picture into a text in Microsoft PowerPoint.
How to insert a picture along with text in PowerPoint
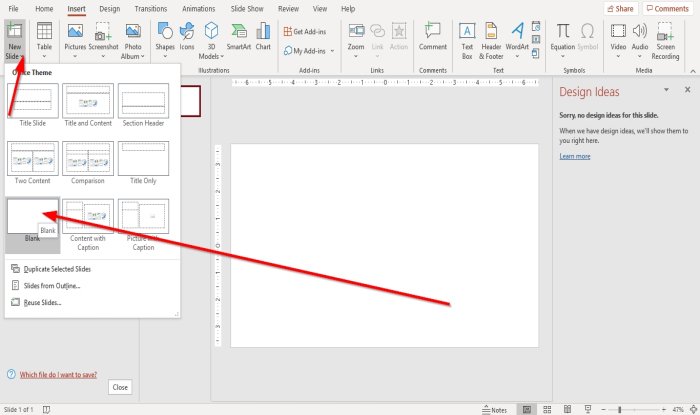
First, we are going to use a Blank Slide. On the Insert tab, click New Slide and select Blank.
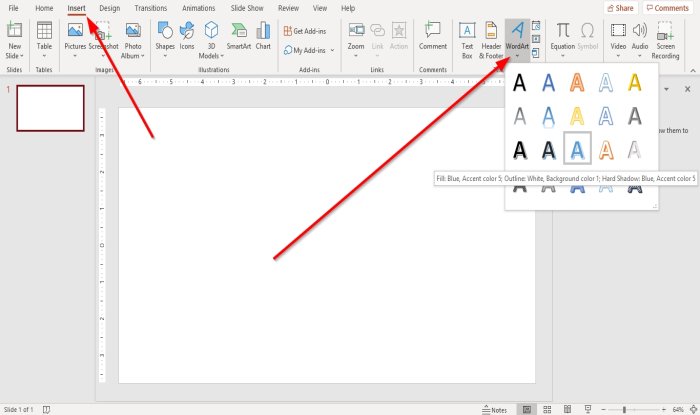
Then go to the WordArt tool on the right in the text category.
Click on the drop-down arrow of the WordArt tool and choose the WordArt you want.
A WordArt Text box will appear, stating “Your text here,” type your desired text into the WordArt textbox.
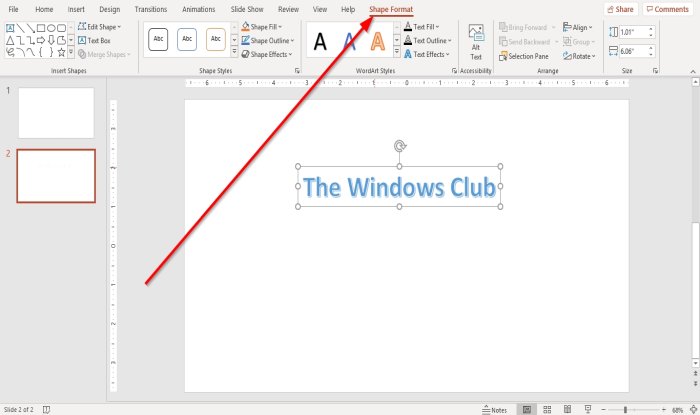
Whenever you add a Shape or WordArt text, a tab will appear on your menu bar called Shape Format.
We can add Shapes, change Shape Styles, Change WordArt Styles, Align Text, and more in the Shape Format tab.
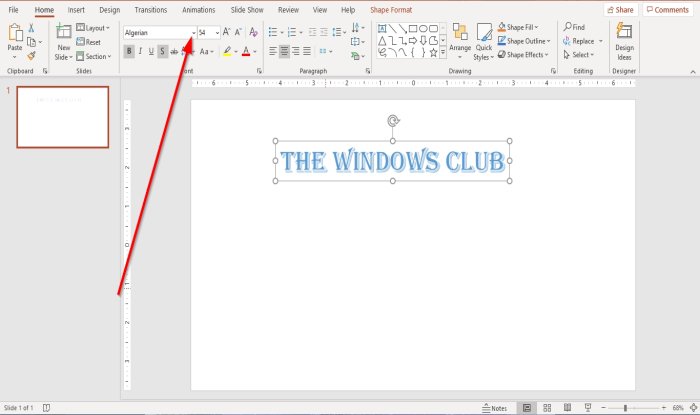
If you want to change the text or size of the text, you can go to the Home tab in the Font group and change the Font, Font Size, and Color if you choose. In this article, we chose the font Algerian.
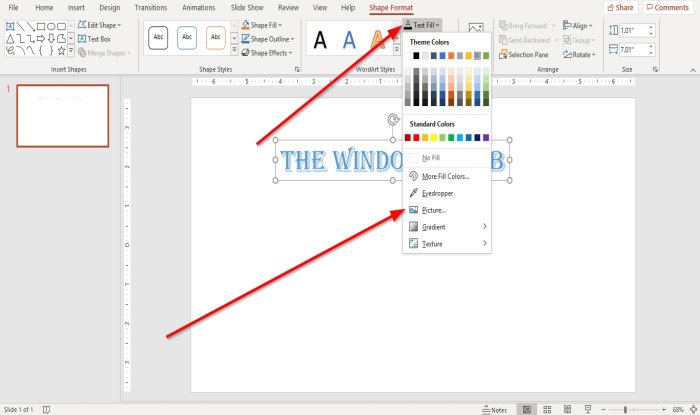
Now, we are going to add the picture to the text.
On the Shape Format tab, click Text Fill in the WordArt styles group. In its drop-down list, select Picture.
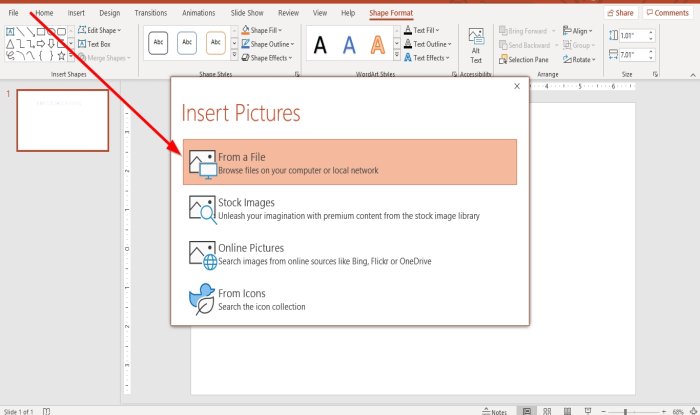
An Insert Pictures window will appear; choose where you want the picture to be selected from, either from a File, Stock Images, Online Pictures, or Icons. In this article, we chose to select from a file.
An Insert picture dialog box will appear; choose a picture file and select Insert.
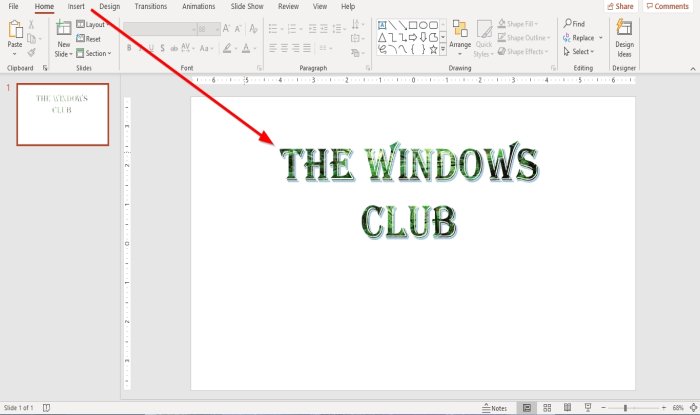
The picture is inside the text.
I hope this is helpful; if you have questions, please comment below.