Thunderbird is a popular free email client software that comes with great features. It comes with numerous add-ons that are used to extend its functionality and appearance. If you are a Thunderbird user, you would be well versed with its popular add-on called Lightning, which is used to organize and manage your import events, deadlines, meetings, and holidays in a calendar that is completely integrated with your Thunderbird email.
One good thing about the Lightning plugin is that it allows you to add another calendar application like Google Calendar with read-only access. No doubt Google Calendar is among the best calendaring software used till today. However, you may want to keep Thunderbird Lightning Calendar as an Outlook alternative. If you are using Google Calendar across the devices and want to set up a sync between Thunderbird and Google Calendar, you are in the right place.
How import Google Calendar to Thunderbird
To get more out of Google Calendar, you need to integrate it with the calendar you use. The Thunderbird Lightning allows you to add network-based calendars with read-only access. To have both read and write access to the external calendar like Google Calendar on Thunderbird, you need to install a plugin called Provider for Google Calendar to sync Lighting with Google Calendar. This provides bidirectional access to Google Calendar. In this article, we explain how to add a Read-Write to Google Calendar on Thunderbird Lightning.

Add Read-Write access to Google Calendar on Thunderbird’s Lightning
To import Google Calendar to Thunderbird, you must first install the two plugins called Lightning, which is the actual calendar application and Provider for Google to enable read/write access to Google Calendar. These two plugins allow you to create an event, edit an event, and delete an event on your Google Calendar from within Thunderbird.
Download and install the Lightning Calendar addon
- Within Thunderbird, go to Menu and click on Plugins
- Select the plugin Lightning and click Add to Thunderbird button
- Once the download is complete, restart the app.
Download Provider for Google Calendar
- Open this Thunderbird addon here.
- Click on the Download button to save the link
Install and configure the Thunderbird add-ons

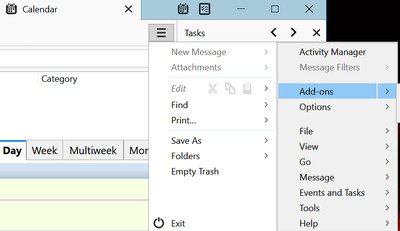
Within Thunderbird, go to the menu bar and select Add-ons.
- In the Add-ons Manager, click on the gear icon and select Install Add-on From File.
- Locate the saved files on your system and click Open.
- Click Install Now button
- Once the installation is complete, restart the app.
Add and Import a New Calendar to Lightning

- Launch Thunderbird and click on the Lightning icon in the top corner of the window.
- Go to the File Menu and select New
- In the Submenu, choose Calendar
- In the new window, choose On the network option from the menu and click Next.
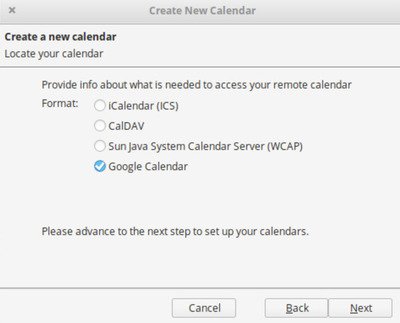
- Select Google Calendar in the Locate your calendar window and click Next.
- Now enter your Google Gmail address and type Next.
- Enter your Gmail account details in the prompt window.
- Once the sign-in process is complete, click the Allow button to grant Provider for Google access to your Calendars and schedules.
- Once done, you will be taken back to the Create New Calendar window.
- Choose the calendar from your Google account that you want to include into the Thunderbird.
- After you select the calendar that you want to use in Thunderbird, click the Next button.
- You will be prompted that the calendar has been created. Click the Finish button in the prompt confirmation window.
Once done, you will now be able to use Google Calendar with the read and write access from within Thunderbird.
I hope you can get it working successfully.
Leave a Reply