Inserting and editing tables in Google Docs is one of the easiest things to do. Some users might find it difficult if they’re coming from Microsoft Word, and that is understandable. But worry not because we’re going to discuss how to make things happen efficiently.
How to add and edit Tables in Google Docs
Now, before we begin, make sure you have Google Docs opened in your web browser of choice. You will need to log-in with your Google credentials before being able to move forward. Furthermore, make sure you have a document opened. It doesn’t matter if it is a blank document or one you’ve been working on already. The process is simple:
- Open your document
- Select the Insert tab
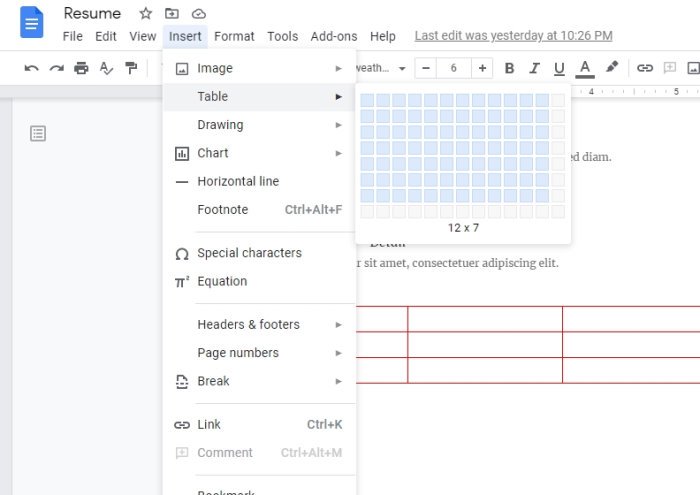
- From the drop-down, hover your mouse over Table
- Choose the number of rows and columns
- Click and the table will appear
OK, so let us begin by explaining how to create a table in your document. It won’t take a lot of time to get done, which is pretty nice.
Click on the Insert tab
After opening your document, you should first select the Insert tab, which is easily found at the top.
When that is done, you should see a dropdown menu with several options to choose from.
Insert a table

After coming across the dropdown menu, please hover the mouse over Table, then choose the number of rows and columns you want from the pop-out box. After selecting the right number, click the mouse button again and watch as it table appears in your document.
Edit your newly added table
While adding a table is super easy, editing takes more work.
How to add and remove rows and columns

Adding new rows and columns to your table is not that hard.
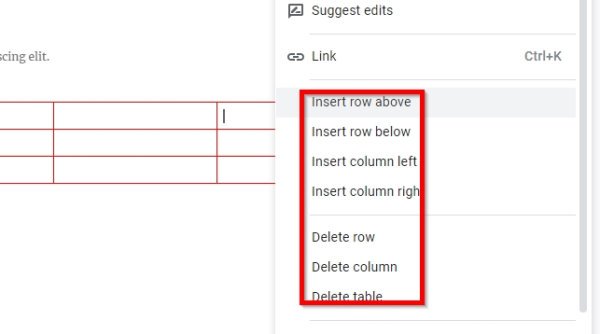
Simply right-click into the cell where you want to add a new column or row, then select the preferred option. Do the same if you want to remove columns or rows from the table.
Make your columns and rows bigger or smaller
Maybe you’re not pleased with the column’s size or row; therefore, it would make a long of sense to resize.
Do this by placing your mouse cursor at the row or column’s border, then click and drag.
Change border and background-color

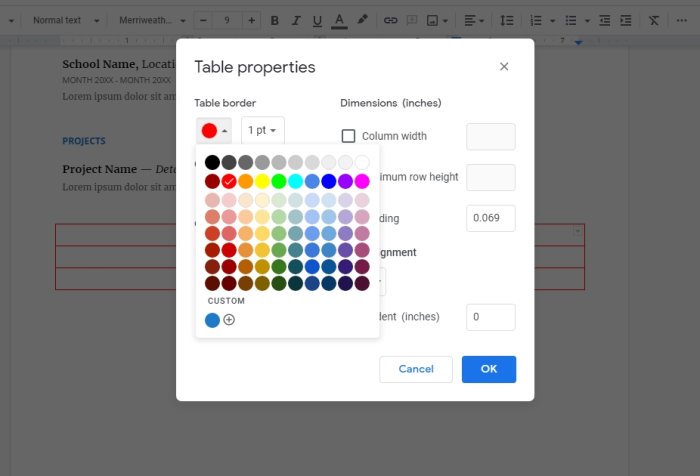
By default, the table border color is black while the cell background color is white. But we can easily make changes.
Just right-click in one of the cells, then select Table Properties from the menu. From there, you can edit both the Table Color and the Cell Background Color to whatever you want.
You should now have a basic idea of how to insert and manage tables in Google Docs.
Now read: How to use Header, Footer, and Footnote in Google Docs.
Leave a Reply