Have you ever been on a website or social media and see pictures move each second automatically? These pictures are called GIFs. GIFs are animated images; they are not videos, and they do not have sound. GIFs are mainly used to create memes are show an image of emotions. They can be made from a video from scratch or using a simple image.
How to add Animated GIF to PowerPoint
Animate is to give an appearance to movements or bring something to life. In this tutorial, we will animate a GIF of a dog running, but we will make him run after a bird.
First, we recommend you download a GIF from Google, Bing, or any other search engine and save it in your File explorer files.
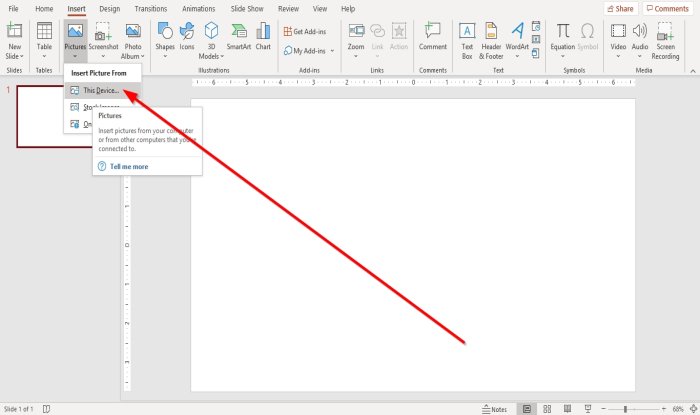
In the Insert tab, click on Pictures; select, Insert this Picture from This Device in its drop-down menu.
The File Explorer window will appear; choose your picture, then Open. The GIF will be in your PowerPoint.
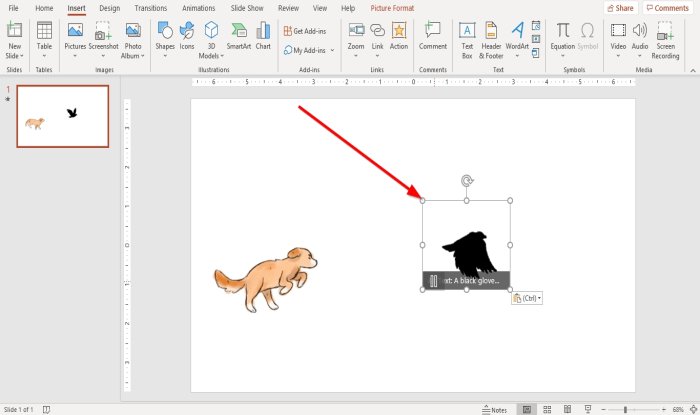
Make the GIF or GIFs smaller by dragging on the circles around the image.
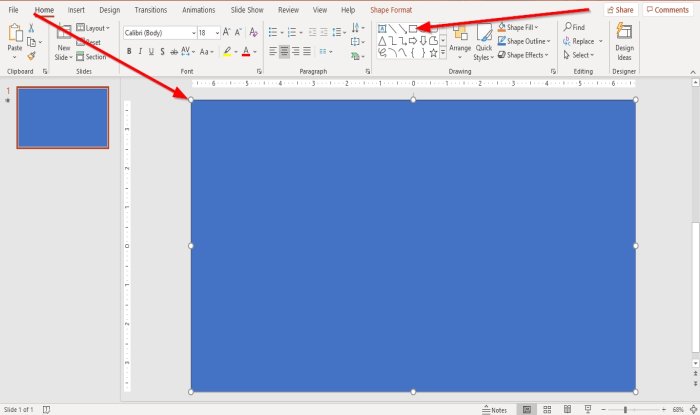
We are going to the Home tab. You will see the shapes in the drawing category, choose a Rectangle, and draw it over the GIF.
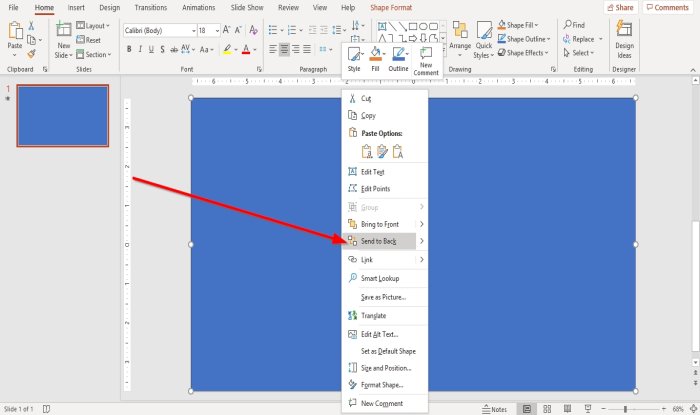
Right-click on the Rectangle and select Send to Back. The Rectangle will send to the back and the GIF to the front.
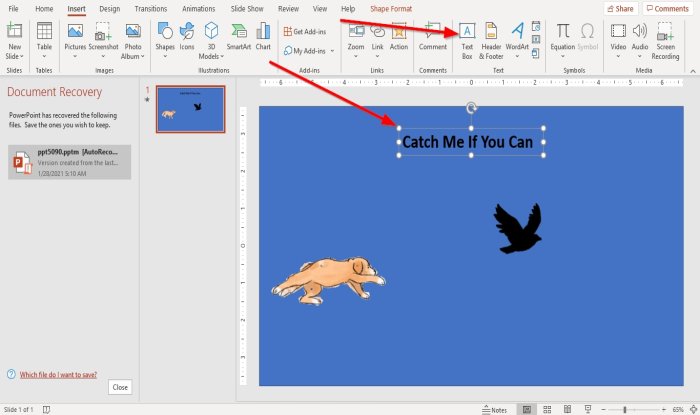
Now we will add a text at the top labeled “Catch me if you can.” To add the text, go to the Insert tab and click the Textbox on the window’s right.
You can choose to increase the Size or change the Font and Color of the text.
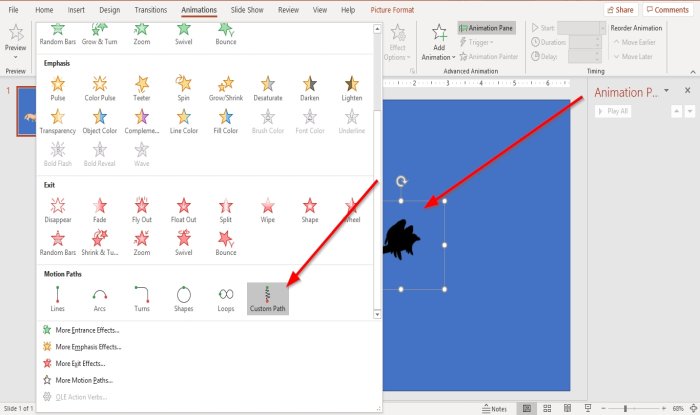
Now back to animating the GIF. Click on the GIF, then go to the Animations tab. In the Animation category, scroll down until you see Custom Path, select it.
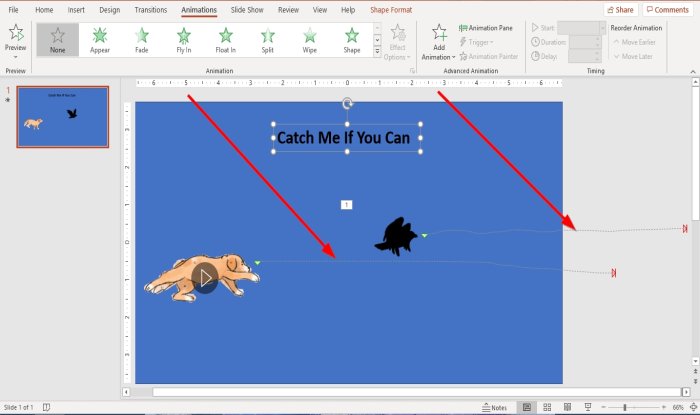
Go to the slide draw the Custom path in a straight line. Do the same with the other image.
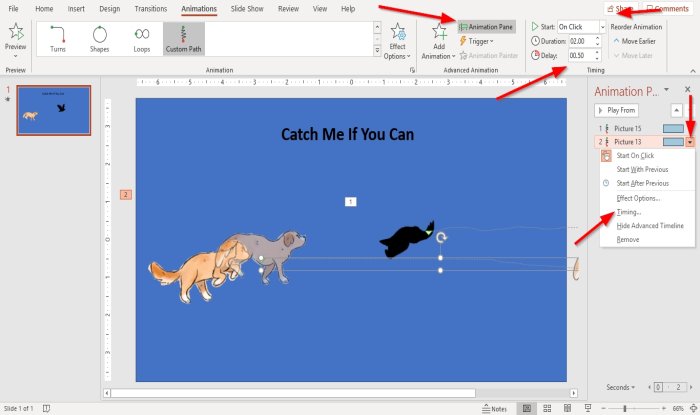
To replay the image, go to the Animation Pane in the Animations tab and click on it.
An Animation Pane window will pop up on the right of the slide.
In the Animation Pane window, select Play All to play the GIFsGIFs on the slide.
You can customize your timing by clicking on any image, then go to the Animation Pane, click on Picture 13, click on its drop-down arrow, and select Timing.
The other option for customizing the Gifs timing is on the Animation tab’s right in the Timing group; you can customize the Start, Time, and Duration of the Gifs.
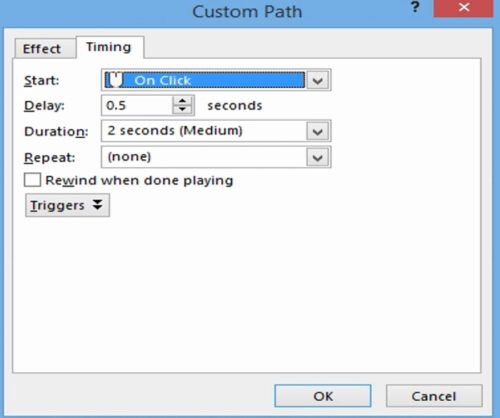
Once you click on the drop-down arrow of Picture 13 and Select timing, a Custom Path Dialog box will appear. You can choose how you want to Start, Delay, Duration, and Repeat your GIF animation.
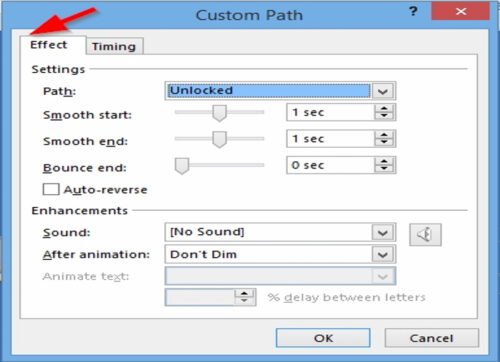
On the Effect tab in the Custom Path dialog box, you can choose to customize the Settings and Enhancement. Once finish, click OK.
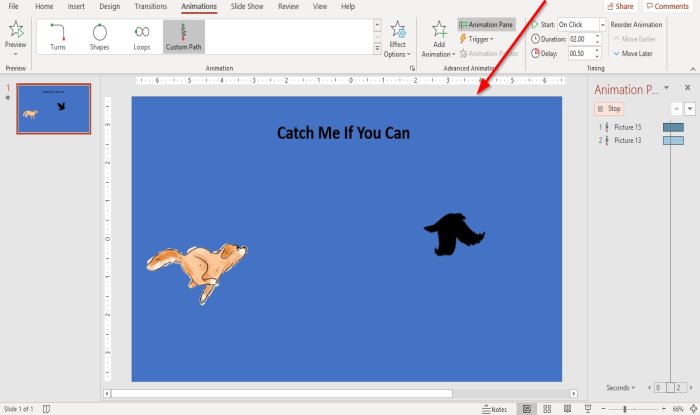
The GIF is animated!
I hope this helps; if you have questions, please comment below.
Now read: How to convert PowerPoint Slides to an animated GIF.
Leave a Reply