If when you try to install/update an app from Microsoft Store using the Add-AppxPackage PowerShell cmdlet on your Windows 11 or Windows 10 computer, and you get the output stating Add-AppxPackage Deployment failed with HRESULT 0x80073CFF or 0x80073CFD. then this post is intended to help you with the most suitable solutions.
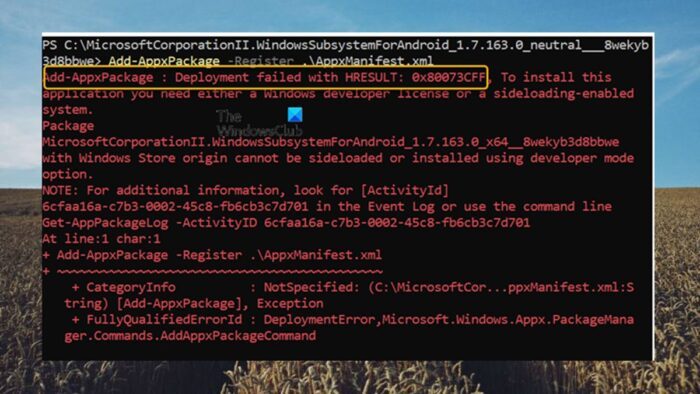
This Microsoft Store error symbolic name and description are as follows;
ERROR_INSTALL_POLICY_FAILURE
To install this app, you need a developer license or a sideloading-enabled system.
Debugging: You may get this error if the package doesn’t meet one of the following requirements: The app is deployed using F5 in Visual Studio on a computer with a Windows Store developer license,
The package is signed with a Microsoft signature and deployed as part of Windows or from the Windows Store, The package is signed with a trusted signature and installed on a computer with a Windows Store developer license, a domain-joined computer with the AllowAllTrustedApps policy enabled, or a computer with a Windows Sideloading license with the AllowAllTrustedApps policy enabled.
When you encounter the error on your device, you will receive the error message along the following similar lines.
Add-AppxPackage : Deployment failed with HRESULT: 0x80073CFF, To install this application you need either a Windows developer license or a sideloading-enabled system. Package <NameOfApp> with Windows Store origin cannot be sideloaded or installe using developer mode option. NOTE: For additional information, look for [ActivityId] 4d02cd87-927a-0006-31cf-024d7a92d101 in the Event Log or use the command line Get-AppxLog -ActivityID 4d02cd87-927a-0006-31cf-024d7a92d101 At line:1 char:1
Add-AppxPackage Deployment failed with HRESULT 0x80073CFF or 0x80073CFD
If you get the Add-AppxPackage Deployment failed with HRESULT 0x80073CFF or 0x80073CFD when you try to install/update an app from Microsoft Store using the Add-AppxPackage PowerShell cmdlet on your Windows 11/10 computer, then you can apply our recommended fixes below to resolve the issue.
- Initial checklist
- Turn on Developer Mode to enable SideLoading of apps
- Create a new User Account
- Configure Group Policy to allow all trusted apps to install
- Perform System Restore
- Reset PC or In-place Upgrade Repair Windows 11/10
Let’s look at the description of the process as it relates to each of the listed solutions.
1] Initial checklist
Before you proceed with the solutions below, you can complete each of the following tasks, and after each task see if you can be able to install the app using the Add-AppxPackage PowerShell cmdlet without issues.
- Install the app using alternative means. Assuming there’s no particular reason why you need to install an app available on the Microsoft Store using the Add-AppxPackage PowerShell cmdlet, you can as well get or deploy the app directly from Microsoft Store app on your Windows 11/10 device. Alternatively, you can use the Winget command-line utility to download/install apps on your device from Microsoft Store.
- Update Windows. In some cases, problems do occur due to a bug and the software vendors or developers will usually release updates for their software. These updates contain fixes for the bugs reported by the users. So, it’s recommended to always make sure Windows is updated to the latest build/version as and when due to get rid of already known bugs that might present on the OS. This also ensures you’re running the latest version of PowerShell. After installing the latest Windows update, check if the issue persists.
- Edit the AppxManifest file. You should do this after you have updated Windows to the latest build. Inside the referenced app folder, you need to edit the AppxManifest’s “TargetDeviceFamily” line as follows and make sure to replace the WinBuild placeholder with your current Windows build number. Afterward, run the Add-AppxPackage command.
<TargetDeviceFamily Name="Windows.Desktop" MinVersion="10.0.WinBuild" MaxVersionTested="10.0.WinBuild" />
- Run Windows Store Apps Troubleshooter. The inbuilt Troubleshooters are designed to help PC users automatically fix some common problems that they may encounter on their Windows devices. In this particular case, running the Windows Store Apps Troubleshooter would be helpful. It’s a good idea and we recommend running the troubleshooter for Microsoft Store apps-related issues.
Read: Fix Microsoft Store error code 0x80073CF3
2] Turn on Developer Mode to enable SideLoading of apps
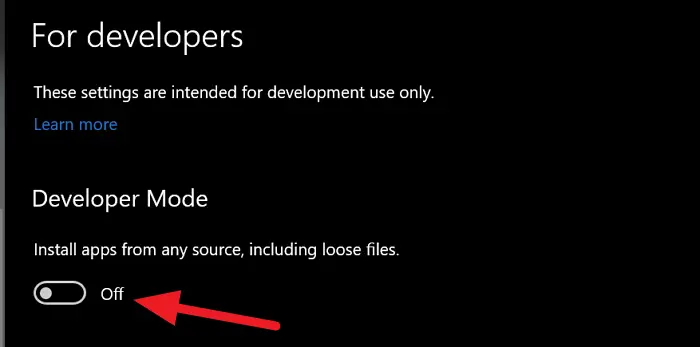
As already indicated in the error message, the Add-AppxPackage Deployment failed with HRESULT 0x80073CFF due to the device the app in question is installed not being registered with a Windows developer license for side loading applications. In this case, to resolve the issue, you can turn on Developer Mode to enable SideLoading of apps on your Windows 11/10 device using the following steps.
- Open Windows Terminal as an Administrator.
- In the PowerShell console, type or copy and paste the following command and hit Enter:
Show-WindowsDeveloperLicenseRegistration
- In the For developers page that opens in the Settings app, toggle the button to On for Developer Mode.
- Click Yes on the prompt.
- Exit Settings app.
You can now attempt to download the application again. But keep in mind that this action is not ideal to keep on or as a workaround, as it loosens restrictions on symlinks and a few other things. So, as a precautionary measure, you can turn off Developer Mode once you have the app installed on your device.
Read: How to sideload Android apps using WSA on Windows 11
3] Create a new User Account
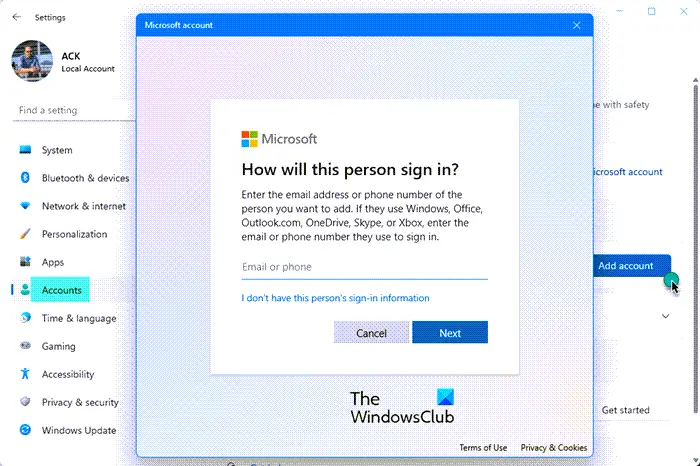
Every other thing being equal, in some cases problems like the issue you’re currently facing can occur in a specific user account especially if the account/profile is corrupted. In this case, you can create a new user account and then see if you can successfully install the app from that user account. If everything is working properly on the new account and there are other issues with the old account, you can transfer your files/data to the new user profile and then delete the old account/profile.
Read: Advantages of creating separate User Accounts on a Windows PC
4] Configure Group Policy to allow all trusted apps to install
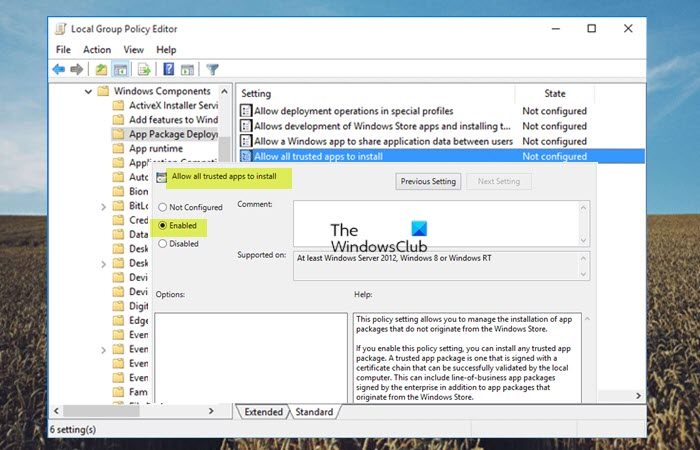
If you’re encountering this issue in an enterprise environment, you can configure GPMC on the local device to allow all trusted apps to install. To perform this task, follow these steps:
- Open the Group Policy Management Console.
- Navigate to the following path:
Computer Configuration > Policies > Administrative Templates > Windows Components > App Package Deployment
- At the location, on the right pane, double-click the Allow all trusted apps to install policy to edit its properties.
- In the policy’s properties window that opens, select the radio button for Enabled.
- Click Apply > OK to save changes.
Note: Before the app package is a trusted app package, the (root) certificate, that is used for signing the app package, has to be trusted. So, to configure Group Policy to correctly import the root certificate for all computers, follow these steps:
- Open the Group Policy Management Console.
- Navigate to the following path:
Computer Configuration > Policies > Windows Settings > Security Settings > Public Key Policies
- At the location, on the right pane, right-click Trusted Root Certification Authorities.
- Select Import.
- In the Certificate Import Wizard that opens, do the following:
- On the Welcome page, click Next.
- On the File to Import page, Browse to the certificate and click Next.
- On the Certificate Store page, click Next.
- On the Completion page, click Finish.
- Exit GPMC when done.
Read: How to Install or Update Group Policy Administrative Templates (ADMX)
5] Perform System Restore
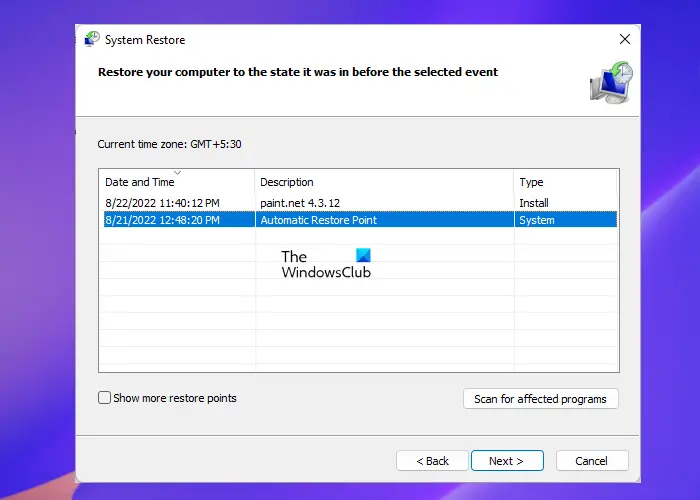
Some affected users reported they were previously able to deploy applications on their Windows 11/10 devices by running the Add-AppxPackage PowerShell cmdlet. In this case, aside from having updated Windows recently, it could be your system has undergone some changes that you might be unaware of. So, to resolve the issue, if this scenario applies to you, you can uninstall any newly installed system update by following the instructions in this guide. Otherwise, since you do not know what changed that might have broken this PowerShell functionality, you can follow the steps described in this guide to perform System Restore to revert your system to an earlier point in time when you know you weren’t having the issue you’re currently facing.
Read: System restore failed while copying, restoring, mounting Registry
6] Reset PC or In-place Upgrade Repair Windows 11/10
As a last resort, if nothing else works, you can reset the PC and choose the option to keep personal files. If the issue persists, you may be dealing with severe system corruption, in which case you can perform an in-place upgrade repair of Windows 11/10.
Hopefully, any of these fixes should work for you!
These posts might interest you:
- Fix Deployment Failed with HRESULT 0x80073D02 error
- Deployment failed HRESULT 0x80073cf6, Package could not be registered
- PowerShell Get-Appxpackage Not working or Access Denied
How do I install Appxbundle on Windows 11?
To install an APPX or APPBUNDLE file on your Windows 11 computer, simply double-click the file in File Explorer. Since the system will identify the file type and let you install the application, you shouldn’t encounter too many issues.
How do I fix deployment failed with HRESULT 0x80073CF6?
To fix the deployment failed with HRESULT 0x80073CF6 error on Windows 11/10 PC, you need to run the Windows Store apps Troubleshooter first. If it doesn’t fix, you can check for Windows Update and install all the available updates. However, you can also reset the Microsoft Store, and perform an in-place upgrade to troubleshoot the error.