In my last post, I talked about how to create a new user account using Office 365 admin account. That procedure is suitable if you have to create 5-10 user accounts, but if you connect with an extensive team of more than ten people, you must try the bulk import feature of Office 365.
This feature lets you import multiple users’ information into Office 365 from a single file source. The file must be a comma-separated values (CSV) file and adhere to the required format. It will then automatically do the rest of the thing for you.
So, before I start telling you the steps to use the bulk import, you must first know about CSV files and how to create an Office 365-supported file.
A CSV file is an easy way to transfer large data between programs. It is a plain-text file that stores database-style information in a particular format. The format requires one record on each line, and commas must separate fields within records.
You can use the Bulk add users wizard to upload an existing CSV file or the provided blank CSV template and edit it in a text editor such as Notepad.
The template contains user data column labels under which you enter information about the users you want to import. The wizard also includes a sample CSV file with a correctly formatted example containing sample user data.
When you create a CSV file, you can enter user data column labels in any language or characters, but the order of the labels, as shown in the sample, is essential for the correct fields to be populated. You can then enter the fields using any language or characters, and save your file in a Unicode or UTF-8 format.
The minimum number of rows is two, including the first row of user data column labels (the second row is a user). The maximum number of rows is 251, including the first row of user data column labels. Only the user name and display name are required entries. Create multiple CSV files if you need to import more than 250 users.
The user data column labels and maximum character length for each in the sample CSV file are:
- User Name (Required): The maximum length of the user name is 79 characters (including @ symbol) in the format name@domain. The user’s alias cannot exceed 30 characters, and the domain name cannot exceed 48 characters.
- First Name: 64
- Last Name: 64
- Display Name (Required): 256
- Job Title: 64
- Department: 64
- Office Number: 128
- Office Phone: 64
- Mobile Phone: 64
- Fax: 64
- Address: 1024
- City: 128
- State or Province: 128
- ZIP or Postal Code: 40
- Country or Region: 128
While making your CSV file for Office 365, you must keep these few things in mind, or else you will get an error:
- Suppose you are importing users from different countries or regions. In that case, we recommend creating a separate CSV file for each country or region and performing a bulk import operation for each CSV file. As part of this import process, you will indicate the users’ location in the CSV file, and only one location can be selected per bulk import operation.
- Ensure that the User Name column of your CSV file contains each user’s full email address (for example, [email protected]), or you will receive an error when you upload the file.

Add users with bulk import in Microsoft 365
1. In the header, click Admin.
2. In the left pane, under Management, click Users.
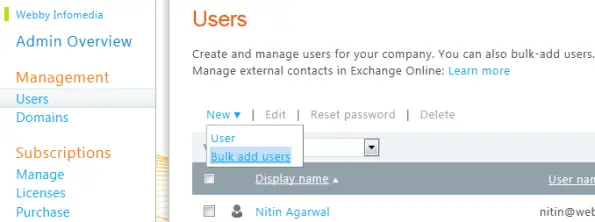
3. On the Users page, click the arrow next to New and click Bulk add users.
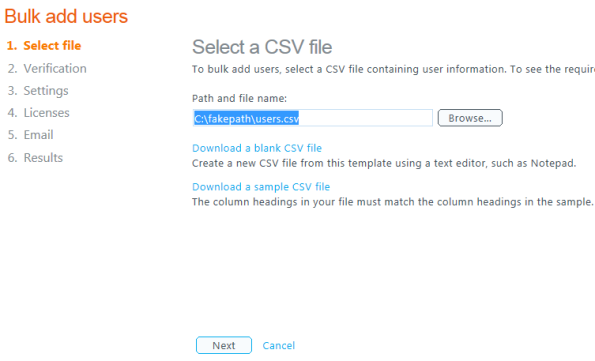
4. Select a CSV file page, do one of the following, and then click Next.
- Click Browse to specify an existing CSV file on your computer.
- Click Download a blank CSV file to create a CSV file using the template provided.
- Click Download a sample CSV file to open a correctly formatted example containing sample user data.
Do not add, change, or delete column labels in the CSV template or sample file, and make sure that you save the file with a .csv extension, or the file may not upload correctly.
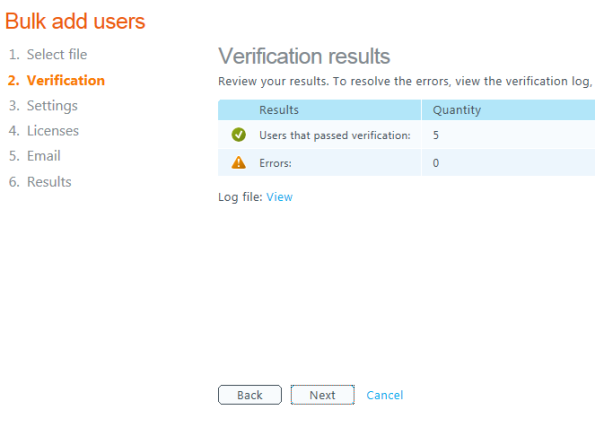
5. On the Verification results page, confirm that there are no errors in your CSV file and that the number of users to import is correct. To review the mistakes in the log file, click View. If you have errors in your CSV file, click Back. Open your CSV file, make the corrections, and perform step 4 again. Once your CSV file has passed verification, click Next.
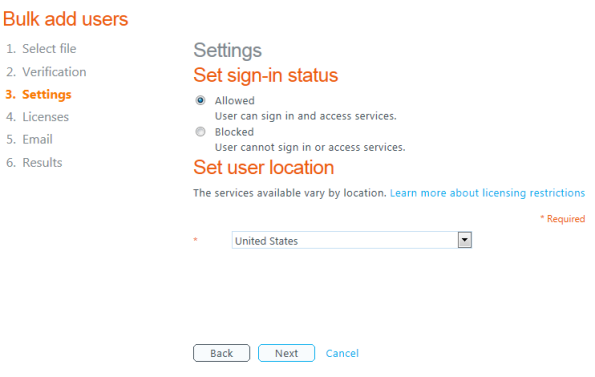
6. On the Settings page, under Set sign-in status, select Allowed to allow users to sign in to Office 365 and access licensed services, or Blocked to block users from signing in to Office 365 and accessing licensed services. Under Set user location, select the users’ work location, and click Next.
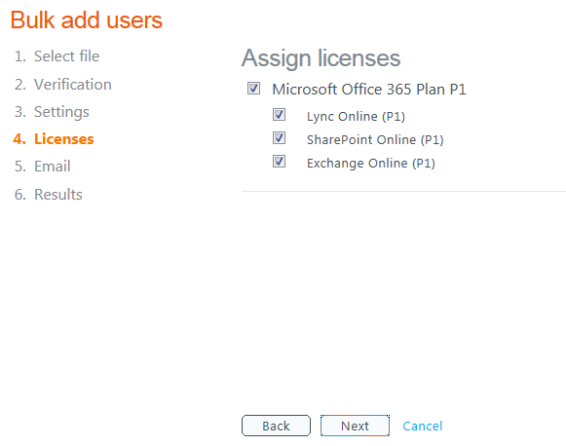
7. On the Assign licenses page, select the licenses you want to assign to all the imported users and click Next.
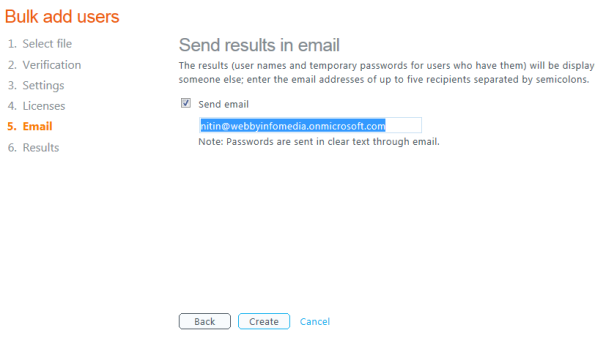
8. On the Send results in email page, select Send email to send a username and temporary password for the added users to yourself and/or recipients of your choice. Enter preferred email addresses separated by semicolons (;), and click Create.
9. The Results page displays a list of successfully imported users and their temporary passwords and any errors during the import process.
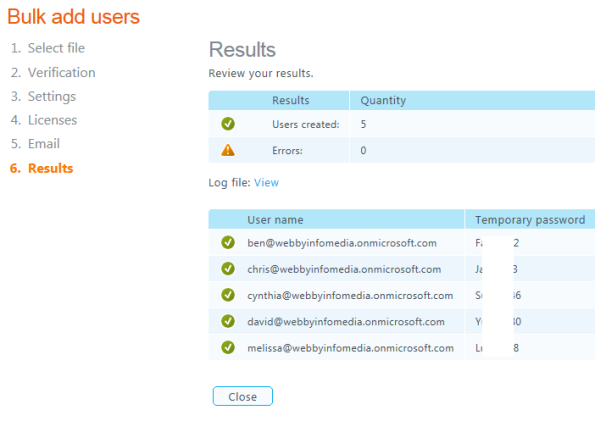
If a user were not imported, you would receive a status message indicating why. If you choose not to send yourself this information by email, you can click View to open the log file and then print or save the data.
10. When you have finished reviewing the results, click Close.
Can multiple users use the same Office 365 account?
Microsoft Office 365 works on multiple PCs, and it can use on up to 5 devices simultaneously as well. However, it has to be the same account and either directly subscribed or part of the Microsoft 365 Family subscription. If you try to sign to more than five devices, Office will sign out of one other device, so the limit is honored. However, for Office for Business, you can install and sign in to Office on 5 PCs or Macs, five tablets, and five phones.
Is Office 365 per user or per device?
Microsoft 365 subscriptions provide per-user licenses, so you must use the same account everywhere. Using Office 365 for home lets you add more users based on family sharing.
