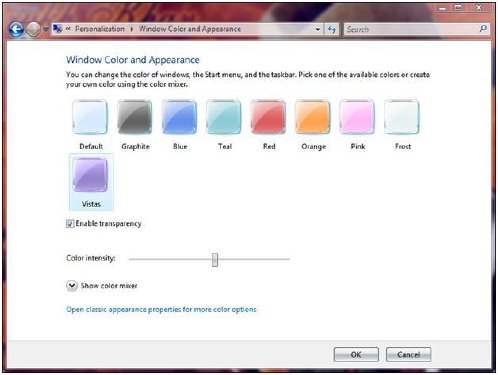
When you right-click on your Windows 7 or Windows Vista Desktop and select Personalize, in the Windows Color & Appearance, you are presented with a set of eight colors to choose from. It can be used to change the color of windows, the start menu, and the taskbar by picking one of these available color schemes. However, you can add a custom color scheme to it, or you can also create your color set using the color mixer, should you wish to. In this post, we will show how you can add custom Windows Color & Appearance in Windows 7 and Vista.

Add custom Windows Color & Appearance in Windows 7 and Vista
To add your custom color for Windows appearance, you need the following:
- Restorator software
- Registry Editor
- Image Editing Software like Adobe Photoshop
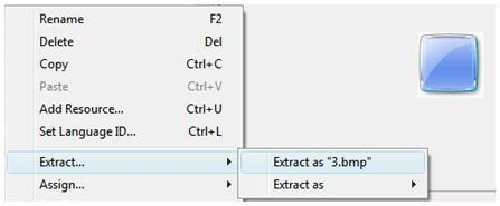
First, run Restorator and open themecpl.dll (located under C:\Windrows\System32) and navigate to BITMAP. Now extract any bitmap file from 1 to 8.

Next, run Photoshop and change colors by adjusting the hue/saturation. Open the extracted bitmap image in Photoshop and click on Image > Adjustments > Hue/Saturation or press CTRL+U. Adjust or change color as you want and save & exit.
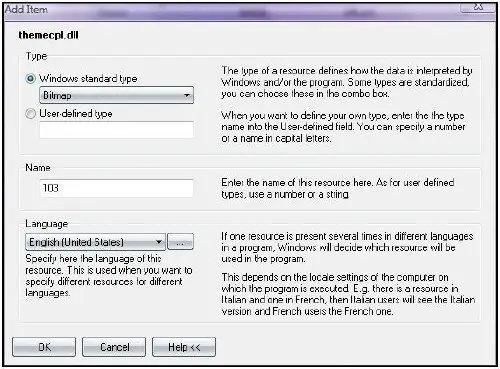
Once again, run Restorator and open themecpl.dll and click on Resources > Add Resources or Press CTRL+U.

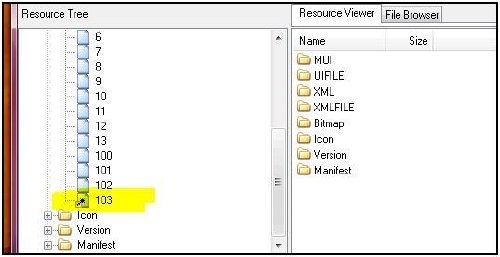
Now select the bitmap file, drag, and drop at the highlighted area.

Change Registry value to apply Custom Colors
HKEY_LOCAL_MACHINE\SOFTWARE\Microsoft\Windows\CurrentVersion\ControlPanel\Glass Colorization\Swatches
1] Create a key with a GUID name. It must be unique among all GUIDs existing under Swatches
Simple trick:
Copy any GUID like {FD81078C-1B36-4595-A92E-91F05C4FA5DC} and change one of the character or digit … I am sure; it will be 99.99 % unique.
The new GUID is {FD81078C-1B36-4595-A92E-91F05C4FA5DD})
2] Create a DWORD (32-bit) value and name it to color. Set the value of color, which you want.
Simple trick: Right Click on the desktop and navigate Personalize > Windows color and appearance, now set your favorite color using the color mixer.
Run Registry Editor and navigate to-
HKEY_CURRENT_USER\Software\Microsoft\Windows\DWM
and click on ColorizationColor and copy its value and paste in Color DWORD value)
3] Create a DWORD (32-bit) value and named NameId. Set the value to 69 in decimal. This registry value reads a string from themecpl.dll.mui file located under C:\Windows\System32\en-US. The 69 String ID in themecpl.dll.mui contains string value Vistas.
4] Create a DWORD (32-bit) value and named PreviewId. Set the value to 103 (The ID or name of the bitmap resource file that has been added to themecpl.dll.)
5] Create a DWORD (32-bit) value and named PreviewOrder. Set the value to 9, which tells the color scheme added at the 9th number.
6] Create an Expandable String value (REG_EXPAND_SZ) and named Resource. Set the value to themecpl.dll.
7] Exit and Reboot the computer.
Update: Restorator is available now as a trial version only. The trial version expires after 30 days. So you can use it to follow this tutorial, knowing this fact.
Guest Post By Ramesh Kumar, MVP.
Leave a Reply