In this tutorial, we will see how to resolve the Excel Add-in error, This add-in could not be started. You may encounter this add-in error in Excel if the add-ins are disabled, not updated, is corrupted, or if the add-ins are installed from unofficial websites. To prevent Excel from disabling an add-in, you should use Excel add-ins from trusted sources only. Once you do this, this ensures that Excel recognizes the add-in as safe and avoids any disruptions.

Fix Excel Add-in error, This add-in could not be started
Here are some suggestions to help you if you encounter the Add-in error – This add-in could not be started in Microsoft Excel:
- Make sure you install add-ins from within the Office software
- Make sure your Office software and installed add-ins are updated
- Uninstall and reinstall the Excel add-in
- Start Excel in safe mode and troubleshoot
Let us see these solutions in detail.
1] Make sure you install add-ins from within the Office software

The add-ins in Excel should be installed from the Microsoft Store or official websites only to avoid any issues.
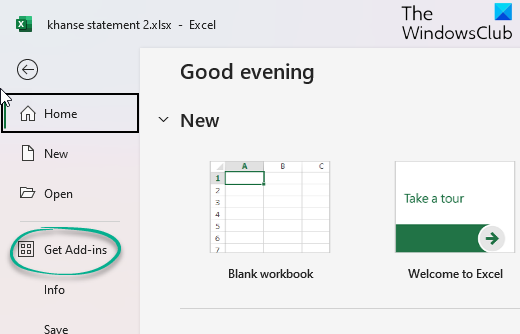
To install Excel add-ins, click on File, and then from the left side, click on Get Add-ins. A new panel will open where you can get Office add-ins.
2] Make sure your Office software and installed add-ins are updated
Ensure that your Office software is updated.

Also, ensure that all the installed add-ins are updated. To do so, open an Excel file, click on File, and then from the left side, click on Get Add-ins. A new panel will open where you can see the installed add-ins under My Add-ins. Click the 3-dots and then on Add-in details. Your browser will launch with the add-ins official page. If you see an Update button, click on it. Alternatively, you can also get the latest add-in file from the official website and replace the folder.
3] Uninstall and reinstall Excel add-ins

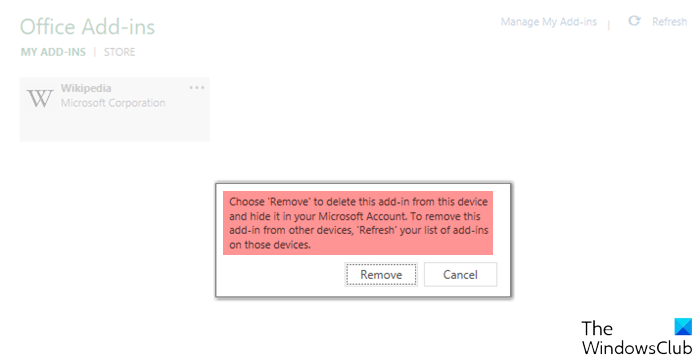
To uninstall an add-in, click the Office Add-ins dialog and select My Add-ins tab. Select the add-in you want to remove and right-click to select Remove option. Reinstall the add-in again now.

To add an add-in to Excel, open Excel, click on the File tab, and select Get Add-ins category. Select the desired add-in from the Add-Ins available and click Add. The add-in will be installed.
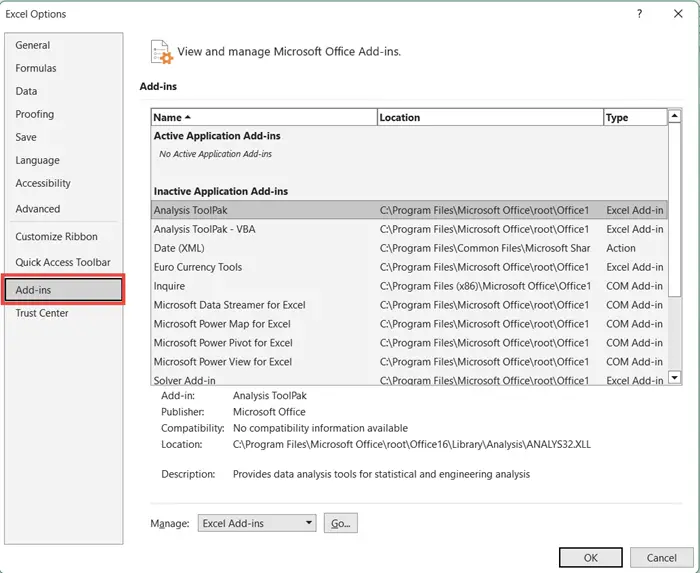
This post will show you how to view, manage, install and remove Add-ins from Office programs.
4] Start Excel in safe mode and troubleshoot

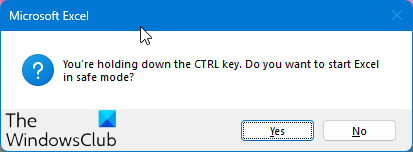
If nothing helps, you should run Excel in Safe Mode so that you can troubleshoot the issue. To launch Excel in Safe Mode:
- Press the CTRL key
- Then click on the Office file to open.
- You will be asked – Do you want to start Word in safe mode?
- Click Yes.
The Office file will open in safe mode.
Alternatively, you can use the /safe parameter in the Run to open the file in safe mode.
By running Excel in safe mode, the application avoids functionality and settings such as alternative startup location, changed toolbars, and startup folders used by Excel add-ins.
Once in Office safe mode, you should try to identify and eliminate potential conflicts that are causing this issue.
While add-ins can enhance your experience, they might occasionally interfere with the smooth functioning of Excel.
I hope these solutions helped you fix the Excel Add-in error.
Read: We can’t start this add-in because it isn’t set up properly in Office
Why can’t I add an add-in on Excel?
To add an add-in to Excel, open Excel, click on the File tab, and select Get Add-ins category. Select the desired add-in from the Add-Ins available and click Add. The add-in will be installed.
How do you prevent Excel from disabling add-ins?
To prevent Excel from disabling an add-in, you must store the file in a trusted location. A trusted location is a folder on your server that has been added to Excel’s trusted locations list. After doing this, Excel will not disable the add-in. The add-in will be available for use whenever you need it.
Leave a Reply