If you start using Office 365 Cloud Business productivity solution plans, you need to set up accounts for your team members as well. As you are the admin, only you have privilege to do so. You’ll need to create user names and email addresses for them.
After you have added users to your service and assigned them a suite license, each user has the following items:
- An Office 365 mailbox that users can access from their Outlook desktop app or Outlook Web App.
- Access to the Downloads page to download Office desktop apps, and to set up and configure their PCs to work with Office 365.
How to create a new user in Office 365 account team
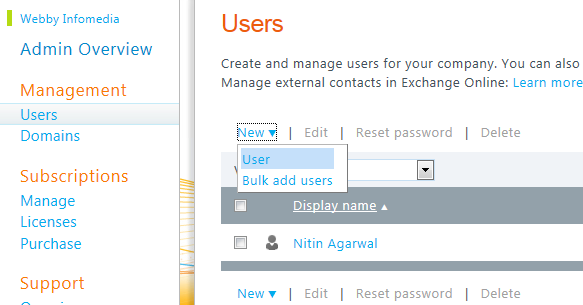
1. Go to the Admin page (in the header, click Admin).
2. In the left pane, under Management, click Users.
3. On the Users page, click New, and then click User to start the New User wizard.
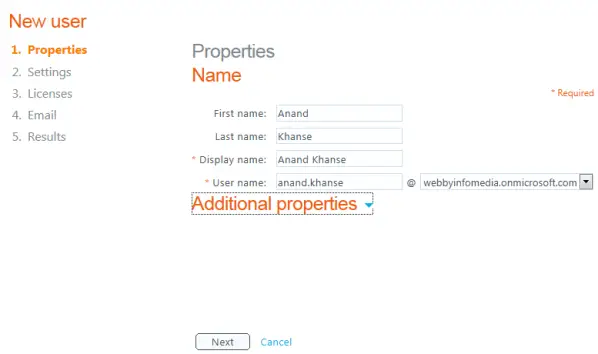
4. Complete the information on the Properties page.
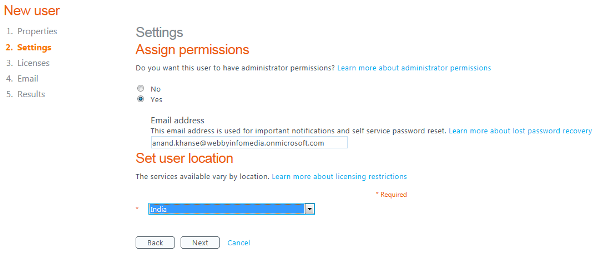
5. On the Settings page, in the Assign permissions section, decide if you want to give administrator permissions to the user.
An administrator has access to the Admin Overview page, enabling them to create new user accounts, manage subscriptions, and modify service settings.
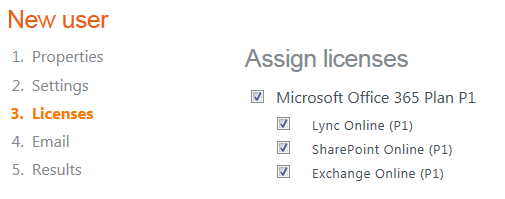
6. On the Licenses page, select the licenses that you want to assign to the user.
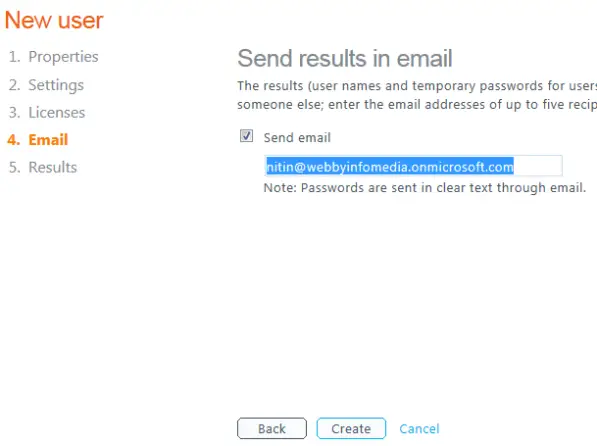
7. On the Email page, you can choose to send the user name and temporary password (credentials) to one or more email addresses. (User can change password later on).
You can send the information to the user’s email address or to your own email address. If you send the credentials to your email address, you can then deliver the information with additional setup instructions that the user will need to access Office 365.
8. To do this, select the Send email check box, type the email address that you want to send the credentials to. You can add up to five reciptients, separated by semi-colons. Click Create.
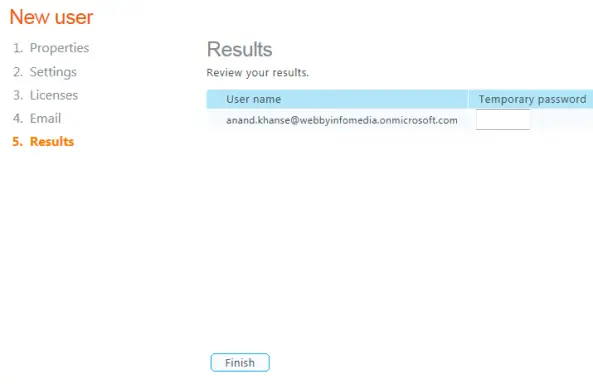
9. Review the information on the Results page and then click Finish.
You can import details of users and can create bulk user accounts if you have quite a big team.
