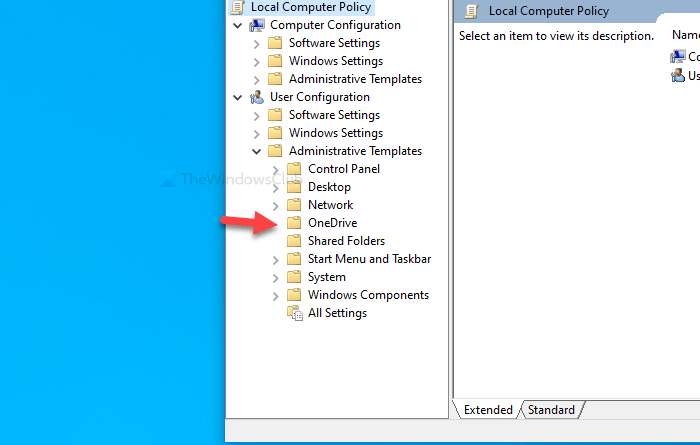
If you are an OneDrive user, you can add OneDrive sync settings in the Local Group Policy Editor to control them quickly. This way, you will get some options or policies to manage all the synchronization-related aspects of OneDrive from one place. Although it is not included, by default, you can make it visible with this tutorial’s help.

OneDrive is one of the best cloud storage solutions for your Windows computer. Moreover, it comes as a pre-installed tool with Windows so that users can get some free storage to synchronize essential files. However, there is only one method for changing the settings.
You must open the “Settings” panel from the system tray. However, if you want more options or settings to manage OneDrive installation on your computer, here is what you can do.
If you have set up OneDrive earlier, all the required files are already available on your computer. Therefore, there is no need to download anything to enlist OneDrive settings in the Local Group Policy Editor. Whether you want to include them in a domain-oriented machine or a client PC, everything is possible.
Before getting started, it is required to show hidden files and folders in Windows. Otherwise, you won’t find the location of the corresponding files.
Add OneDrive sync settings in Local Group Policy Editor
To add OneDrive in the Local Group Policy Editor, follow these steps-
- Open File Explorer on your computer.
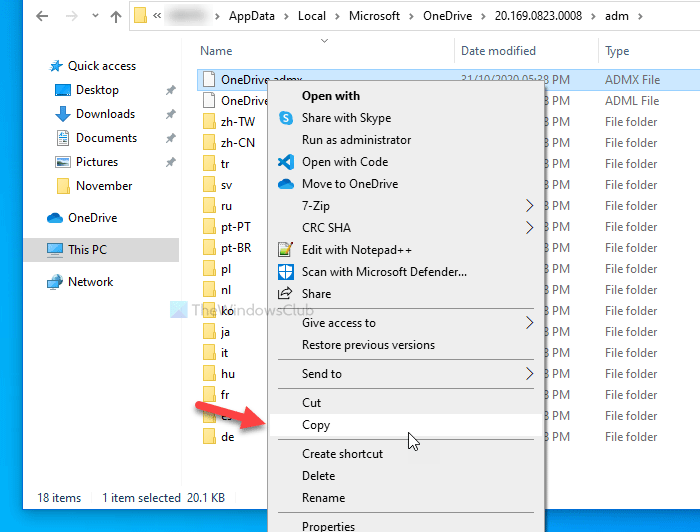
- Navigate to OneDrive’s adm folder in the AppData.
- Copy OneDrive.admx file.
- Open PolicyDefinitions folder in your system drive.
- Paste the OneDrive.admx file here.
- Copy OneDrive.adml from adm folder.
- Paste it in the en-US folder under PolicyDefinitions.
- Open Local Group Policy Editor to find OneDrive settings.
Open the File Explorer and navigate to the following folder-
C:\Users\username\AppData\Local\Microsoft\OneDrive\build-number\adm
Don’t forget to replace the username with your original username and build-number with the build number visible in the OneDrive folder.

After opening the adm folder, you will find two files – OneDrive.adml and OneDrive.admx. At first, copy the OneDrive.admx file and paste it in this location-
C:\WINDOWS\PolicyDefinitions
Here C represents the system drive. If you have a domain-connected PC, visit the domain’s Central Store and paste the file here-
\\domain\sysvol\domain\Policies\PolicyDefinitions
Don’t forget to replace the domain with the original domain name.
Following that, revisit the adm folder, and copy the OneDrive.adml file.
You will see a language subfolder in the PolicyDefinitions folder. Paste the OneDrive.adml file in the language subfolder, which has a name like this: en-US.
Now, you can open the Local Group Policy Editor to find OneDrive settings.
Leave a Reply