This post will show you how to add, remove, backup, and restore User names and Passwords using Credential Manager in Windows 11/10. Windows 11/10 allows you to store login credentials, which can be used to log in to various servers, websites, or programs. These are quite handy to use, and they are stored in an electronic vault called Credential Manager or Windows Vault.
How to add a Password to the Credential Manager in Windows 11/10
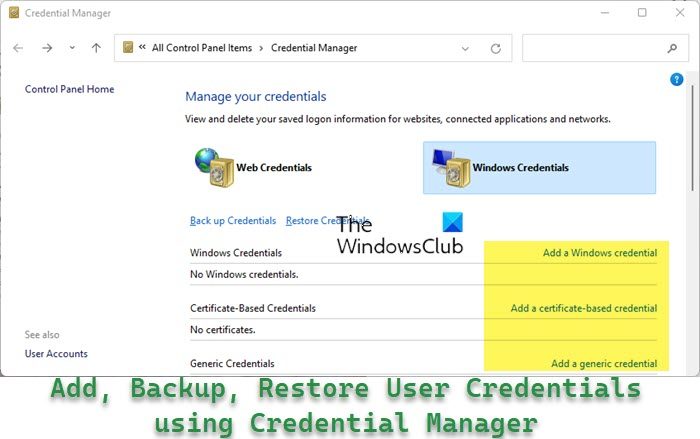
To add an entry into Credential Manager or Windows Vault: Go to Control Panel > User Accounts > Credentials Manager.
- Click on Add a Windows Credential. You will be asked to fill in the details. Just fill them up.
- Click on Add a Generic Credential and fill in the password etc.
- To add a Certificate based credential click on Add a Certificate-based credential
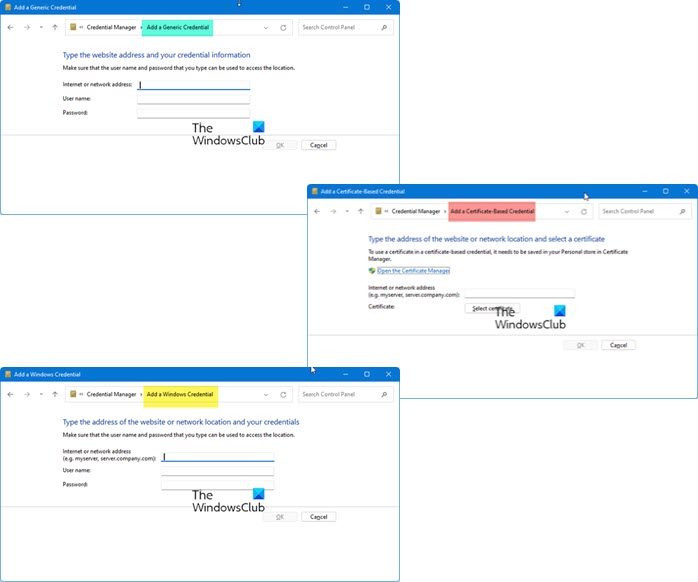
Click OK and exit.
How do I add or remove Usernames & Passwords from Credential Manager
Windows Credential Manager is a handy utility available in Control Panel.To open it just click the Windows button, type Credentials Manager in the Search bar, and hit Enter.
When the Credentials Manager opens under the Control Panel of Windows 11/10, switch to the Windows Credentials tab.
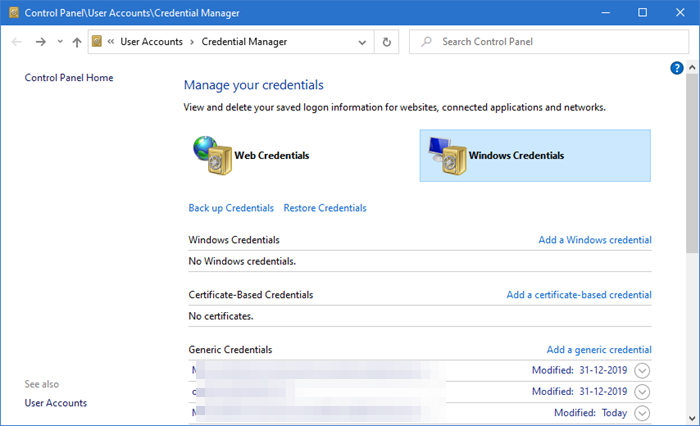
Now, to add a username to it, click Add a Windows credential link.
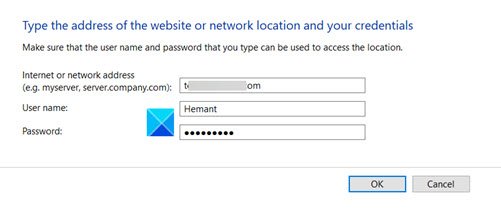
Type the address of the website or a network location and your credential (username and password).
Hit the Ok button.
Your credentials will be saved. To remove them, go back to the Manage your credentials section.
There, click the drop-down arrow next to your stored credentials.
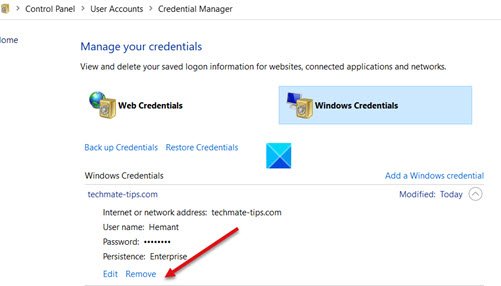
Locate the Remove option. When found, click it to remove the user and its credentials. When prompted to confirm the action, click Yes.
How to backup Credentials in Windows 11/10
To backup Credentials in Windows 11/10, follow these steps:
- Open Credential Manager on your computer.
- Click on the Back up Credentials option.
- Click on the Browse button.
- Select a path where you want to save the file.
- Press CTRL+ALT+DELETE.
- Enter a password to encrypt the file.
To learn more about these steps, continue reading.
First, you need to open the Windows Credential Manager on your computer. For that, you can search for credential in the Taskbar search box and click on the individual search result.
Then, click on the Back up Credentials option.

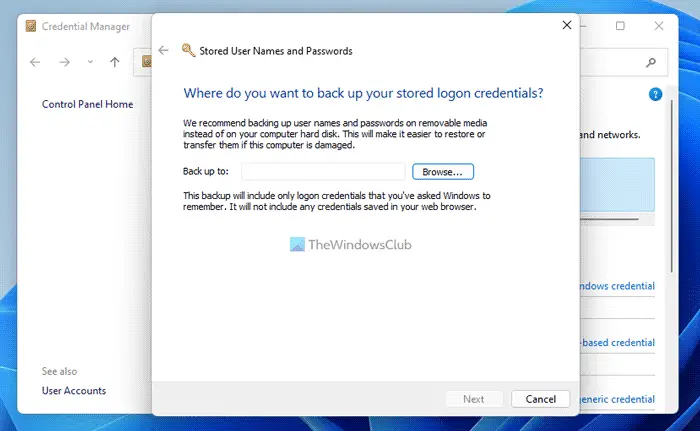
Following that, click the Browse button.
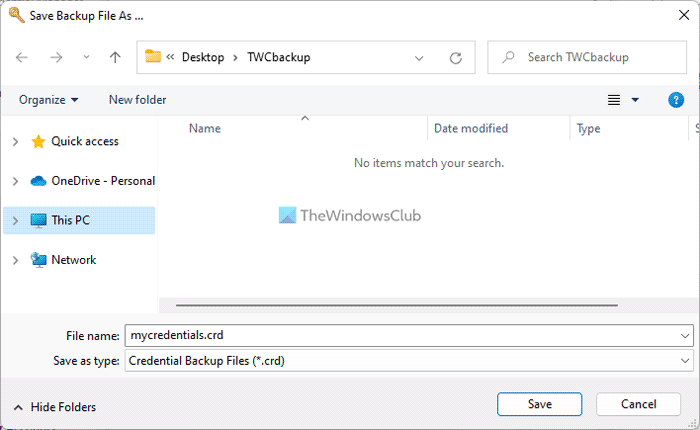
From here, you need to choose a path where you want to save the file. For that, you can select any location you want. Once done, enter the name of your file and click the Save button.
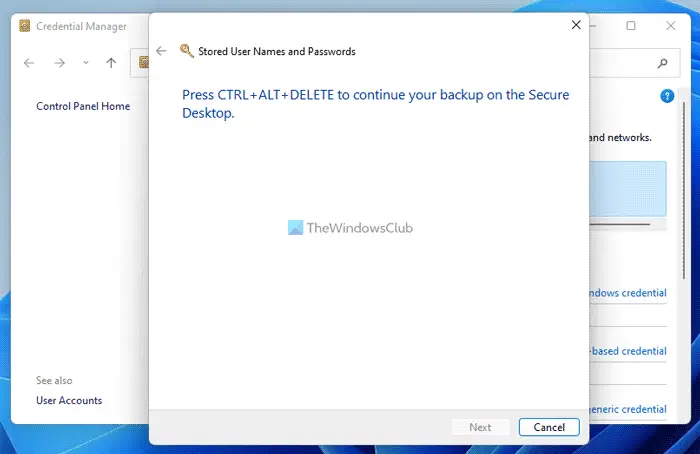
Once you click the Next button, it will ask you to press the CTRL+ALT+DELETE buttons together.
Next, you need to enter a password to lock the .cred file on your computer. It helps you protect the file from being opened by unwanted people. For your information, this password is required to restore the credentials as well.
Finally, you can find the .cred file in the desired folder you selected earlier.
How to restore Credentials in Windows 11/10
To restore Credentials in Windows 11/10, follow these steps:
- Open Credential Manager on your computer.
- Click on the Restore Credentials option.
- Click the Browse button and select the file.
- Click the Next button.
- Press CTRL+ALT+DELETE buttons.
- Enter the password.
Let’s check out these steps in detail to learn more.
To get started, search for the credential in the Taskbar search box and click on the individual search result to open the Credential Manager on your computer.
Next, click on the Restore Credentials option and click the Browse button to select the backup file.
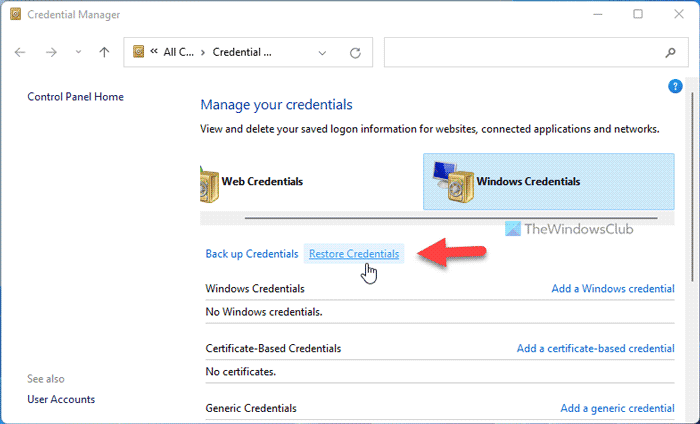
Following that, click the Next button and press the CTRL+ALT+DELETE buttons together.
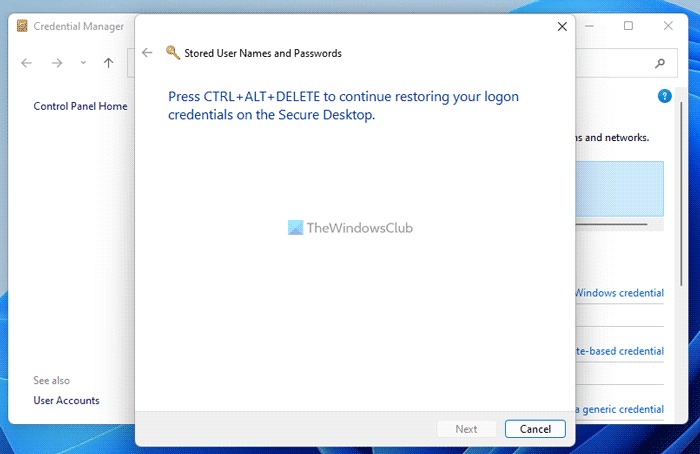
Then, you need to enter the password you used when you backed up the credentials. The fil will be of .crd type.
Once done, your credentials will be restored automatically and immediately.
You have to do this to ease your life and have an automatic login. I will suggest you add an entry into Credential Manager to have automatic login using your personal computers, because generally, browsers use cookies to store this information, which is susceptible to various security attacks, whereas here the information is stored in an electronic vault.
I hope that helps!
How do I restore my Windows credentials?
To restore your Windows credentials in Windows 11/10, follow the aforementioned guides. For obvious reasons, you must have the credential file and remember the password you used when you created the backup. Then, you can open Windows Credential Manager to complete the job.
How do I add credentials to Credential Manager?
To add credentials to the Credential Manager in Windows 11/10, you need to open this utility first. Then, you can click on the Add a Windows credential or any other similar option. After that, you can add the credential details and finish the setup.
this works!
This is not safe to do even under the best and safest circumsatnces and why it is being posted here when it is ill advised all over the web is confusing to me.
Automatic log in to any server or site is the worst thing anyone can do with all the security holes that are constantly being found not only in IE but Windows also. It only takes 15 seconds to punch in your user/pass to any site or server. If you want to back up your user names and passwords that is ok but do it on something external. By doing what is written above you are only asking for trouble.
Well ED first of all you might be right in your own respect but this feature is still quite handy. Passwords are encrypted and it uses DPAPI for the. The feature mentioned is just for the sake of simplicity for end users and this is aren’t that bad which you think. Saving the passwords in cookies makes you more vulnerable.
Sorry, I did not mean for it to sound like I was discrediting what you had wrote. If anyone is comfortable doing this then by all means do it.
As for me I do not store ANY usernames or passwords on any of my devices, I also make a habit of entering all that info manually when I visit sites or servers. And if I happen to forget a username or password, it is backed up on a thumb drive stored in a safe place.
Even though you say the passwords are encrypted and uses DPAPI it would be interesting to see if a program something like Trinity would be able to crack it because it DOES crack Windows logon passwords which is supposed to be encrypted the same way.
As per my knowledge, user name and passwords are stored in an electronic vault and this stuff is encrypted. Exact name of the algorithm I still don’t know. But i believe they are encrypted using AES algorithm i.e. Rijndael which provides 256 bit encryption as .Net framework has support for it. AES passwords are hard to break. If you find any tool which breaks the security of Windows Vault then please share with us.
windows password password preofessional is great! I have used it!
CTRL+ALT+DELETE (or CTRL+ALT+END on Remote Desktop)