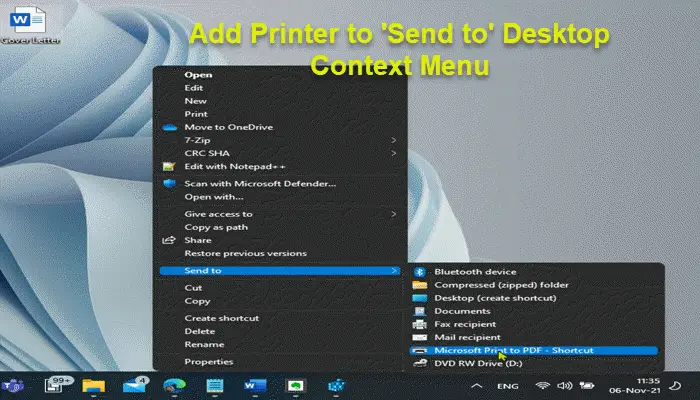
Windows users can add, remove, edit Context Menu items on Windows 11 or Windows 10 computers using Context Menu Editors. In this post, we will walk you through the steps on how to manually add Printer to ‘Send to’ Desktop Context Menu on Windows 11/10 to make printing easier and faster.

We have already seen how you can add or remove any item to the Send To context menu. You can do so manually or simply use freeware SendToSendTo. Although pressing the Shift key and right-clicking will offer you many more hidden entries, you will not see Printer. But using the same method, you can also add the Printer shortcut to the ‘Send to’ menu.
How do I add a shortcut to the Send To menu?
PC users can easily add a shortcut to the Send To menu in Windows 11/10 by opening File Explorer window and type shell:sendto in the address bar and then hit Enter. This will take you straight to the Send To folder. At that location, you can right-click an empty space and select New Shortcut, and then fill in the information about the program you want to send to.
How do I add a Print to the context menu?
To add a print to the context menu, follow these instructions: open File Explorer. Type shell:sendto in the address bar and hit Enter. With both the Send To folder and Printers folder File Explorer windows open and visible, select the printer you want to add to the Send to menu and drag that printer’s icon to the Send to File Explorer window.
Add Printer to ‘Send to’ Desktop Context Menu
When you successfully add a printer in the Send To menu on your Windows system, you’ll be able to send documents directly to the selected printer without having to open the file. Also, in the case you have multiple printers, adding other printers on your network in the ‘Send To’ menu gives you more flexibility in choosing the printer you want to print from.
To add a Printer to the ‘Send to’ Desktop Context Menu on your Windows 11/10 computer, do the following:
- Press Windows key + E to open File Explorer.
- Once File Explorer window opens, press Alt + D keyboard shortcut.
- Now, copy and paste into the highlighted File Explorer address bar the shell command below and hit Enter to open the Printers folder. Alternatively, you can press Windows key + R to open the Run dialog box and navigate to this location.
shell:PrintersFolder
This folder contains all your printers. If you have several printers, locate the printer you want to add to Send To menu and drag and drop the printer shortcut to the desktop.
- Next, open the Send To folder by running the shell command below, using any of the methods as above:
shell:SendTo
- Once the Send To folder opens, copy and paste the printer shortcut from the desktop into the Send To folder.
- Repeat to add additional printers.
- Exit File Explorer when done.
Now, in Windows 11, if you want to print a document on your desktop without opening the file, right-click the document, click Show more options, select Send To, then select the printer you want to print from.
Related post: Add OneDrive shortcut to the ‘Send to’ menu in Windows.
Why is my wireless printer not showing up?
If your wireless printer is not showing up or detected by your Windows PC, you can try the following suggestions: Make sure it’s connected to WiFi. Use a USB cable to connect and see if that works. Move your printer to where it gets the best WiFi signal without interference. Reconnect your device to the network, reconfigure security settings to include printers, and also make sure installed printer drivers are updated on your computer.
Read: Send To Menu is Empty or Not working.
How do I pin a printer to my desktop in Windows 11?
You can pin a printer to your desktop on Windows 11 using the Control Panel. First, open the Devices and Printers section and select a print that you want to pin. Next, right-click on it and select the Create shortcut option from the context menu. Finally, confirm the change y clicking the Yes button.
Hope it helped.
Leave a Reply