To improve and enhance users’ working experience, Windows 11/10 allows folders from different locations in the Windows Library to be viewed and accessed from a single place. For instance, if you keep some audio/video content on an external hard drive or a shared folder on your network, you can include it in any of the default folders of the Windows Library. In this post, let us learn how to add a folder to the Library in Windows 11/10.
Add or Remove folders in Windows Library
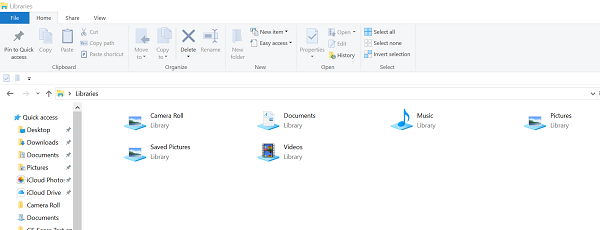
Library in Windows can be defined as a virtual collection of folders on a system. Virtual because it does not exist as a real folder. By default, Windows 11/10 comes with the following Libraries:
- Camera Roll
- Documents
- Music
- Pictures
- Saved Pictures
- Videos.
Libraries are also pinned to the navigation pane. If you would like to add more folders to the Libraries, follow the steps given below. Windows 11/10 allows the addition of up to 50 locations to a Library. You have three ways to do it.
Read: Which folders can be added to the Windows Library.
1] Using Folder Properties
Open the Libraries folder using File Explorer. Next, right-click a library and select Properties in the context menu. If Libraries is not visible under File Explorer, press the Win + R keys and type shell:Libraries into the Run box and hit Enter.
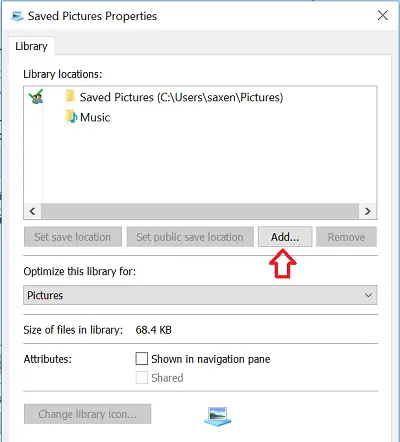
In Properties, click on the Add button seen on the right-hand side to browse to a location and add it to the library.
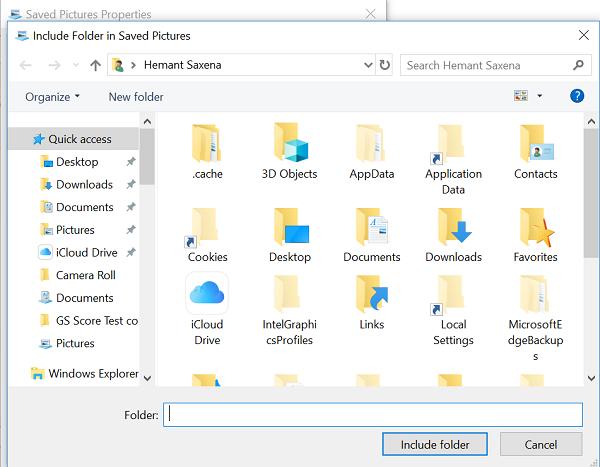
In the next dialog, browse for a folder and select the Include folder button to add to the library.
Related: How to Add or Remove Libraries from File Explorer Navigation Pane in Windows
2] Via Explorer Ribbon
Similarly, you can add a folder to a Library via Manage Library dialog, readily accessible through the Ribbon menu.
Select the desired library in the Libraries folder.
Under the ‘Ribbon’ menu, navigate to the Manage tab visible under Library tools.
After that, click on the Manage library button on the left.
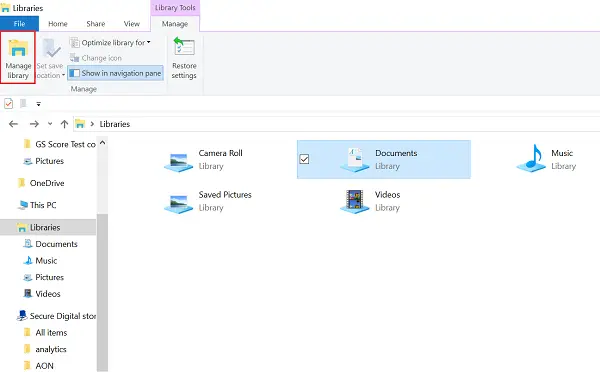
Then, in the next dialog, add the folder/s of choice using the buttons adjacent to the folder list.
3] Via Context Menu
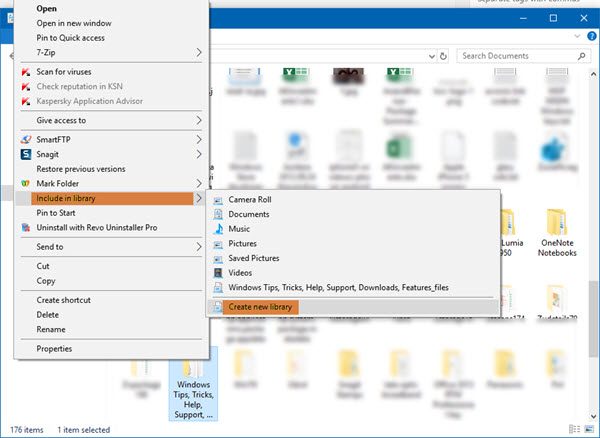
Then there is another simple way. Open File Explorer and navigate to the location, which includes the folder you want to add to the Library. Now right-click on it and select Include in library > Create new library.
Open the Libraries folder, and you will see it there.
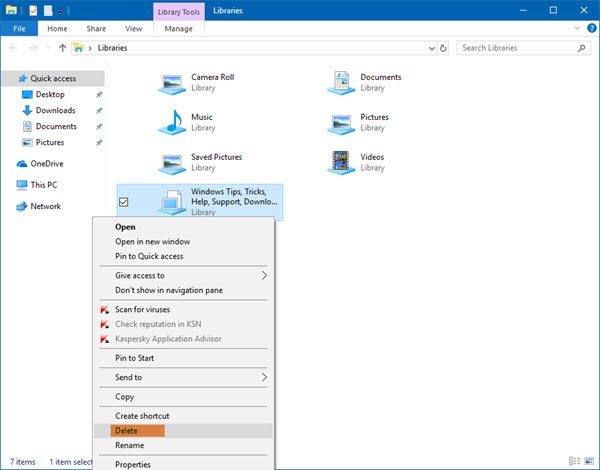
To remove a library folder, right-click on the library folder and select Delete.
I hope this helps!
How to remove Include in Library Context Menu?
Open Registry Editor
Navigate to the following Registry key:
HKEY_CLASSES_ROOT\Folder\ShellEx\ContextMenuHandlers
Here, delete the subkey named Library Location on the left side.
The Include in Library command will be removed from the context menu.
What is the difference between a library and a folder?
Libraries are where you go to manage your documents, music, pictures, and other files. You can browse your files the same way you would in a folder, or you can view your files arranged by properties like date, type, and author. Libraries contain folders and files from various locations across your computer or network, whereas a folder will only contain files or folders that are stored in that folder.
These may interest you: