Now that we have successfully hosted an FTP Server, configured its connections to pass through Windows Firewall, set up the FTP server to be accessed via an external network, and enabled browsing and updating files on the FTP Server, we will now be discussing how to add specific users to access that FTP Server. There are 2 main stages of this task. It involves adding multiple users and registering them to the FTP Server configuration settings. So follow every step carefully.
Add specific users to access FTP Server on Windows
As mentioned above, we will carry out three major tasks in this article. They are:
- Create multiple FTP Accounts.
- Configuring the FTP Server settings to add a new user.
- Setting up rules for the users to access the FTP Folder.
1] Create multiple FTP Accounts
You need to create some user accounts authenticated to access the computer from the Windows Settings App.
For this, start by hitting the WINKEY + I button combinations on the keyboard to start the Settings app. Now, navigate to Accounts > Family & other users.
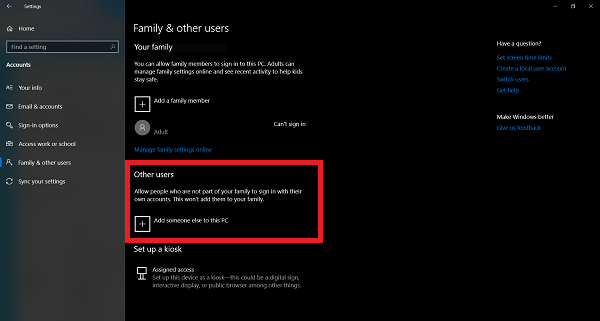
On the right side panel, scroll down to the section of Other users and click on Add someone else to this PC.
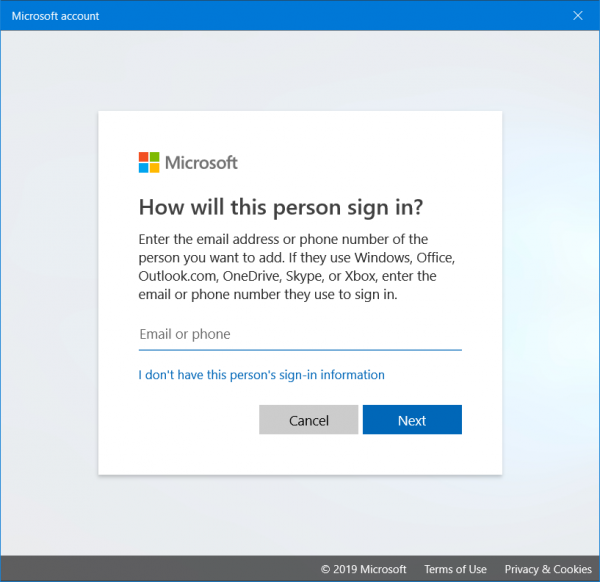
It will open another mini window. On the bottom part, click on the option labeled as I don’t have this person’s sign-in information.
On the next screen, you can add the required details like the username or Microsoft account details whichever is applicable.
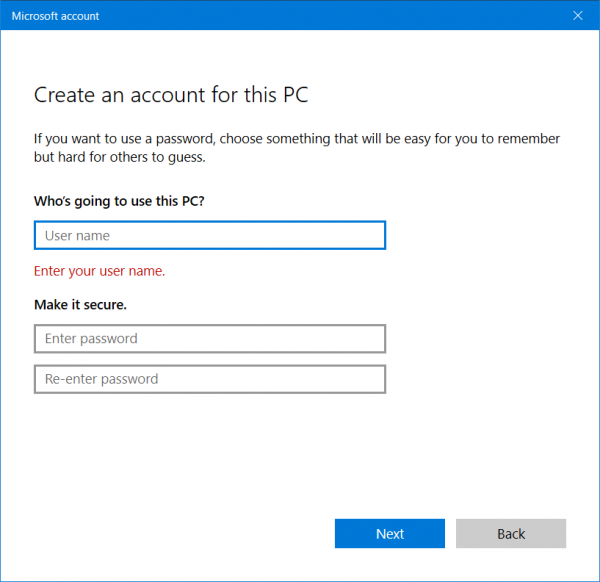
If you choose to continue without a Microsoft Account, set a strong password for your FTP Login Credentials.
Now, we are ready for the next step.
2] Configuring the FTP Server settings to add a new user
Navigate to the folder that you set to contain the files that are visible on the FTP Server. Right click on it and click on Properties.
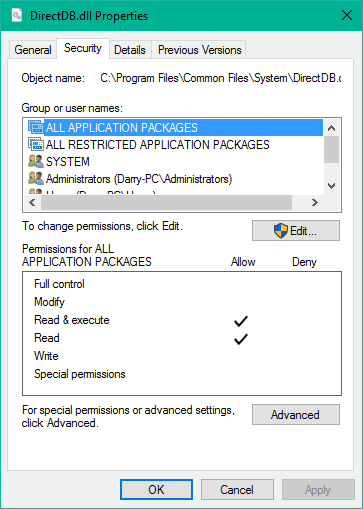
Navigate to the tab called Security. Click on Edit.
On the next screen, click on Add.
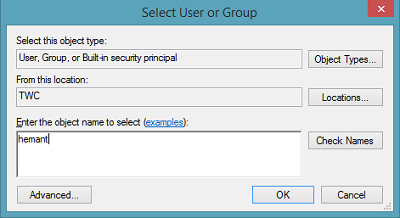
Now a dialog box called Select users or groups. Here, enter the name of the user you want to add and click on Check names.
Select the user from the list populated and click on OK. It will bring the Add button screen but it will now contain the name of the new user in the list of the users.
Select the user from that list and set the appropriate permissions and finally click on OK. Just make sure that in the list of permissions in the small bottom section is ticked with everything as per your wish.
Now, we can move to the next step.
3] Setting up rules for the users to access the FTP Folder
In this step, we will configure the FTP Server to allow the newly created user accounts to access it.
Search for Internet Information Services (IIS) in the Cortana Search Box and select the appropriate result.
On the left side navigation menu, expand the folder called Sites. Now you will find your FTP Server listed under it. Select it.
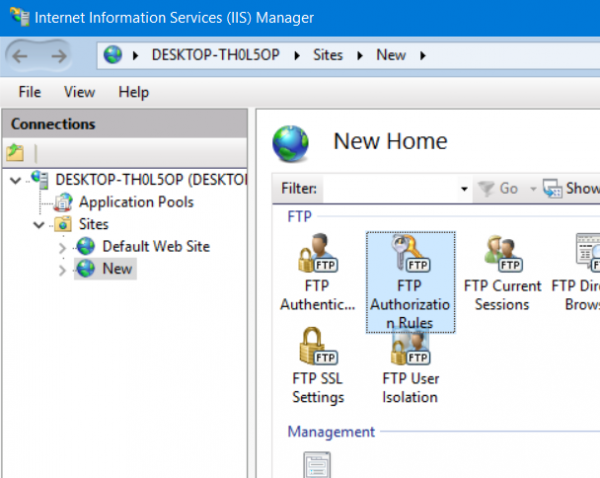
On the right side panel, you will find an option called FTP Authorization Rules icon.
Right-click on it and click on Add allow rules in the context menu.
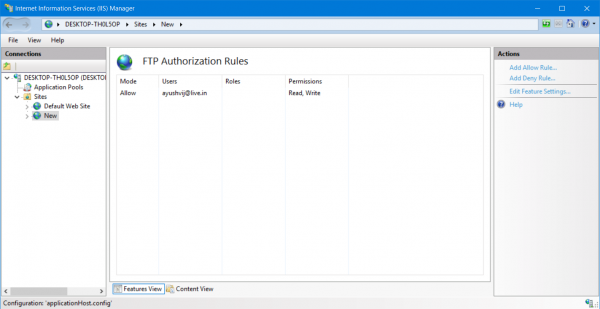
You will now get a new mini window. Select Selected Users option.
Enter the User Account that you created earlier.
You can also set the permissions that you want to assign to the particular user. Finally, click on OK.
Now, the newly created and assigned user will now be able to access your FTP Server both inside and outside the local network.
Voila! Your FTP Server is now totally ready for use by the desired users.
Leave a Reply