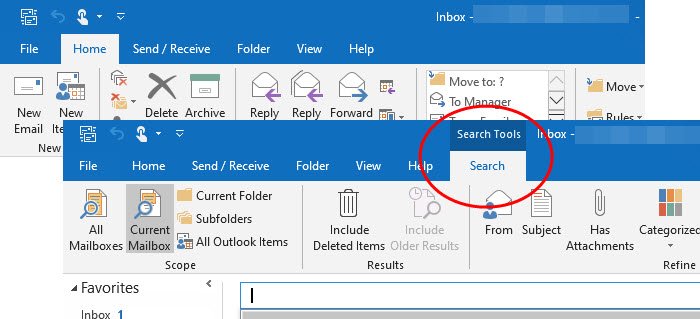
You may not have realized this, but Microsoft Outlook has a new search area that is now located at the very top. It was a Tab, but for some reason, the folks at Microsoft decided this was no longer a good idea.

How to add the Search tab to Outlook Ribbon
If you prefer the search tab rather than the new option, then you might be wondering if there is any way to get it back. Well, the answer is yes since the feature is hidden and not completely removed from the software.
Now, the only time the search tab appears is when the user clicks within the search box, but that’s only a temporary thing and that is not what we want. The new search box is currently available to those using the latest version of Microsoft Office 365.
Launch the Customize area

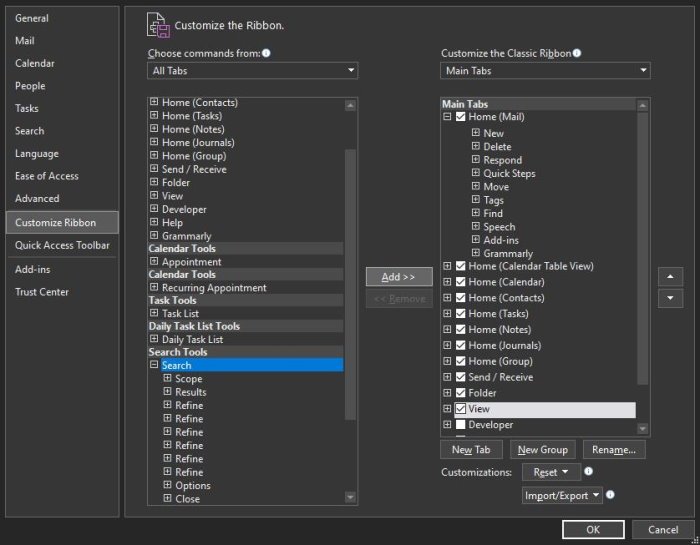
OK, so the first thing you will want to do in order to return the Search tab to its rightful place, is to fire up the Customize area. From this section, the user can also find several of the classic Ribbon features that were removed in the past, and yes, the Search tab is included.
In order to get to this section, the user must right-click on the Ribbon, and from there, select Customize the Ribbon. Alternatively, you could click on File > Options > Customize Ribbon.
Add the Search option to the tab

When it comes down to re-adding the old Search tab, you are required to take a few steps, but nothing out of the ordinary.
From the Customize area, go to the section that says Choose command from, and select the dropdown menu and be sure to click on All Tabs. From here, scroll down to Search under All Tabs, and make sure to select it. Move over to the section on the right that says Customize the classic Ribbon and select View.

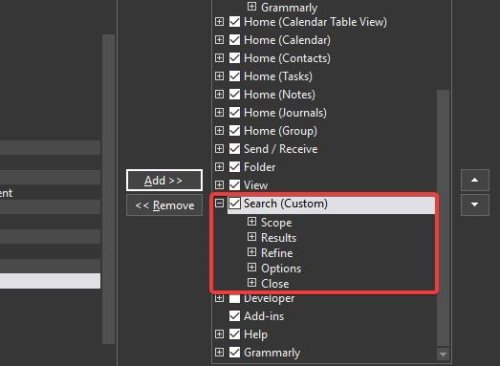
Finally, hit the button that says Add in the middle of both sections, then click on the OK button to complete the task.
If everything went according to plan, then the Search tab should be at its rightful place and ready to be used.