A user profile folder (or User Folder) in Windows 11/10 contains files and folders stored in different locations like Desktop, Documents, Favorites, Downloads, Searches, Pictures, and more. It is located at C:\Users\<username>. If you want to access these locations quickly and easily, then adding your user profile folder to the navigation pane of File Explorer would be a good option. This post will help you with how you can do that.
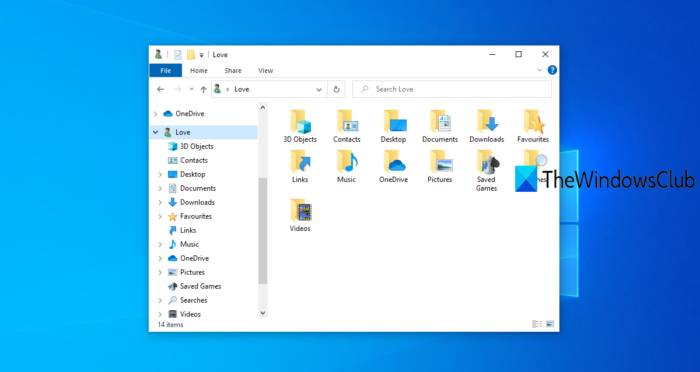
Add User Profile folder to Navigation Pane of Explorer
You can add the user folder to the navigation pane in two different ways:
- Using Registry Editor
- Using Ultimate Windows Tweaker.
Let’s check both options.
1] Using Registry Editor
Before trying these steps, you should backup Registry, just in case. Now follow these steps:
- Open Registry Editor
- Access CLSID Registry key
- Create
{59031a47-3f72-44a7-89c5-5595fe6b30ee}Registry key - Create
System.IsPinnedToNameSpaceTreeDWORD value - Add 1 in Value data box
- Restart File Explorer.
Use Win+R hotkey to open the Run Command box, type regedit, and press Enter key to open Registry Editor. If you want, you can try some other ways to open Registry Editor.
After this, access the CLSID Registry key. Here is the path:
HKEY_CURRENT_USER\SOFTWARE\Classes\CLSID
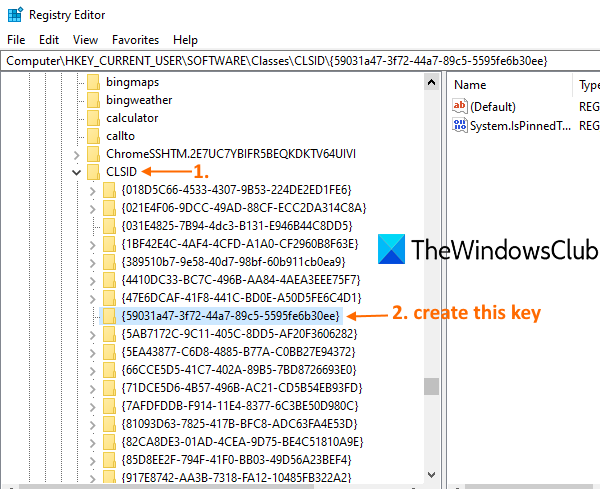
Right-click on the CLSID key, access New and use the Key option. This will create a new key. Rename that key to:
{59031a47-3f72-44a7-89c5-5595fe6b30ee}
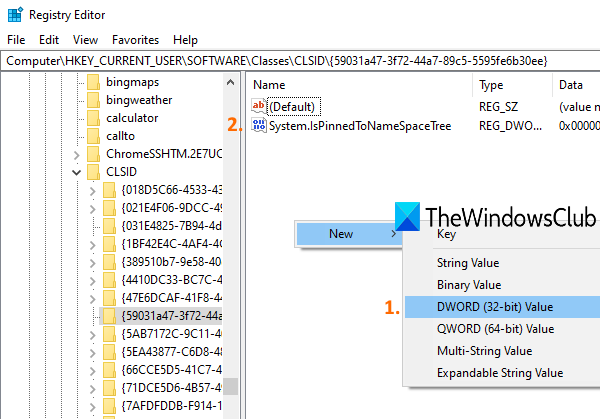
Under that key, create a System.IsPinnedToNameSpaceTree value, as visible in the screenshot below.
For this, right-click on an empty area, select the New menu and click on the DWORD (32-bit) Value option. After that, rename that value.
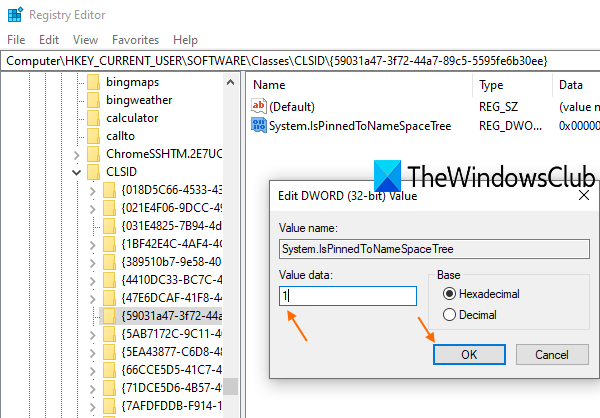
Double-click on the value you created and you will see a small window. There, put 1 in the Value data, and press OK.
Now just restart File Explorer. After that, when you will open File Explorer, you will see that the user folder is added to the navigation pane with all the locations present in that folder. Click on any location and you can view all the files and folders.
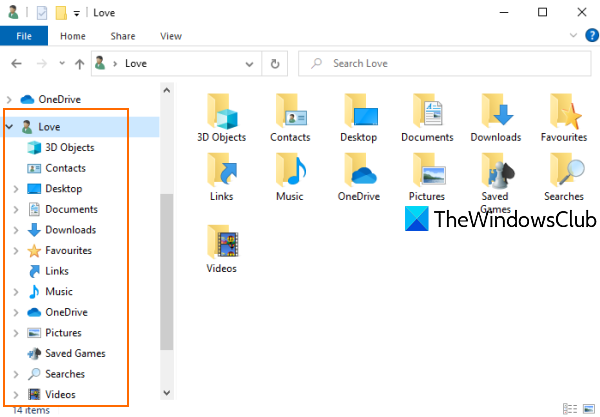
To remove or disable the user profile folder from the navigation pane, simply follow the above steps and delete {59031a47-3f72-44a7-89c5-5595fe6b30ee} key.
Restart File Explorer to apply the changes.
2] Using Ultimate Windows Tweaker
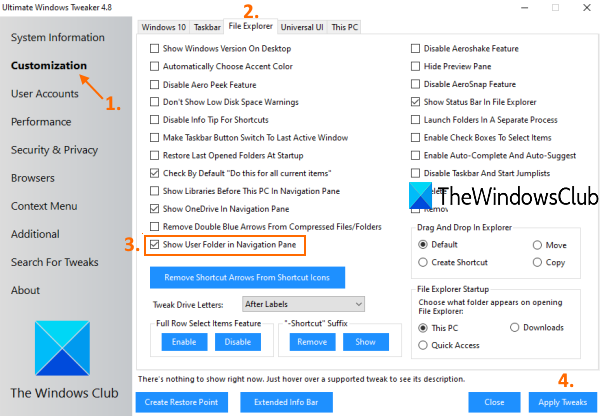
This is the easiest and simplest way to do this. You can use our own Ultimate Windows Tweaker tool. Our free tool comes with a lot of tweaks such as change taskbar thumbnail size, disable Task Manager, and lots more. Adding the user folder to the navigation pane of File Explorer is one of those tweaks.
Using this tool is pretty simple and it also prompts you to create a system restore point before using any tweak. Just grab its zip file, extract it, and run the Ultimate Windows Tweaker tool. After that, follow these steps:
- Click on the Customization category available on the left part
- Access the File Explorer tab on the right section
- Select Show User Folder in Navigation Pane option
- Click on Apply Tweaks button available on the bottom right part.
Read next: How to delete a user profile in Windows.
This will automatically restart File Explorer and apply the changes. You will see that the user folder has been added to File Explorer’s navigation pane.
I hope this is helpful.
Leave a Reply