The Lockscreen of a Windows computer is the window you see every time you boot it up, right when you’re about to log into your system. The screen is highly customizable on Windows computers. Since it’s the first thing you view every time you begin to work on your computer, it’s important that it houses all the important stuff, stuff that you need to catch up with instantaneously. For many people, that can be the weather forecast for the current and upcoming days. In this article, we will be showing you how you can add the weather widget to your lock screen, and also to your desktop screen and taskbar in Windows 11/10.
How to add a Weather widget to the Lock screen in Windows

The process to do so is unsurprisingly easy. All you have to do is make a change in your Windows settings and you’re good to go. Here’s what that change is:
- Open the Windows Settings by pressing the Windows and ‘I’ keys together
- From the options available on the main window, go to Personalization
- Here, click on Lock Screen from the left-side options pane
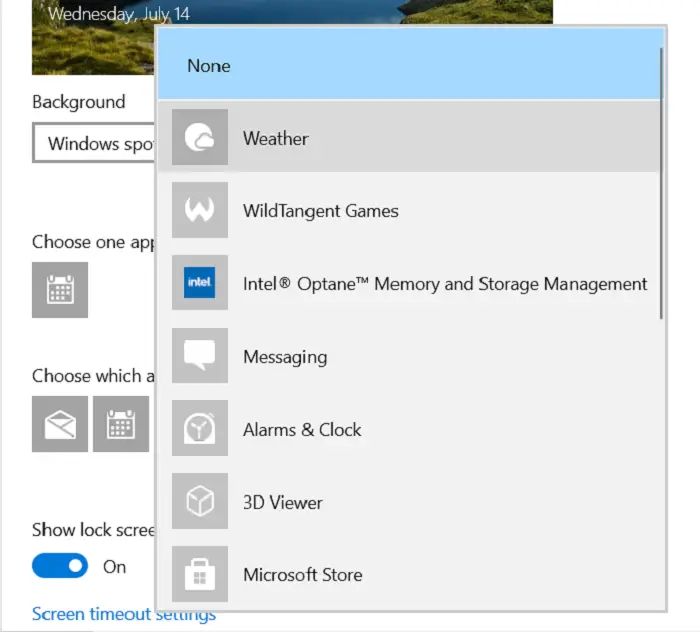
- Here, you see an option to add items to your lock screen. This typically includes the date and time, next to which is a ‘+’ sign
- Click on that and from the list, select ‘Weather’
- If you want to undo this change, click on it again and this time select ‘None’
How to add Weather to desktop in Windows 11/10
The process isn’t as easy to replicate with your desktop as it is with the Lock screen. In fact, Microsoft doesn’t provide an option to its users to add a weather widget to their desktop screen using a built-in utility. Thus, we have to rely on third-party apps for the same. The most reliable and efficient one for this purpose is a package named Widget Launcher. It consists of not just weather but several more widgets like date & time, currency conversion, etc.
The process to set the app up is pretty easy and takes just a couple of minutes. Here’s what you need to do:
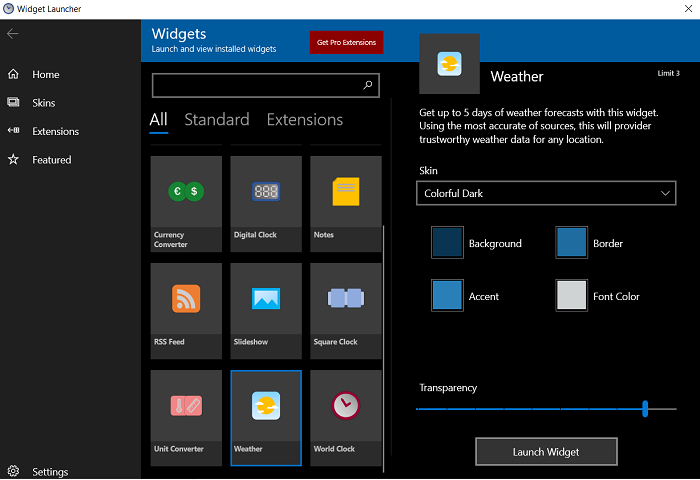
- Download the Widget Launcher app from the Microsoft Store. (It went by the name Widget HD before, so you can search with that name too).
- Launch the app once it’s been downloaded.
- There, you’ll see all the widgets the package has to offer.
- Last on the list will be one named ‘Weather’.
- Click to configure it.
Type out your location, or the location the weather of which you want to keep track of, and enter it.

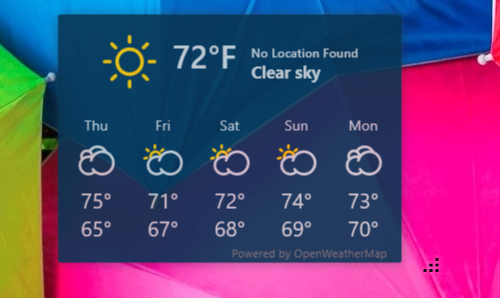
You’ll find a Widget as below on your Desktop screen. You can customize this widget based on your preferences, such as its colors and how transparent you want it to be.

You can also drag to increase or decrease its size based, again, on your choice and the number of apps you have on your desktop, since a big widget may make it look crowded. If you want to get rid of it, simply open the Widget Launcher and disable it.
How to add a Weather widget to the Taskbar in Windows 11/10

This isn’t something a user of the latest Windows version would be asking, since this has been taken care of by Microsoft with the News and Interests feature. This utility sits on a user’s taskbar, displaying the weather, and when you hover over it you see several cards, some with the news you want to read and things that are of interest to you.
So, the best way to get the weather feature on your taskbar without relying on a third-party utility is to update your PC to the latest Windows version and use the News and Interests feature.
We hope that this post was helpful and that you are now able to display the weather widget wherever you want on your PC.