Not all the Windows users are physically identical, and that is the reason Microsoft added a new feature called Color Filters. This feature allows users to set different filters to the computer screen based on individual requirements and it can help color-blind or visually impaired persons better view the display. If a color-blind person wants to work on the Windows 11/10 machine, he/she will face problems because of the impairment. However, now Windows 11/10 users can choose different settings to make the screen easily readable even with their impairment. In this post, we will see how to enable ColorBlind Mode and apply Color Filters on Windows 10 screen.
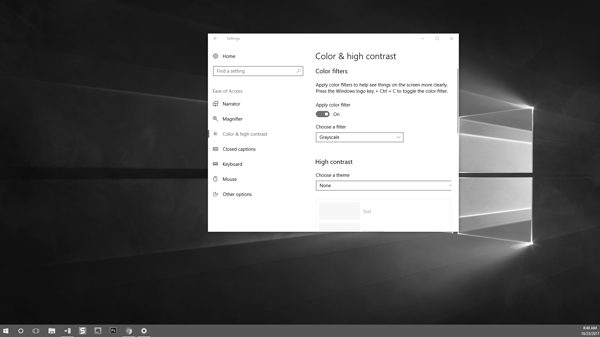
How to Turn off or on ColorBlind mode in Windows 11/10
There are three different methods to enable & apply Color Filters to the computer screen, and you can try any of them on your Windows 10 PC.
1] Using the Keyboard shortcut
This is probably the fastest way to enable the color filter on your Windows 10 screen. Just press Win+Ctrl+C keys together. You will get the Grayscale effect immediately. However, the problem with this keyboard shortcut is it cannot enable other color filters except Grayscale. To check out different filters, you need to follow the following guide.
2] Windows Settings Panel
Windows 11
Right-click on the Windows button on the Taskbar and select Settings from the list of options displayed therein. Alternatively, you can use the Win+I keyboard shortcut to go to the Settings panel directly.
Once there, select Accessibility from the side panel on the left.
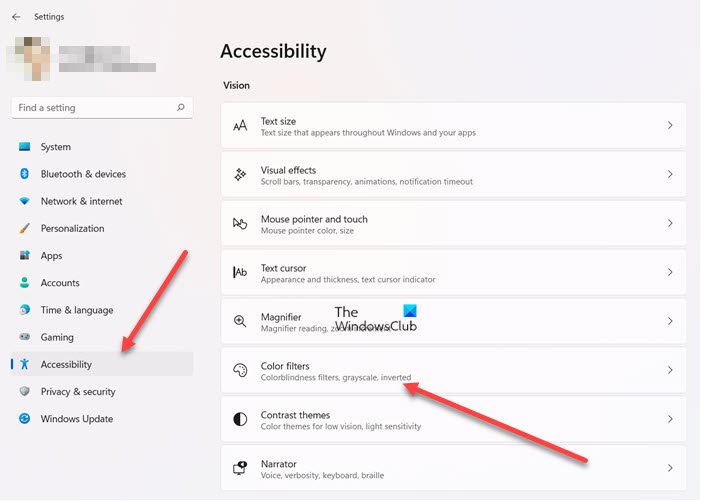
Switch to the right. Under the Vision section, scroll down to the Color Filters heading and click the heading to expand its menu.
When directed to a new screen, scroll down to Color Filters entry and slide the toggle next to it to the on position.
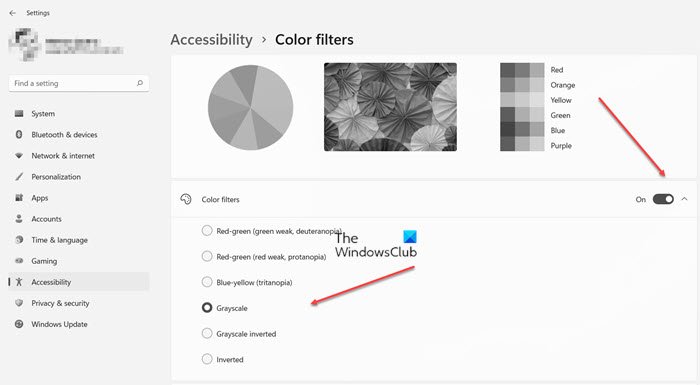
you can choose various filters such as:
- Inverted
- Grayscale
- Grayscale inverted.
Also, you can select color blindness filters like:
- Deuteranopia
- Protanopia
- Tritanopia.
Windows 10
This is where you can find the Color Filters option. Open Windows Settings panel by pressing Win+I and go to Ease of Access > Color filters.
On your right-hand side, you can find an option called Turn on color filter. Toggle the button to enable it immediately.
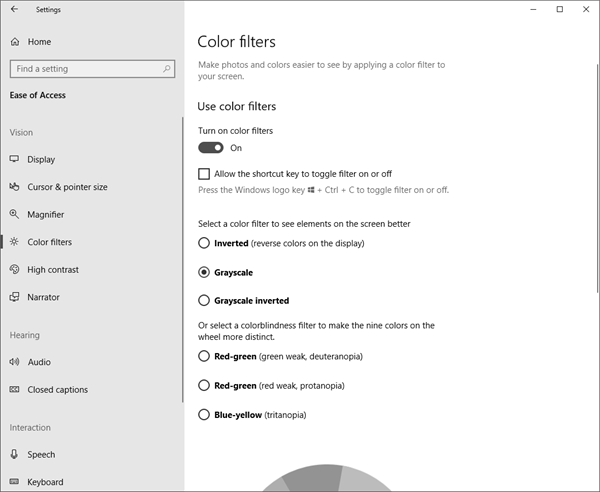
After enabling, you can choose various filters such as:
- Inverted
- Grayscale
- Grayscale inverted.
Or you can select color blindness filters like:
- Deuteranopia
- Protanopia
- Tritanopia
These are different conditions. For example, Deuteranopia, Protanopia, and Tritanopia are different types of color blindness.
3] Registry Editor
Open Registry Editor. For that, press Win+R, type regedit and hit the Enter button. Before using Registry Editor, make sure you have created a system restore point and backed up Registry files.
Now, navigate to the following path-
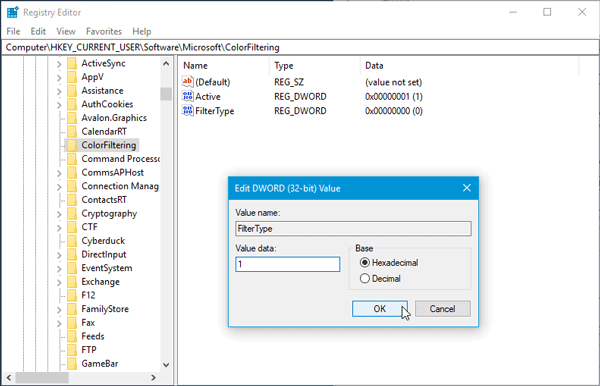
Computer\HKEY_CURRENT_USER\Software\Microsoft\ColorFiltering
On your right-hand side, you can find two different keys, i.e., Active and FilterType. Double-click on “Active” key and set the value to 1. After that, double-click on the “FilterType” key and set the value anything between 0-5 as required.
- 0 = Grayscale
- 1 = Invert
- 2 = Greyscale Inverted
- 3 = Deuteranopia
- 4 = Protanopia
- 5 = Tritanopia
That’s it!
What does a Colorblind mode do?
The Colorblind mode in Window allows you to adjust the on-screen colors for several different types of color blindness. Most common forms of red-green color blindness, which are genetic conditions caused by a recessive gene, but there are other types as well.
What is color filters in laptop?
Color filters are a setting in Windows that allows you to change the color palette on the screen. This helps you distinguish between things that differ only by color. It’s especially useful when you find it hard to see what’s on the screen.
Related read: How to enable and use Color Filters for Colorblind users in Windows.