By default, all changes made in the Local Group Policy Editor are applied to all users of your system. If you want to apply Group Policy settings to non-administrators only in Windows 11/10, here is what you need to do. As GPEDIT is a snap-in of Microsoft Management Console, you can use it to get your job done.
The Local Group Policy Editor helps you set various restrictions and tweak your system as per your needs. It is easier than using Registry Editor because of the graphical and user-friendly user interface. You can open any setting and make the change immediately. Everything about the Local Group Policy Editor is fine except one thing. It applies all the changes across all types of users, including administrators.
Sometimes, you may want to allow administrators to make a change but prevent other users from doing the same. If so, you should follow this step-by-step guide to know how you can apply Group Policy to non-administrators only in Windows 10. You need to create a snap-in of Local Group Policy Editor for non-administrators.
Apply Group Policy to Non-Administrators only in Windows 11/10
To apply Local Group Policy settings to all users except Administrators in Windows 11/10, follow these steps:
- Open Microsoft Management Console.
- Go to File > Add/Remove Snap-in.
- Select Group Policy Object Editor and add it to the list.
- Choose Non-Administrators.
- Save the snap-in.
- Start making changes for non-administrators.
To get started, you need to open the Microsoft Management Console. For that, press Win+R, type mmc.exe, and press the Enter button. You may have to select Yes on the UAC prompt.
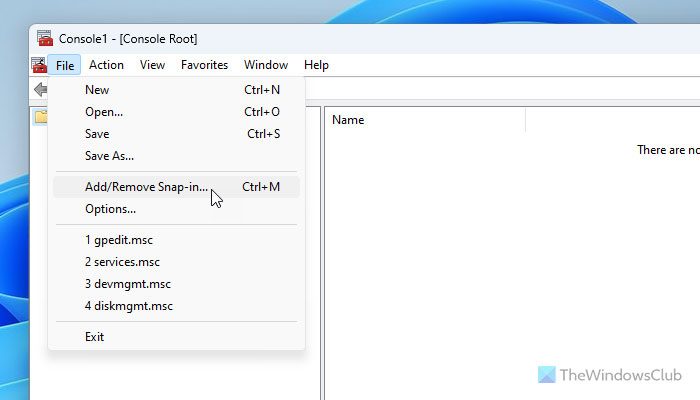
After that, click the File button, and select the Add/Remove Snap-in option. Alternatively, you can press Ctrl+M.

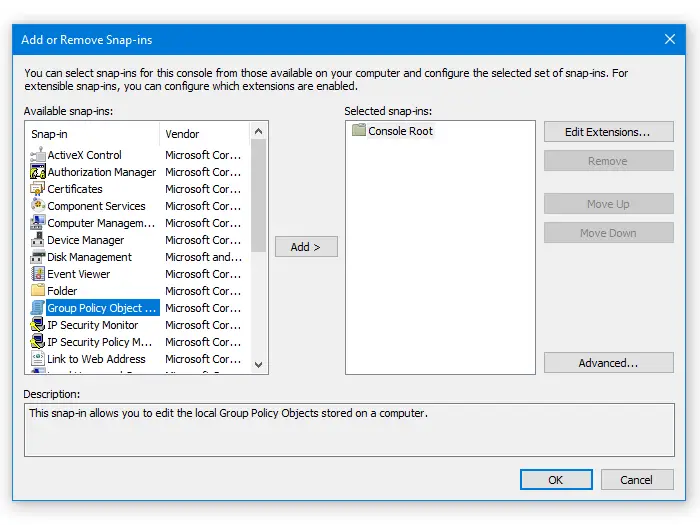
Now, you need to select the Group Policy Object Editor on your left side and click the Add button.

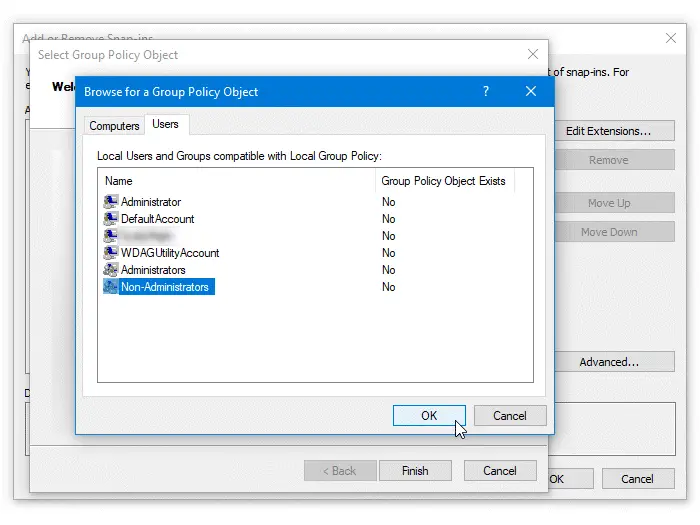
Click on the Browse button, go to Users tab, select Non-Administrators, and click the OK button.

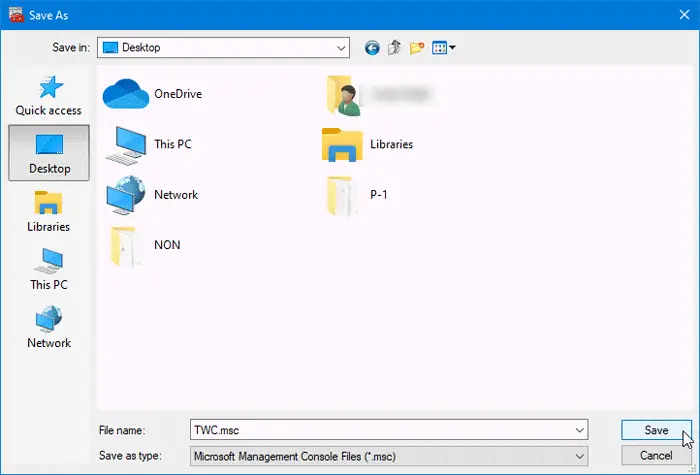
You can set all these settings by clicking the Finish and OK buttons, respectively. Now, you need to save it somewhere. For that, go to File > Save As, and select a path where you want to save the snap-in. Then, give it a name and click the Save button.

From now on, you need to open the newly created snap-in for non-administrators to make any Group Policy changes. It looks exactly like the original Local Group Policy Editor.
I hope this tutorial helps you.
Read: Find Group Policy Settings with Group Policy Search from Microsoft
How do I apply Group Policy to a specific user only?
To apply Group Policy to a specific user only, you need to go through the same steps as above. In other words, you need to open the Microsoft Management Console first. Then, go to File > Add/Remove Snap-in, choose the Group Policy Object Editor and click the Add button. Next, click the Browse button and select the user from the list. Finally, click the OK button and save it.
How do I get Local Group Policy Editor in Windows 11?
There is nothing you need to do to get the Local Group Policy Editor in Windows 11 or Windows 10 PC. If you use the Pro version, you have multiple options to open it. The easiest way to do that is by using the Run prompt. That said, press Win+R to open the Run prompt, type gpedit.msc and hit the Enter button. On the other hand, if you use the Home edition, you can follow this detailed guide to add Group Policy Editor to Windows Home Edition.
Read: How to search Group Policy for specific GPO in Windows.