Sometimes an individual will type dates, numbers, and days into the worksheet, and it can get tiresome to type constantly, but in Excel, there is a feature that can make it easier; this feature is called AutoFill. In Microsoft Excel, AutoFill fills data series automatically in which saves the user some time. AutoFill creates a string of numbers, dates, and days to apply formatting from one cell to adjacent cells.
How to use AutoFill in Excel
AutoFill is a feature that fills cells with data that follows a sequence or is based on data in other cells. In this tutorial, we will explain:
- How to fill a simple numeric, date, and day series.
- How to fill a particular date or day series.
- How to fill a formatted numeric series.
- How to set advanced options for a numeric date and day series.
- How to prohibit formatting when filling a series.
- How to create a custom fill series.
- How correct a repeated sequence.
1] How to fill a simple numeric, date, and day series
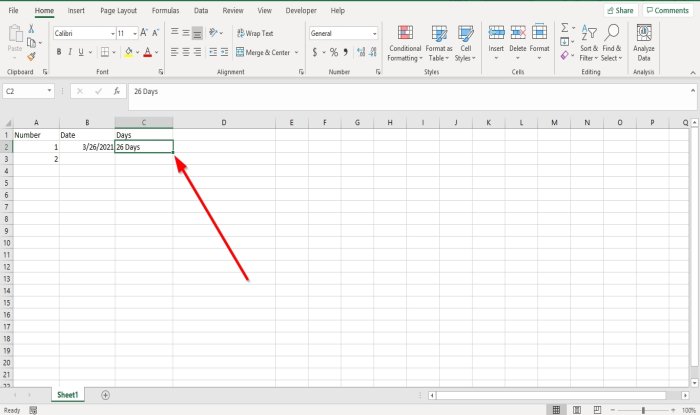
To create a numeric series, type number one into the cell and type two into the second cell.
Select both numbers one and two and drag the fill handle down or to the right to create an increasing series.
Drag both the fill handle up to create a decreasing series.
To create a date or day series, click the cell that contains the date or day and drag the fill handle down.
2] How to fill a particular date or day series
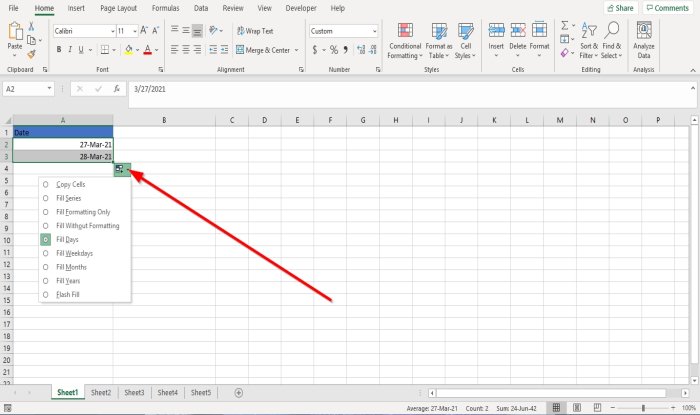
If the user wants to change the date or day in a cell automatically, drag the selected cell’s fill handle. An AutoFill Options button will appear on the bottom right of the cell.
Click the AutoFill Options button, then click either Fill Days, Fill Weekdays, Fill Months or Fill Years.
The selection of each will determine how the sequence of the pattern will go.
3] How to fill a formatted numeric series
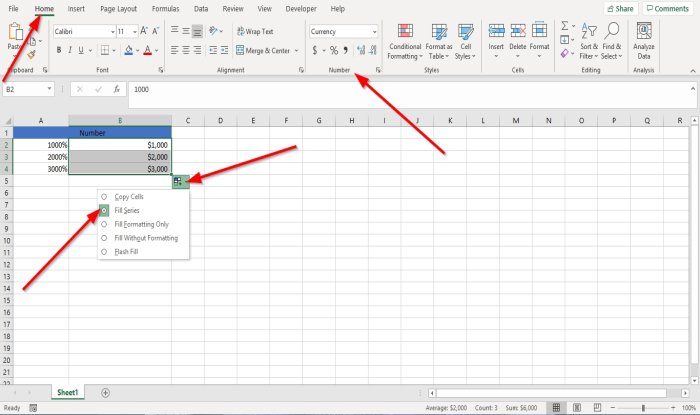
Enter an amount into the cell.
Go to the Home tab in the Number group to format the amount, namely Percentage, Currency, Fraction, etc.
Select the cells and drag the fill handle down.
Click the AutoFill Options button.
In the AutoFill Options menu, click Fill Series.
4] How to set advanced options for a numeric, date, and day series
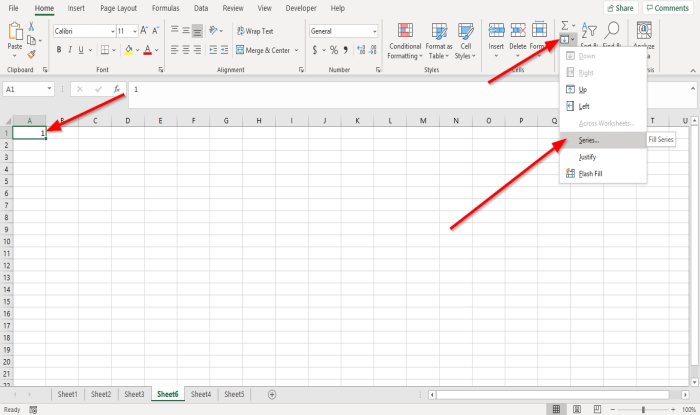
Enter a number or date into the cell.
Go to the Home tab and click the Fill button in the Editing group.
In the drop-down list, click Series.
A Series dialog box will appear.
Inside the Series dialog box, choose your options.
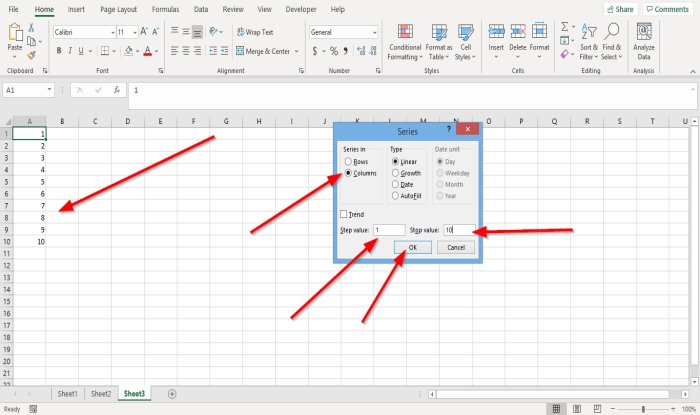
In this tutorial, we will explain the process of using the series box for the numeric series.
In the Series dialog box, in the section Series in, you can choose between Rows or Columns where you want your series to be.
In the Step Value section, enter the number into the box where you want the series to start from, for instance, one.
In the Stop Value, enter the number where you want the series to stop, for example, ten.
Then, click OK.
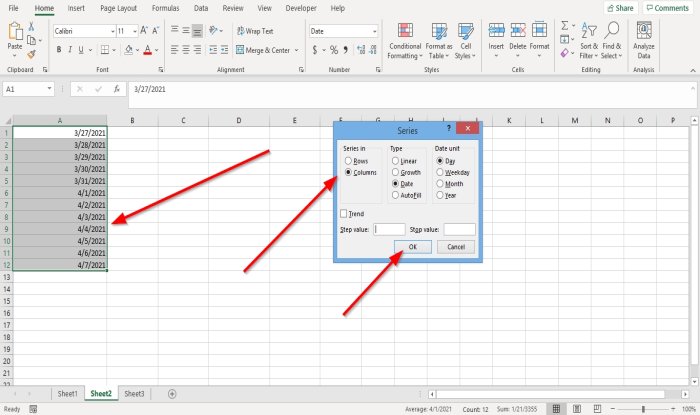
For the date or day series, highlight the column or row you want the series to be.
Then go to the Fill button in the Editing group on the Home tab.
The Series dialog box will pop up.
Inside the dialog box, ensure that the Date in the Type section and the Day in the Day Unit section checkboxes or checked, then click OK.
The Dates and Days will appear in the worksheet as a series.
5] How to prohibit formatting when filling a series
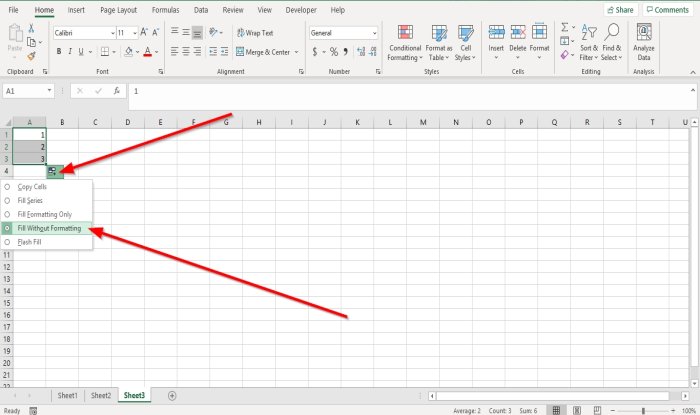
If you want to stop the auto-fill while filling your series.
Drag the fill handle down; when the Auto Fill Options button pops up, click it.
In the AutoFill Options menu, select Fill Without Formatting.
You will notice that the number, date, or day you recently fill disappears.
6] How to create a custom fill series
In Microsoft Excel, there is a feature where you can create your custom series if the data does not match the series type or unit provided by Excel.
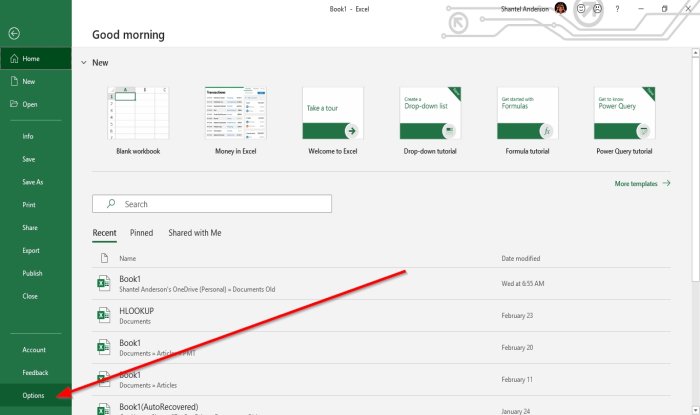
On the Backstage View, click Options.
An Excel Options dialog box will appear.
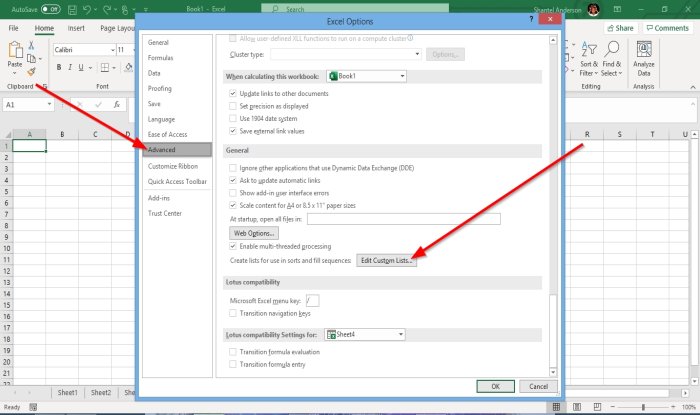
Inside the Excel Options dialog box, click the Advance page.
On the Advanced page, in the General section, click the Edit Custom Lists button.
This button creates lists for use in sorts and fills sequences.
Once the Edit List button is clicked, a Custom List dialog box will open.
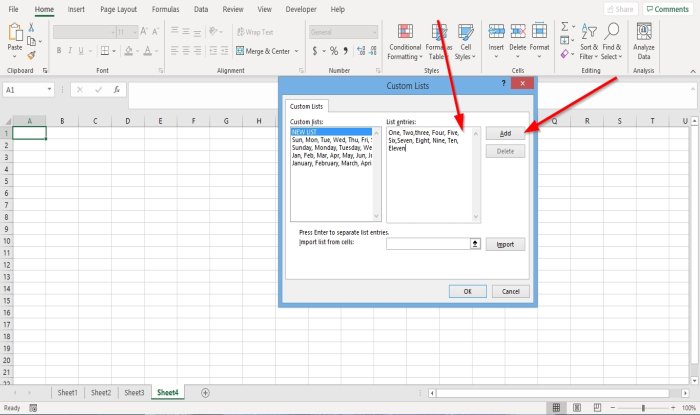
Inside the Custom List dialog box, in the section, list entities, type the lists you want, for example, One, Two Three or Summer, Winter, Autumn, Spring.
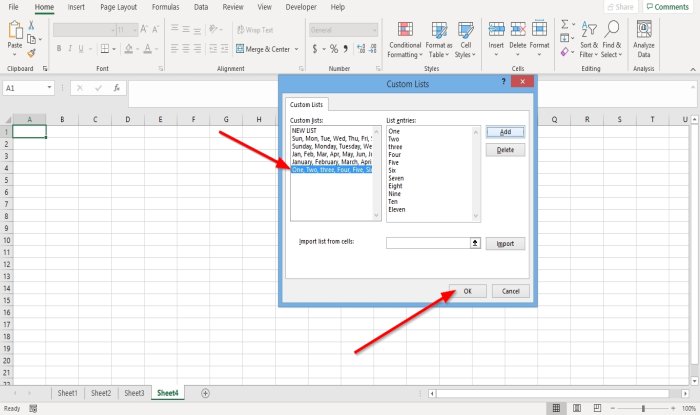
Then click Add, you will see your list is displayed in the Custom List section.
Click Ok.
The Excel Options dialog box will pop up click OK.
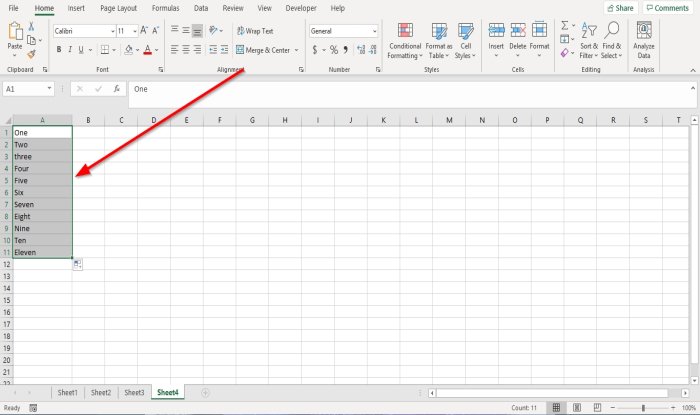
On the worksheet, type one of the data from your custom list into a cell.
Drag the cell down with the fill handle.
You will see all the data you have entered in the custom list you have created.
Read: How to use Geography Data Type in Excel.
7] How correct a repeated sequence
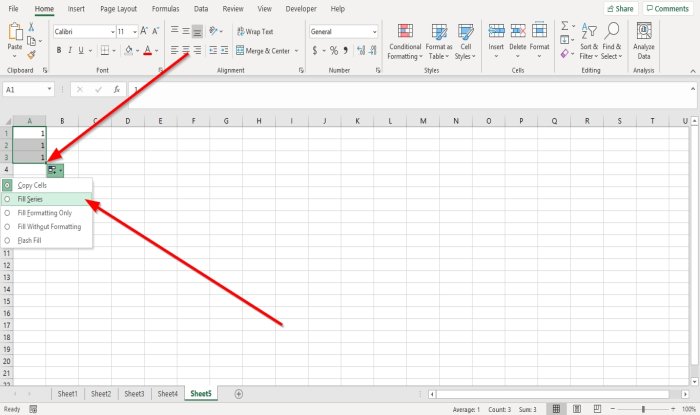
If the user use drags the fill handle down but only seeing a repeated sequence, this can be corrected by; clicking the AutoFill Options button.
In the menu, select Fill Series.
Now, we have a sequence.
I hope this helps; if you have questions, please comment below.
Leave a Reply