The Automatic Tuner in the NVIDIA app finds the best overclock settings for the GPU and maintains that performance regularly. The Automatic Tuning feature is not working for some users and they are getting the Automatic tuning was interrupted error in NVIDIA app. If you encounter this error, the solutions provided in this article will help you.
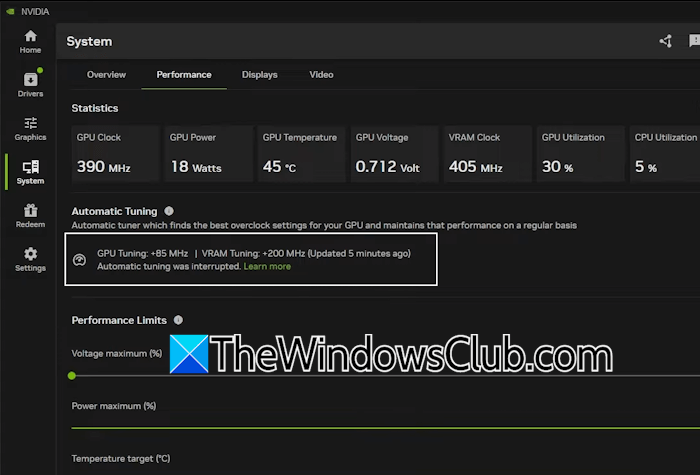
Automatic tuning was interrupted in the NVIDIA app
Use the following fixes for the Automatic tuning was interrupted error in the NVIDIA app:
- Turn off Instant Replay
- Disable NVIDIA Overlay
- Close background applications
- Lower your monitor refresh rate
- Try in a Clean Boot state
- Clean install the GPU driver
All these fixes are explained below in detail:
1] Turn off Instant Replay
Turn off Instant Replay and see if it helps. The following steps will guide you on this:
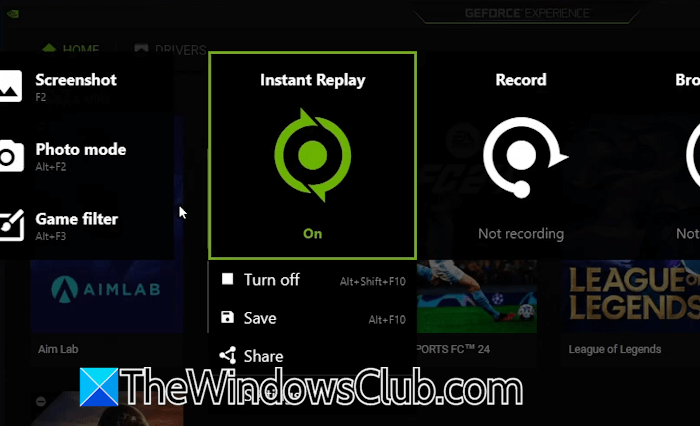
- Open the NVIDIA app.
- Click on the icon between the Notification and Settings icons.
- Click the Instant Replay option and select Turn off.
2] Disable NVIDIA Overlay
The next fix that you can try is to disable NVIDIA Overlay. Here is how to do that:
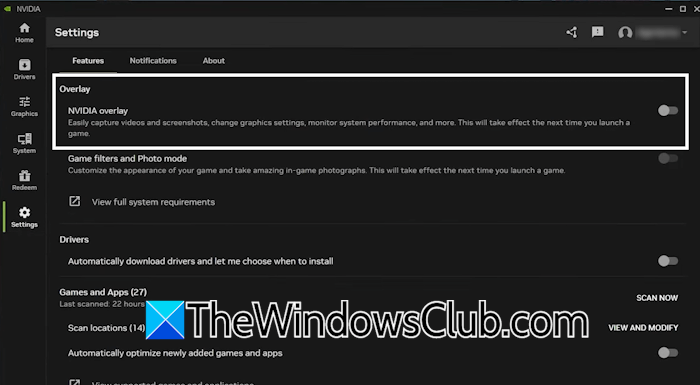
- Open your NVIDIA app.
- Click Settings on the left panel.
- Turn off the NVIDIA overlay switch.
3] Close background applications
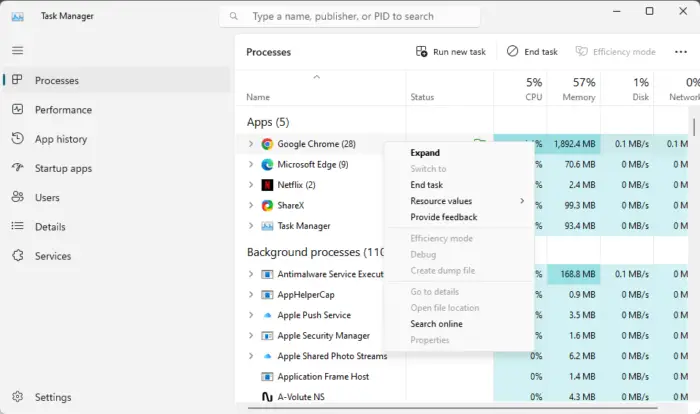
If the issue persists, close all background applications. Background applications continue to consume our system resources, so disabling them frees up some RAM for other useful applications. Open the Task Manager and search for all background applications under the Applications tab. Right-click on each background application and select End task.
4] Lower your monitor refresh rate
The next thing that you can do is lower your monitor refresh rate. On Windows 11, you can do this by following these steps:
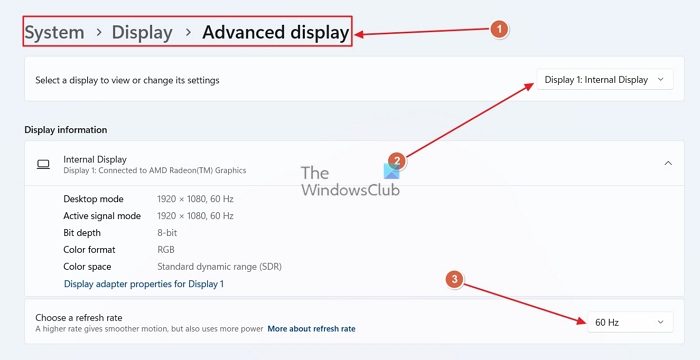
- Open Windows 11 Settings.
- Select System > Display > Advanced Display.
- Select your display from the drop-down (applicable in case of multiple displays).
- Select a lower refresh rate from the drop-down.
Now, try again and see if the problem is fixed. If the issue persists, turn off all other monitors and try again. You can turn them on after tuning completes.
5] Try in a Clean Boot state
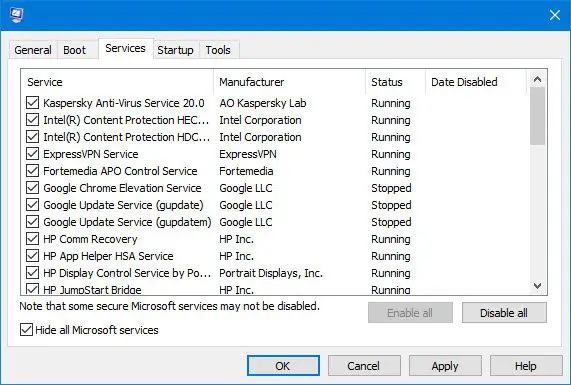
A third-party background service might be interfering with the NVIDIA app. In such a case, you can perform tuning in the Clean Boot state. To enter the Clean Boot state, you have to disable all background applications and third-party services. Once you are in the Clean Boot state, launch the NVIDIA app and start tuning. Be careful while disabling services, as disabling Microsoft services can get you in trouble.
6] Clean install the GPU driver
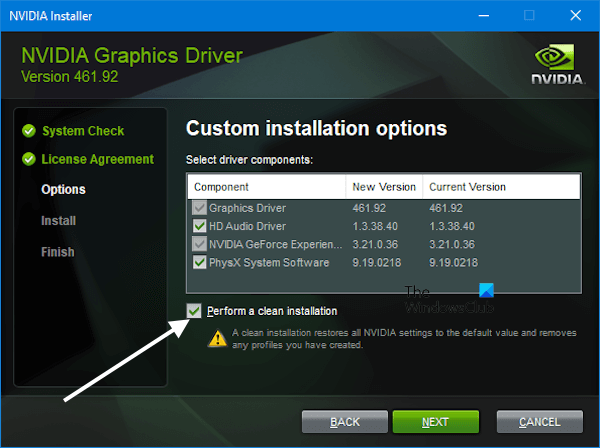
The last resort is to perform the clean installation of the GPU driver. To do this, download the latest version of your graphics card driver from the official NVIDIA website. Now, double-click on the installer file. Select the Custom (Advanced) option to install the driver and click NEXT. On the next screen, you will see an option that says “Perform a clean installation.” Select that option and click NEXT.
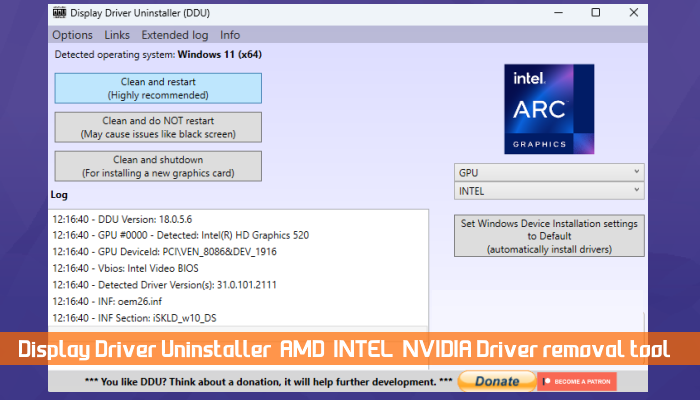
Alternatively, you can also use the DDU utility to remove the graphics card driver from your system completely. After that, run the installer file you downloaded from the NVIDIA website to install the GPU driver.
That’s it. I hope this helps.
How to enable automatic tuning in the NVIDIA app?
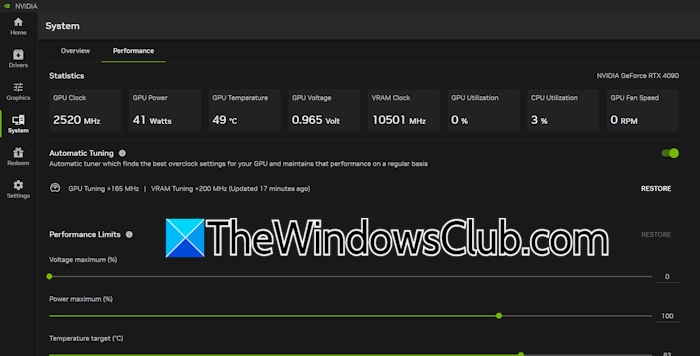
To enable Automatic tuning in the NVIDIA app, open the app and select the System section from the left side. Now, turn on the Automatic tuning switch to enable this feature.
What GPU do I have?
You can view your GPU model number in the Task Manager. Open the Task Manager and select the Performance tab from the left side. Select GPU to view its model number. You can also view your graphics card model number in the System Information app of Windows 11/10.
Read next: GeForce NOW error code 0x0000012E.
Leave a Reply