If you do not want to keep your browsing data such as browsing history, cookies, cache, etc., you can automatically delete all or selected browsing data when Firefox closes on Windows 10. Although the in-built options let you auto-delete Firefox browsing data on exit, you can do the same using the Registry Editor and the Local Group Policy Editor.
Let’s assume that your network has multiple users, and each person uses Firefox as the default browser. If you do not want to keep their browsing data on your computer due to any reason. Therefore, instead of asking them to use a Private Window, you can set this setting in Registry Editor or Group Policy to get the job done automatically for all.
Before you begin, you need to download and add Group Policy Template for Firefox.
Automatically delete All or Selected Firefox browsing data on exit using GPEDIT
To automatically delete all or selected Firefox browsing data when closes using Group Policy, follow these steps-
- Press Win+R to open the Run prompt.
- Type gpedit.msc and press the Enter button.
- Navigate to Firefox in Computer Configuration.
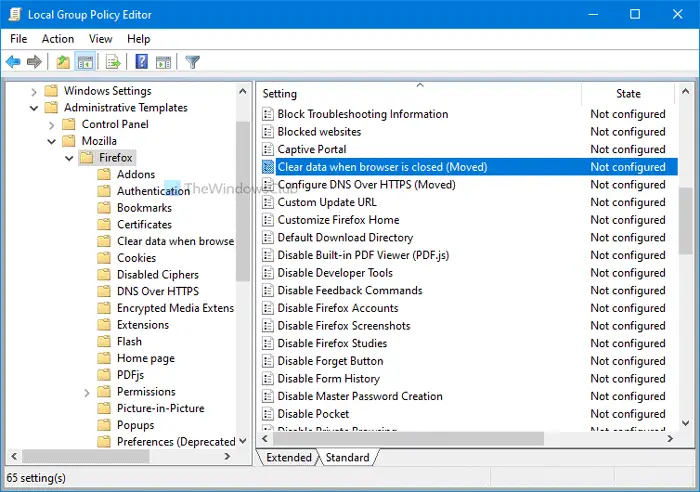
- Double-click on the Clear data when browser is closed setting.
- Choose the Enabled option.
- Tick all the checkboxes you want to clear.
- Click the OK button.
Open the Local Group Policy Editor by pressing Win+R, typing gpedit.msc, and hitting the Enter button. Once it is opened, navigate to the following path-
Computer Configuration > Administrative Templates > Mozilla > Firefox
In the Firefox section, you can find a setting called Clear data when browser is closed. Double-click on this setting and choose the Enabled option.
Then, you can see some checkboxes. The options are:
- Cache
- Cookies
- Download History
- Form Search History
- Active Logins
- Site Preferences
- Offline Website Data.
Make a tick in every corresponding checkbox that you want to clear. For instance, if you want to delete only Cache and Cookies, tick those two checkboxes. Similarly, if you’re going to clear everything when Firefox closes, tick all the checkboxes.
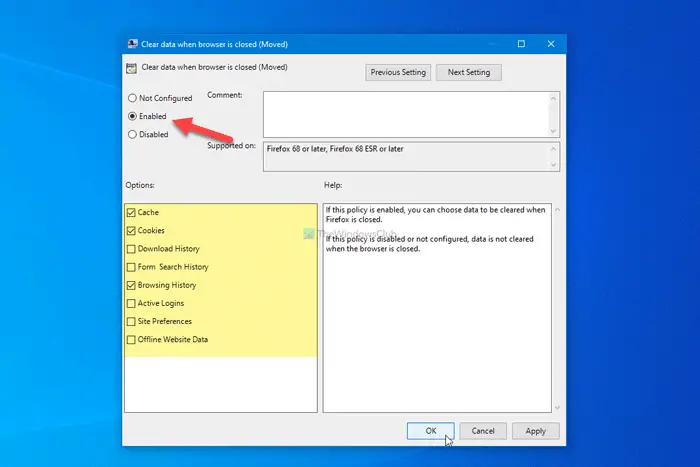
At last, click the OK button.
You can set it up using Registry Editor also. If you follow the following method, don’t forget to backup your Registry files before changing any value.
Auto-delete Firefox browsing data on exit using REGEDIT
To auto-delete Firefox browsing data on exit using Registry, follow these steps-
- Press Win+R to open the Run prompt.
- Type regedit and press the Enter button.
- Go to Policies in HKEY_LOCAL_MACHINE.
- Right-click on Policies > New > Key.
- Set the name as Mozilla.
- Right-click on Mozilla > New > Key.
- Name it Firefox.
- Right-click on Firefox > New > Key.
- Name it as SanitizeOnShutdown.
- Right-click on it > New > DWORD (32-bit) Value.
- Name it as Cache.
- Double-click on it to set the Value data as 1.
- Click the OK button.
- Repeat these steps to create REG_DWORD values for Cookies, Downloads, Browsing History, etc.
Let’s check out these steps in detail to know more.
To get started, open the Registry Editor by pressing Win+R, typing regedit, hitting the Enter button, and selecting the Yes option. Then, navigate the following path-
HKEY_LOCAL_MACHINE\SOFTWARE\Policies
Right-click on the Policies key, select New > Key and set the name as Mozilla. Then, right-click on Mozilla > New > Key, and name it as Firefox.
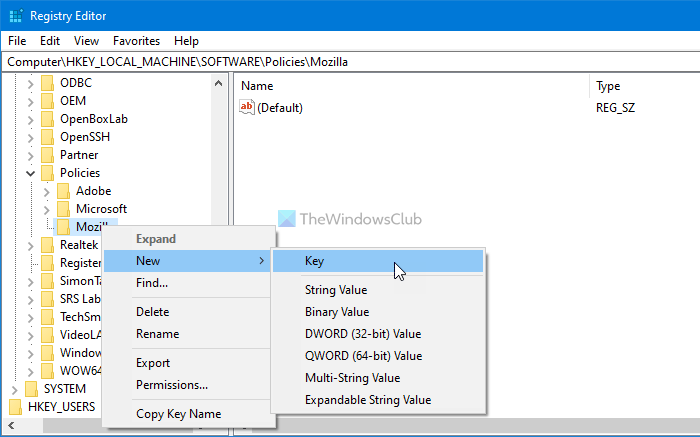
Following that, right-click on the Firefox key, choose New > Key and name it as SanitizeOnShutdown.
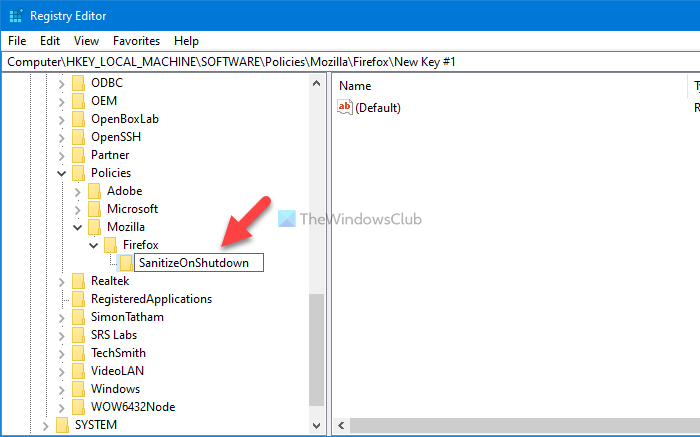
Now, right-click on SanitizeOnShutdown, select New > DWORD (32-bit) Value, and name it as Cache. In other terms, you have to name this REG_DWORD value as per the data you want to clear. In case you want to clear only cache, call it Cache. Otherwise, you can use the following names as per your requirements-
- Cache
- Cookies
- Downloads
- FormData
- History
- OfflineApps
- Sessions
- SiteSettings
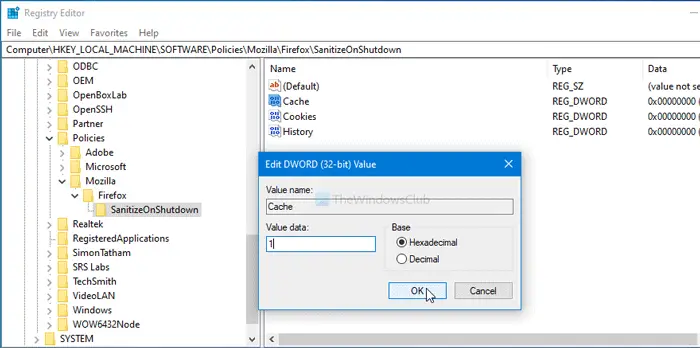
After creating the REG_DWORD value, you have to change the Value data to 1. For that, double-click on the REG_DWORD value, enter 1 as the Value data and click the OK button.
That’s all! Hope it helps.
Leave a Reply