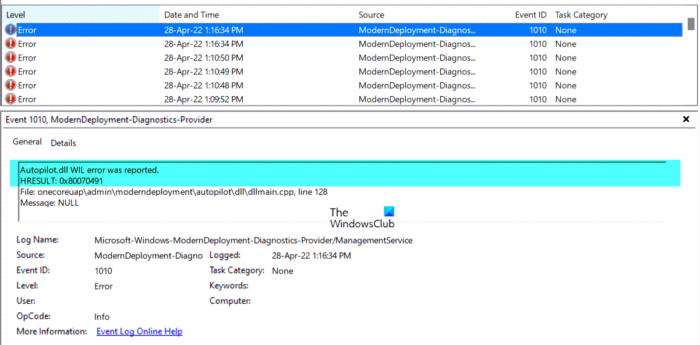
The Autopilot.dll WIL error is an error that is seen in the Windows Event Viewer. In this article, we will be looking at a few potential causes behind this error and how you can fix it in Windows 11/10. The Autopilot.dll WIL error can potentially cause occasional crashes or unexpected system reboots on your Windows computer.
Autopilot.dll WIL error was reported.
HRESULT: 0x80070491
File: onecoreuap\admin\moderndeployment\autopilot\dll\dllmain.cpp, line 128
Message: NULL

To those who are unaware, the Windows Event Viewer keeps a log of all the tasks and operations that the OS processes, and there are hundreds and thousands of those every minute. While most logs only serve as informative messages, they can sometimes come in handy while figuring out different errors.
What is Autopilot.dll?
Autopilot.dll file is an Application extension file located in the System 32 folder. It is a key component of the Microsoft AutoPilot feature in Windows and allows administrators to customize the user setup process.
Autopilot.dll WIL error was reported in Windows 11/10
Before we look at any workarounds, we should look at some of the possible causes behind the error under discussion. The first, and a very common one, is outdated Windows running on your PC. Overclocked memory or dysfunctional Microsoft Account Sign-in Assistant service can also lead to this error. Let us now see how you can remediate this issue.
- Disable Microsoft Account Sign-in Assistant service
- Remove Overclocking
- Check for a Windows Update
- Use MDM Diagnostics Tool to troubleshoot Autopilot errors
- Repair Windows System Image
1] Disable Microsoft Account Sign-in Assistant service

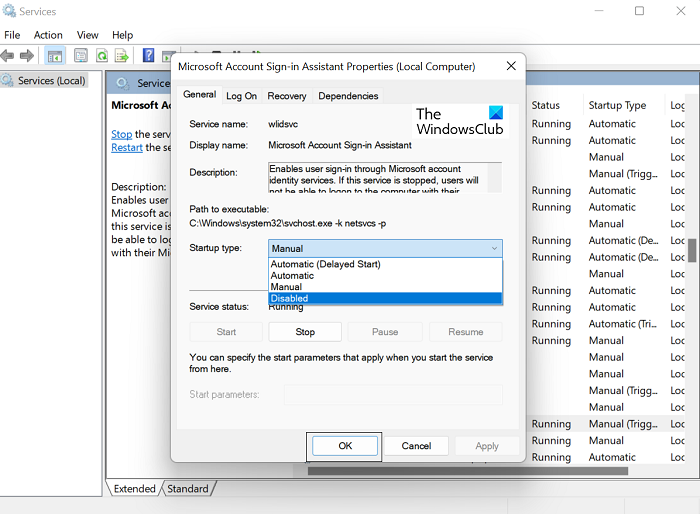
The very first thing you should try doing is disabling the Microsoft Account Sign-in Assistant service. This sign-in assistant utility facilitates users in signing on to several Microsoft apps. You can see in the details of this error that the only active service at the time of this error is the Sign-in Assistant service, so disabling it might do the trick for you.
- Press the ‘Win + R’ key combination to open the Run command prompt
- In the prompt that shows, enter “services.msc”. This will open the Windows Services manager
- Scroll down and find the “Microsoft Account Sign-in Assistant service”. Right-click on it and further click on Properties
- In the subsequent dialog box, under the General tab, click on the Startup drop-down and select Disabled
- Save these changes by clicking on Ok > Apply
Restart your PC to make these changes take effect and check if the issue has been resolved yet.
Do note that if you are using the Outlook Calendar, Phone Link app, etc., then those apps will not be able to connect to your account.
Read: View, troubleshoot Event Logs with Windows Event Viewer Plus
2] Remove Overclocking
If you have Overclocked your computer, we suggest reversing those changes. If you have enabled XMP, disable it in the BIOS and see.
3] Check for a Windows Update

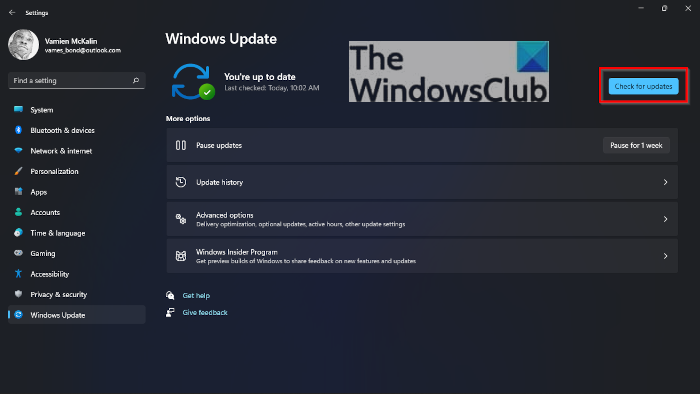
The second thing you can try to counter the error at hand is to install all Windows updates. An outdated operating system can cause all kinds of errors, including the Autopilot.dll WIL error.
- Press the ‘Win + I’ key combination to open Windows Settings
- Click on the Windows Update tab
- If there are any pending Windows updates, they will show up here, after which you can install them and check again if the issue has been resolved
If the error started appearing after installing an Update or new software, we recommend you uninstall the Update or the Program or use System Restore to go back to a good point.
4] Use MDM Diagnostics Tool to troubleshoot
You can use the command line MDM Diagnostics Tool to troubleshoot Autopilot errors. You can learn more about this on microsoft.com.
5] Repair Windows System Image

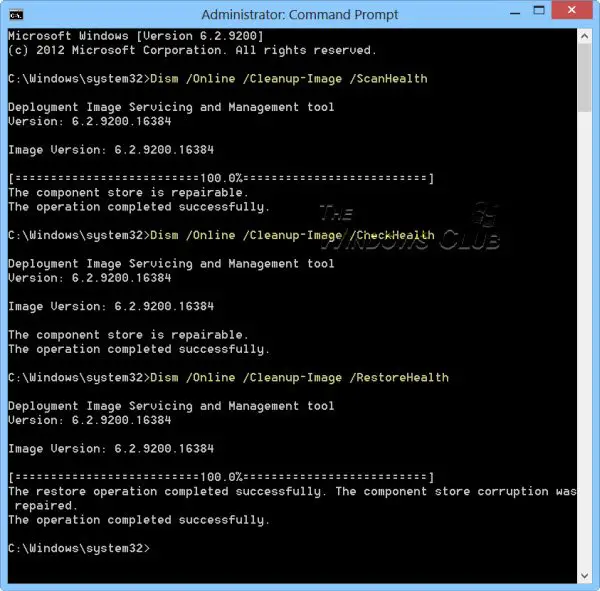
If you continue to see this error message, then you should Repair Windows System Image using the DISM Tool.
What is Windows Autopilot?
Windows Autopilot is a bundle of technologies that help in setting up new devices and can be used to deploy Windows PCs. The purpose of this software is to smoothen and simplify the lifecycle of Windows devices.
How do I remove Intune from Windows 11?
If you ever want to remove a Windows device from the management services, you can do so via Windows Settings. A consequence of that would be that you won’t be able to use it for work or school access. In order to disable Intune from Windows 11, open Windows Settings > Accounts > unlink the device you want to remove Intune for.