This post lists the best free Timetable software for Windows 11/10. As the name implies, Timetable software lets you plan and manage your daily activities. The Timetable Management Systems offer many advantages like:
- They save our time and effort,
- They reduce errors as compared to manual Timetable scheduling,
- These systems offer easy customization, etc.
If you are a student, you better know the importance of time management. These free Timetabling software will help you manage your schedule so that you could give appropriate time to each of your subjects and score better in your exams.
How can I make a Timetable on my PC?
You can use Microsoft Excel or any other similar application to create a simple Timetable. But when it comes to creating a complex Timetable that requires adding school buildings, rooms, teachers, subjects, etc., you may need to use a program or app. In this article, we have compiled a list of the best free Timetable software for Windows 11/10. You can use any of these software to create a Timetable for your school, college, or organization.
What is the need of a Timetable?
A Timetable is one of the most crucial components of schools, colleges, and organizations. it does not matter whether your organization is big or small, you need a proper Timetable to get productive work.
- For students, a Timetable helps plan a productive schedule for their examinations. A proper schedule helps them not only to stay focused on their studies but also to maintain a balance between their studies and personal life.
- For entrepreneurs and working professionals, a proper Timetable helps them stay productive and maintain a healthy work-life balance.
Free Timetable software for Windows 11/10
We have the following software on our list:
- FET
- Open Course Timetabler
- iMagic Timetable Master
- TimeTable
Let’s have a look at all these software one by one.
1] FET
FET is a free Timetable software that comes with a lot of advanced features. Using this freeware, you can create simple to complex Timetables. FET allows you to assign different subjects to different teachers, add multiple classes, create different students’ groups, etc. An interesting feature of this software is that it generates the Timetable automatically after you enter all the required data.
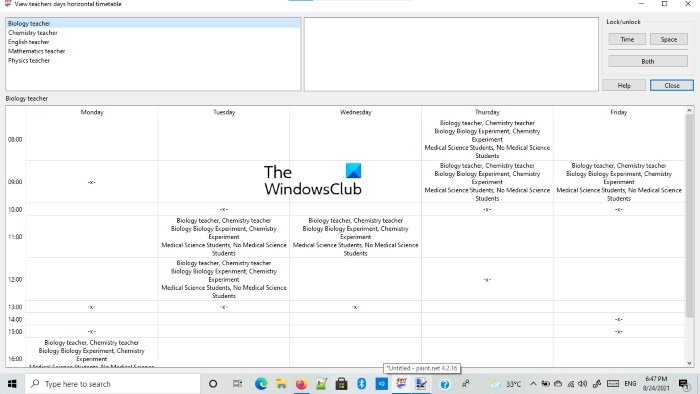
How to use FET
Let’s see how to use FET.
1] First, you have to download the software from its official website. It will be downloaded in the zip file. Hence, you have to extract it by right-clicking. After extracting, open the respective folder. There you will find the executable file. It is portable software. Therefore, you can run it without installing it on your system. Double-click on the executable file to launch the program.
2] After you launch the FET, you will see a small panel in the middle of its interface with five different tabs, namely, File, Data, Time, Space, and Timetable. To start a new project go to the File tab and click on the New button.
3] After creating a new project you can enter further information to generate a Timetable.
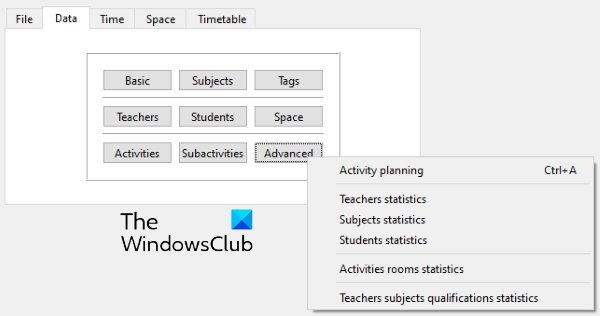
The Data tab consists of the following sections:
- Basic: Here, you can add information, like your school or institution name, days and hours at which your school or institute remains open, etc.
- Subjects: In this section, you can add the subjects that are taught in your school or institute.
- Tags: You can create different tags here.
- Teachers: Here, you can create a database of your school teachers.
- Students: When you click on this button, you will see three options, years, groups, and subgroups. You can create a database of students in your school by selecting these options.
- Space: If your school has more than one building, you can use this feature to create a database for that.
- Advanced: The advanced options include Activity Planning, Teachers Statistics, Students Statistics, etc.
You can also create activities and subactivities for different teachers and students.
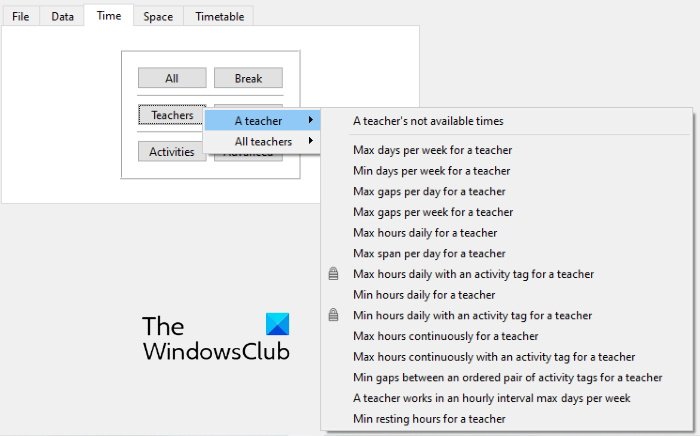
4] The Time tab lets you prepare a timetable schedule for different teachers and students. In the Space tab, you can create a database according to the buildings and rooms available in your school or college.
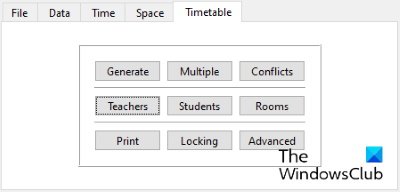
5] When you complete entering all the data, you can generate the Timetable. For this, go to the “Timetable > Generate” and click on the Start button. Your Timetable has been generated. You can view this Timetable for teachers, students, and rooms by clicking on the respective buttons.
You can download FET from Sourceforge.net.
2] Open Course Timetabler
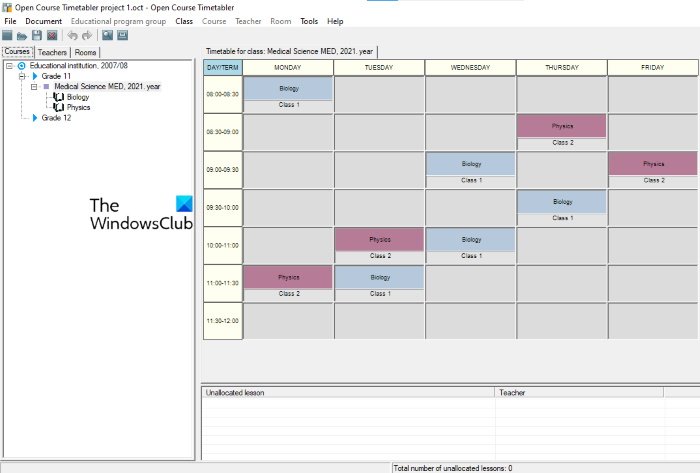
Open Course Timetabler is a Timetable software on this list that comes with a pool of features. It lets you create a Timetable for teachers, courses, and rooms separately. For the first time, you may experience some difficulties in using this software. Hence, we are providing here a quick tutorial that will help you understand how to create a Timetable in Open Course Timetabler.
How to use Open Course Timetabler
1] To begin, go to “File > New Document” or simply press Ctrl + N keys. You can select either School or University from the drop-down menu. Now, enter the name of your school or university and click OK. This will create a new project. Now, in your new project, you can add teachers, courses, and rooms. Click on the Document menu and select the desired option.
2] Now, to add data, click on its respective tab. For example, if you want to add teachers, click on the Teachers tab. After that, right-click on the name of your school or university and select the Add Teacher option. By following the same procedure, you can add courses and rooms.
To add days and time slots, go to Document and select the Add day and Add term options respectively.
3] Adding the courses requires a few more steps as compared to adding teachers and rooms. Here are the steps that you should follow:
- Click on the Courses tab and right-click on your school or university name. Select Add new educational program group. This group will be added as a submenu under your school or university name.
- Now, right-click on the educational group that you have just created and select Add class.
- Now, right-click on the class and select Add new course. All the courses that you add will be available in the bottom panel under the Unallocated lesson section.
- Drag the lessons from the Unallocated lesson section and drop them into your Timetable chart one by one.
You can print the Timetable for classes, teachers, and rooms separately. When you are done, save your project from “File > Save.”
Visit sourforge.net to download this freeware.
Read: Best Google Sheets and Excel Online Calendar templates.
3] iMagic Timetable Master
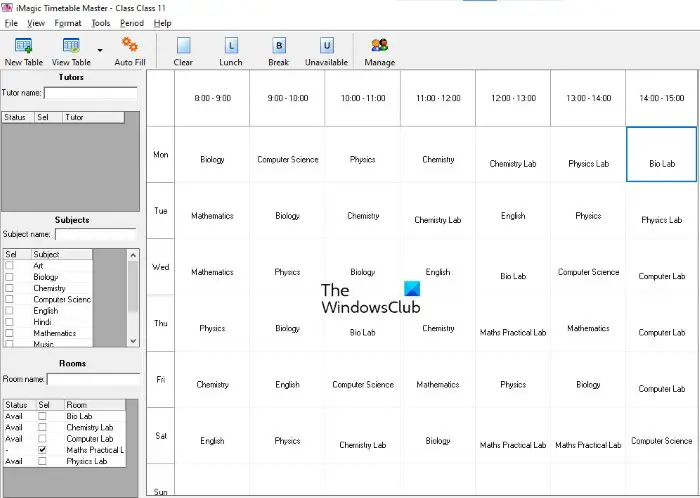
iMagic Timetable Master is another powerful Timetable software for Windows 11/10. In this software, you can create multiple projects with different time schedules. In each project, you can create multiple Timetables for different classes. It has a very simple interface. You can add multiple subjects, tutors, and rooms to a project. All the Timetables that you create will be available in the View Table drop-down menu. It also has an option to mark a period as Lunch, Break, and Unavailable.
You can use the Autofill feature to add the subjects to your Timetable quickly.
How to use iMagic Timetable Master
Let’s see the process to create a Timetable in the iMagic Timetable Master.
1] When you launch the software, you will be prompted with a Create Timetable Wizard. If the wizard does not open by itself, go to “File > New Project” and click Next. Now, give a name to your project and save it on your hard drive.
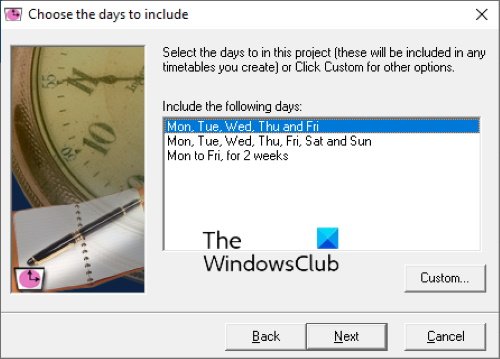
2] In the next step, you will have to select the number of days for your Timetable schedule. You can select the days from the available list or click on the Custom button to add custom days. When you are done, click Next.
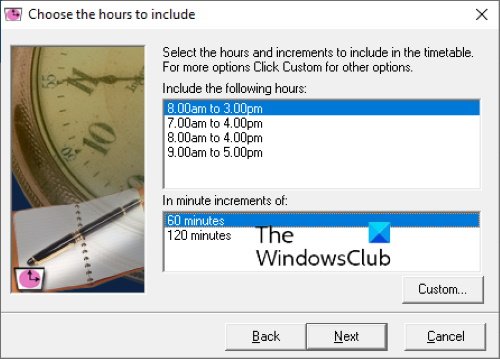
3] In the next step, you have to select the time slots. You can select a slot either from the available list or click on the Custom button to set the custom time slots. Here, you can also select the time duration of class periods.
4] Click Next and then Finish. Your new project has been created. Now, open your project to create different Timetables.
Do note that, the days and time slots that you have selected while creating a particular project will remain the same for all the Timetables in that project. If you want to create a Timetable for different time slots, you have to create another project.
The Timetables that you create in a particular project will be saved automatically. A Print option is provided so that you can save a Timetable as a PDF or print it directly.
To download this freeware, visit imagictimetablesoftware.com.
4] TimeTable
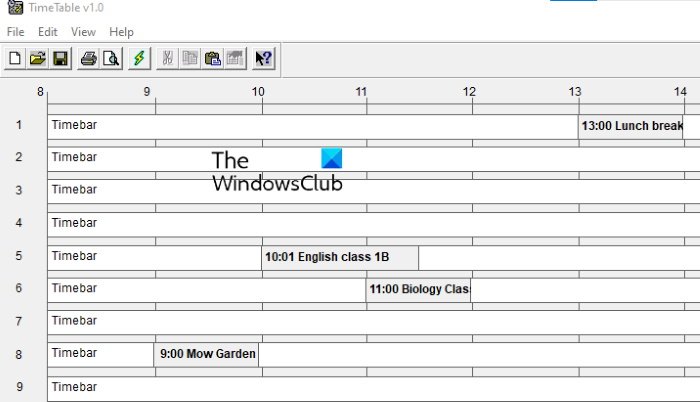
TimeTable comes with a simple and easy-to-understand interface. You can use it to schedule your daily tasks and activities. If you are a student, you can use it to manage your study time. By default, it shows 17 horizontal timebar slots. If you want to add extra or remove the existing time slots, go to “File > Properties.” Multiple timebar rows are provided to avoid the condition of overlapping in case there is more than one event on the same time slot.
Double-click on a particular time slot to add an event. After that, it shows you the list of some predefined events. You can either select an event from the list or add a new event by clicking on the Add new button. In the event properties, you can define its length, start time, and its position on a timebar. You can also change the time of the event by sliding it.
When you are done, you can save your Timetable as a PDF by using the Print option. A Save option is also available in the software, but it did not work for me.
You can download TimeTable software from daansystems.com.
That’s it.
Now read: