If you see a black box around the mouse pointer on your Windows 11/10 computer, the solutions provided in this article will help you fix this issue. According to the reports, this issue usually occurs when establishing a Remote Desktop Connection or using dual monitors. However, you can also experience this problem on your system with a single monitor.
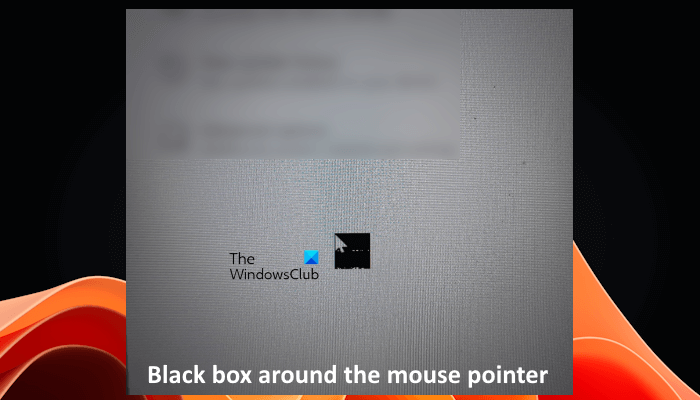
Fix Black Box around the Mouse Pointer on Windows 11/10
The following suggestions will help you fix the black box that may appear around the mouse pointer on Windows 11/10. Before proceeding, turn Off and On your mouse switch, restart your system, and see if it helps. If the issue occurs due to a minor glitch, this can help. If this does not help, follow the solutions mentioned below:
- Reinstall the mouse driver
- Reinstall the graphics card driver
- Disable Pointer Shadow
- Change your mouse pointer scheme
- Change your mouse pointer color
- Troubleshoot in a Clean Boot state
- Check the thickness of the blinking cursor
- Modify the Local Group Policy Settings
Let’s start.
1] Reinstall the mouse driver
Most of the mouse issues occur due to the bad driver. Therefore, we recommend you reinstall your mouse driver. This should fix the problem. The steps are simple.
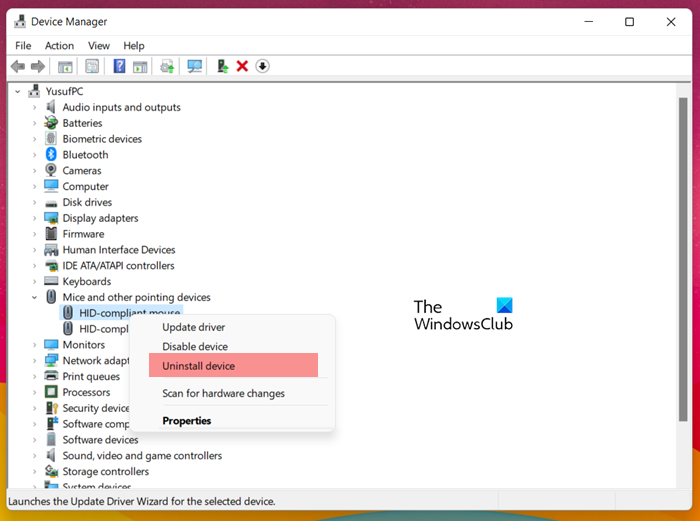
- Open the Device Manager.
- Expand the Mice and other pointing devices branch.
- Right-click on your mouse driver and select Uninstall device.
- Now, restart your computer.
Windows will automatically install the missing driver on restart. Alternatively, you can also perform a scan for hardware changes instead of restarting your computer.
2] Reinstall the graphics card driver
Based on our experience, such types of issues are also associated with the graphics card driver. Therefore, another fix that we suggest is reinstalling the graphics card driver. You have to completely remove your graphics card driver from your system and then reinstall it.
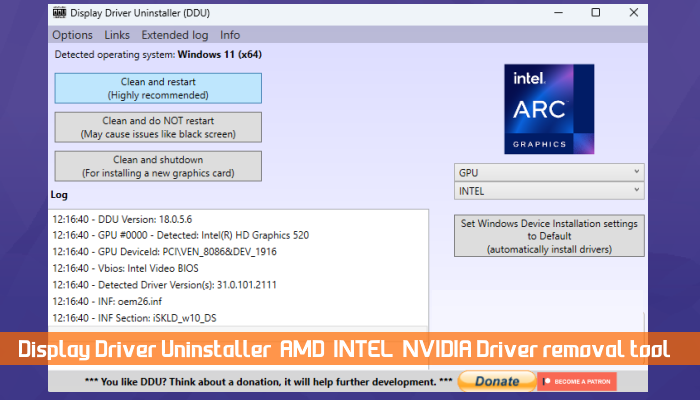
- Download the most recent version of your graphics card driver from the official website of your computer manufacturer.
- Now, install DDU (Display Driver Uninstaller). Run this tool to completely remove your graphics card driver.
- After removing your graphics card driver, run the installer file to reinstall your graphics card driver.
Check if the issue persists.
3] Disable Pointer Shadow
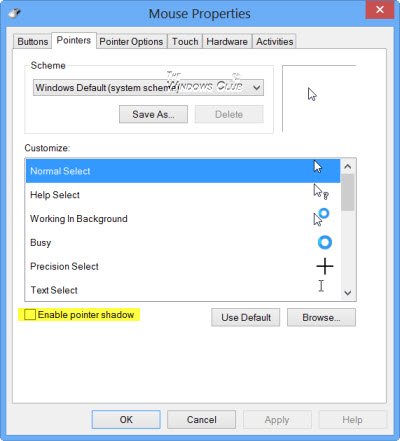
Another fix that you can try is disabling the pointer shadow. The option to disable mouse pointer shadow is available under the Pointers tab of the Mouse properties window.
4] Change your mouse pointer scheme
Changing the mouse pointer scheme can also fix this issue. We suggest you try this and see if it helps. The steps to change the mouse pointer scheme are written below:
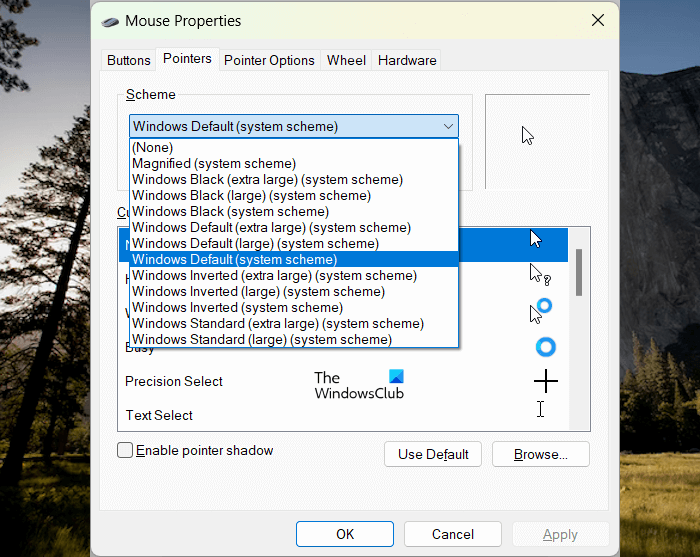
- Open the Control Panel.
- Type mouse in the Control Panel search bar and select Mouse from the search results.
- Go to the Pointers tab.
- Click on the drop-down and select another mouse pointer scheme.
- Click Apply and then OK.
Try all the available mouse pointer schemes and see which one fixes your problem.
5] Change your mouse pointer color
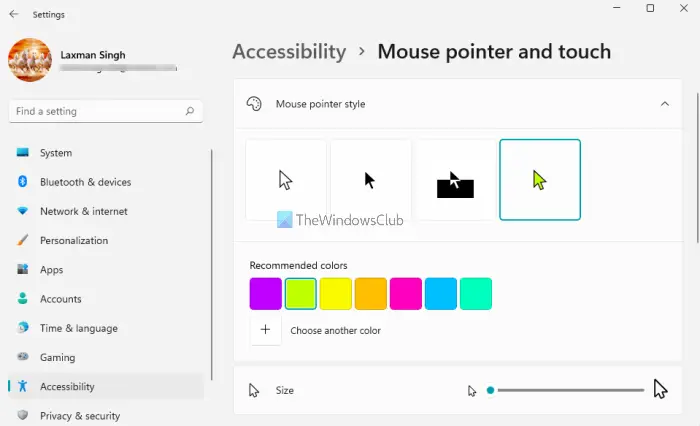
If the above fix did not help, change the mouse pointer color. First try black, white, and inverted options. If these options do not fix the problem, select the Custom option and then select the color of your choice.
6] Troubleshoot in a Clean Boot state
The issue can also occur due to a third-party background application or service. You can check this in the Clean Boot state. Start your computer in a Clean Boot state and then see if the issue persists. If not, you have to find out the problematic application or service.
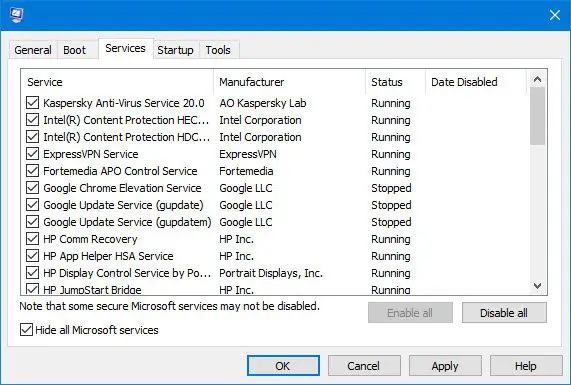
To find out the culprit, enable some of the background applications and restart your system. If the issue persists, one of these applications is the culprit. Repeat the same procedure to find out the problematic third-party service.
7] Check the thickness of the blinking cursor
In Windows computers, you can change the thickness of the blinking cursor. By default, it is set to 1. Though this setting should not cause this type of issue, you should check the thickness of the blinking cursor and change it back to 1 (if applicable).
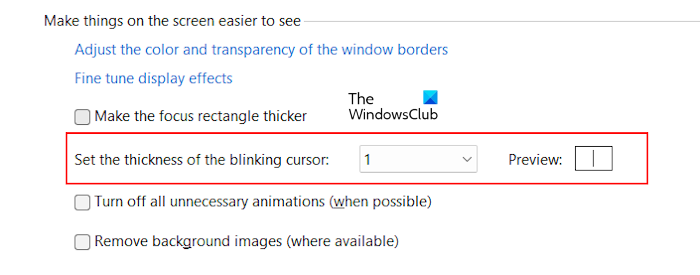
- Open the Control Panel.
- Change the View by mode to Small icons.
- Select Ease of Access Center.
- Now, select Make the computer easier to use.
- Set the thickness of the blinking cursor to 1.
- Click Apply and then OK.
8] Modify the Local Group Policy Settings (for Remote Desktop Connections)
If you are experiencing this issue on a Remote Desktop and despite trying the above fixes, the issue is not fixed, you can modify the Local Group Policy Settings. By default, the Remote Desktop Connections use WDDM graphics. But you can force Remote Desktop Connections in Windows to use the XDDM graphics by modifying a Group Policy Setting. The steps to do this are as follows:
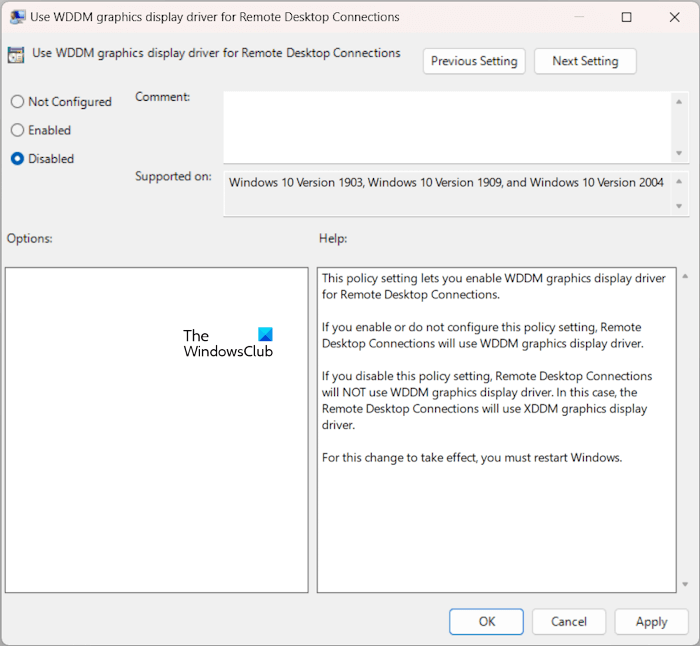
Open the Local Group Policy Editor. Go to the following path:
Computer Configuration > Administrative Templates > Windows Components > Remote Desktop Services > Remote Desktop Session Host > Remote Session Environment
Double-click on the “Use WDDM graphics display driver for Remote Desktop Connections” policy on the right side. Select Disabled. Click Apply and then click OK.
I hope this helps.
How do I get rid of mouse shadow in Windows 10?
To get rid of the mouse shadow, you have to disable the mouse pointer shadow. You can do so by opening the Mouse Properties window in the Control Panel. Once you open the properties window, you will find the respective option under the Pointers tab.
How do I fix a black screen with a cursor in Windows 11?
To fix the black screen with a cursor, you can use some fixes, like reinstalling the graphics card driver, troubleshooting in a Clean Boot state, performing an In-place Upgrade, etc.
Read next: Mouse cursor turns white or disappears in Chrome or Edge.