In this post, we will help you disable including of driver updates with Windows Update in Windows 11/10. By default, when you check for Windows Updates, it automatically includes and downloads the updates related to Device Drivers. Though driver updates work well most of the time, some users prefer manual installation or driver updater software for their drivers. If you also want the same, then this post can help you to disable or turn off receiving driver updates in Windows Quality Updates.
There are other ways to disable automatic driver updates that work pretty well, but those options don’t prevent the installation of those drivers whose device IDs, device instance IDs, and device classes are added in Group Policy for automatic installation. If you want to prevent the automatic updates of all the drivers, then you can try the options covered in this post.
Block Driver Updates via Windows Quality Update
You can exclude driver updates with Windows Quality Updates in two native ways:
- Using Group Policy
- Using Registry Editor.
Let’s check both of these options.
1] Using Group Policy
This feature is present in Pro and Enterprise editions of Windows 10. Home edition users need to add Group Policy Editor in Home Edition first so that they can use this feature. Here are the steps:
- Open Group Policy
- Access Windows Update folder
- Access Do not include drivers with Windows Updates setting
- Use Enabled option
- Save the changes.
First of all, you need to open Group Policy using the Search box or other ways.
Now access the Windows Update folder in Group Policy. The path is:
Computer Configuration > Administrative Templates > Windows Components > Windows Update
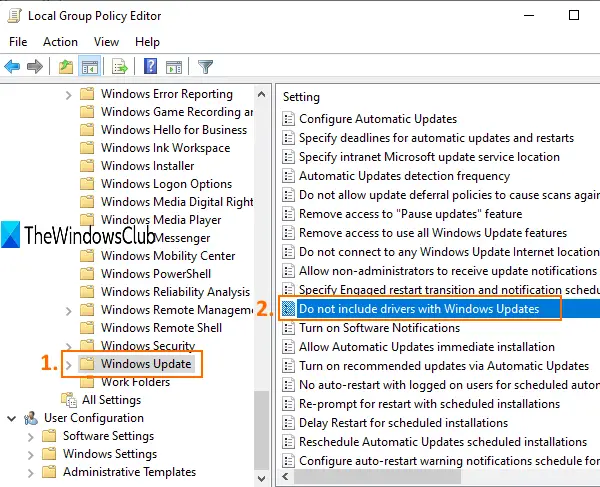
On the right-hand section, scroll down and double-click on Do not include drivers with Windows Updates setting. A new window is opened.
Enable this policy to not include drivers with Windows quality updates. If you disable or do not configure this policy, Windows Update will include updates that have a Driver classification.
There, click on the Enabled radio button. Save your changes using the OK button.
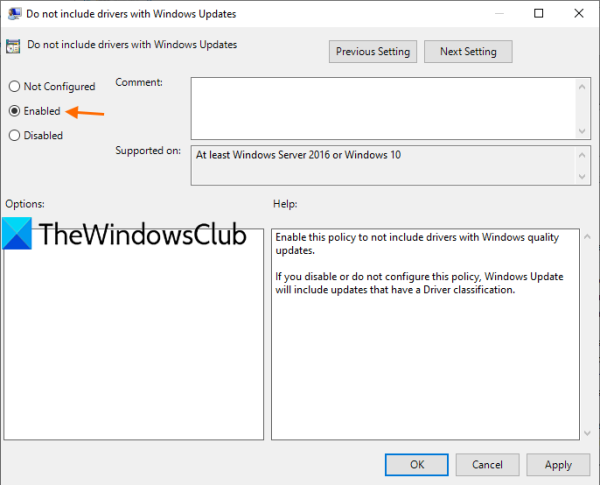
The new setting is applied and Windows updates won’t include updates for drivers.
To undo the changes or enable the driver updates again, just follow the above steps, and use the Not Configured/Disabled radio button. Save the changes.
2] Using Registry Editor
Before using this feature, take a backup of Registry so that you can restore it later if something wrong happens. After that, use these steps:
- Open Windows 10 Registry Editor
- Access Windows key
- Create WindowsUpdate key
- Create ExcludeWUDriversInQualityUpdate DWORD value
- Set Value data to 1 to disable driver updates in quality updates of Windows 10
- Set Value data to 0 to enable driver updates in Windows updates.
At first, open Windows Registry Editor.
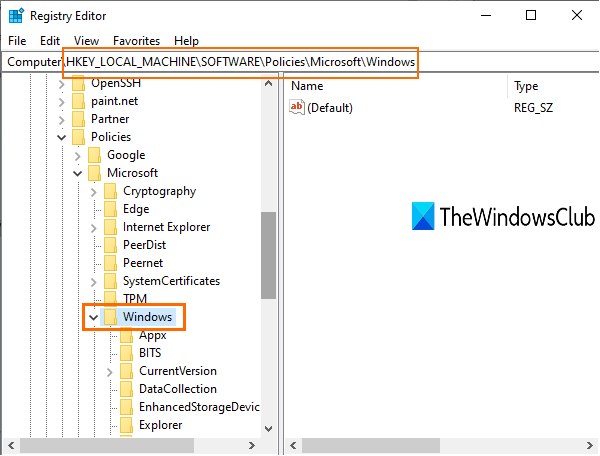
In Registry Editor, access Windows key. Its path is as follows:
HKEY_LOCAL_MACHINE\SOFTWARE\Policies\Microsoft\Windows
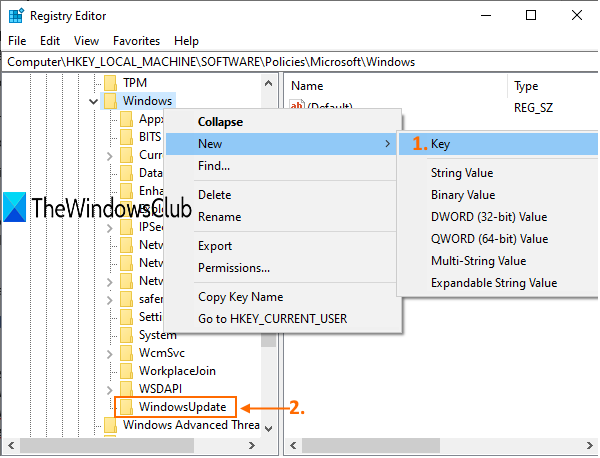
In Windows key, create a new Registry key, and set its name to WindowsUpdate.
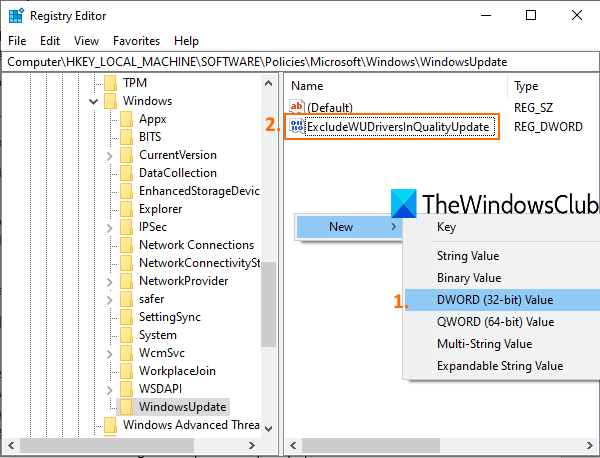
Under that WindowsUpdate key, create a DWORD value.
To create it, right-click on the empty area, access the New menu, and use the DWORD (32-bit) Value option. After creating it, rename this value to ExcludeWUDriversInQualityUpdate.
Now double-click on that value. When a small box is visible, enter 1 in the Value data box, and press OK. Finally, restart the PC to successfully apply this new setting.
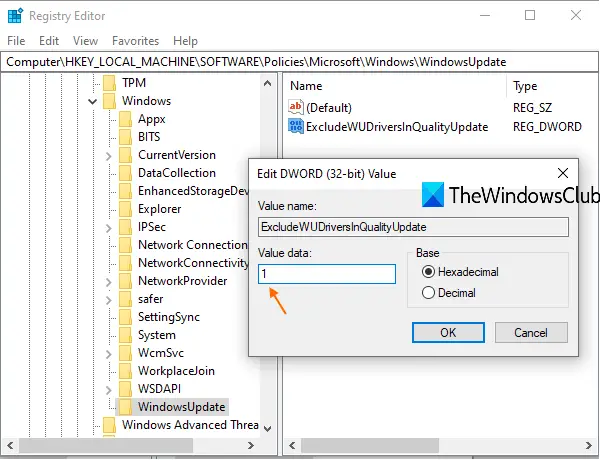
To enable driver updates again in Windows 10 quality updates, you can follow the above-mentioned steps, enter 0 in Value data, and use the OK button. Restart PC to apply the changes.
That’s all!
I hope these two ways will help you disable or turn off downloading driver updates with Windows updates.