To keep users’ data safe and avoid malware infections, Windows introduced Block at First Sight protection in Windows Defender. So, if you have deployed Windows 11/10 and are using Windows Defender, be sure to check out Block at First Sight protection feature in Windows Defender.
Block at First Sight feature in Windows Defender
The feature uses machine learning techniques to identify if the program is malicious or not. If it fails to make a distinction between the genuine or fake product, a copy of the program is sent to Microsoft cloud protection for checking. If Microsoft suspects the program to be malicious, Windows Defender is signaled to block it.
The main advantage of this process is that in most cases it has managed to reduce the response time to new malware from hours to seconds.
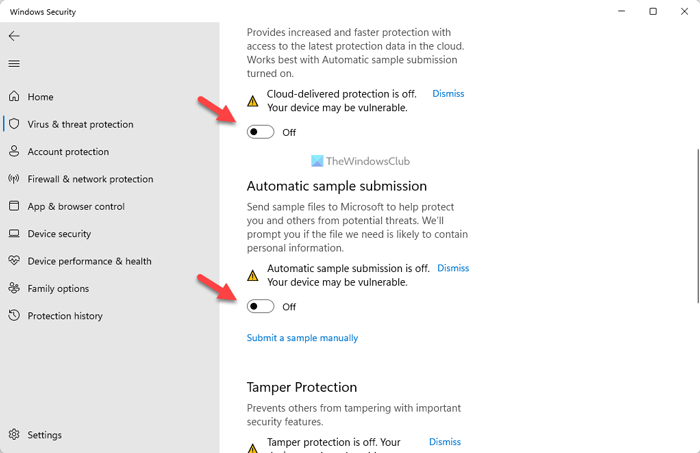
Block at First Sight is enabled by default. It is automatically turned on, so long your Cloud-based protection and Automatic sample submission are enabled.
If you wish to confirm whether Block at First Sight is enabled on individual clients, do the following:
Open Settings > Update & Security > Windows Defender.

Make sure that Cloud-based Protection and Automatic sample submission are switched to ‘On’.
Block at First Sight Group Policy setting
Open the Group Policy Management Console, right-click the Group Policy Object you want to configure and click Edit.
Next, in the Group Policy Management Editor navigate to Computer configuration. Then, click Policies and choose ‘Administrative templates’.
Now, expand the tree to Windows components and go to Windows Defender > MAPS and configure the following Group Policies:
- Double-click the ‘Join Microsoft MAPS’ setting and ensure the option is set to Enabled and then, click OK.
- Double-click the ‘Send file samples when further analysis is required’ setting and ensure the option is set to Enabled. Click OK. The options available here are:
- Always Prompt (0)
- Send safe samples (1)
- Never Send (Block at First Sight will not function) (2)
- Send all samples (3)
Now, in the Group Policy Management Editor, expand the tree to Windows components > Windows Defender > Real-time Protection:
- Double-click the ‘Scan all downloaded files and attachments’ setting and ensure the option is set to Enabled. Click OK.
- Double-click the ‘Turn off real-time protection’ entry and ensure the option is set to Disabled. Click OK.
How to disable Block at First Sight feature in Windows Defender
You can disable Block at First Sight with Group Policy. To do so, open the Group Policy Management Console, right-click the Group Policy Object you want to configure and click Edit.
In the Group Policy Management Editor go to Computer configuration and click Policies and chose Administrative templates.
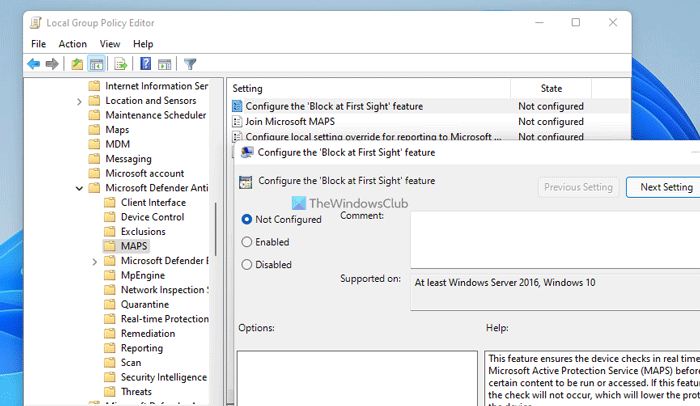
Expand the tree through Windows components > Windows Defender > MAPS.
Double-click the Configure the ‘Block at First Sight’ feature setting and set the option to ‘Disabled’.

You may choose to disable the Block at First Sight feature if you are experiencing latency issues or you want to test the feature’s impact on your network.
Block at First Sight is a great feature of Windows Defender Cloud Protection that provides a way to detect and block new malware within seconds. Suspicious file downloads requiring additional backend processing to reach a determination will be locked by Windows Defender on the first machine where the file is encountered, until it is finished uploading to the backend. Users will see a longer “Running security scan” message in the browser while the file is being uploaded. This might result in what appear to be slower download times for some files, says Microsoft.
How to turn on Real-time protection in Windows Defender in Windows 11?
To turn on real-time protection in Windows Defender in Windows 11, you need to open the app and click on the Virus & threat protection menu. Then, select the Manage settings option. Here you can find an option called Real-time protection. You need to toggle the respective button to turn it on.
How do I block Windows Defender in Windows 11?
You could use Local Group Policy Editor to block Windows Defender in Windows 11. Having said that, open the utility and navigate to Computer Configuration > Administrative Templates > Windows Components > Microsoft Defender Antivirus. Double-click on the Turn off Microsoft Defender Antivirus and select the Enabled option. Click the OK button to save the change.
Wait there are more such settings! This post shows how you can harden Windows Defender protection to the highest levels on by changing a few Group Policy settings.
Leave a Reply