If you want to block NTLM attacks over SMB in Windows 11, here is how you can do that. An administrator can block all the NTLM attacks over Server Message Block with the help of the Local Group Policy Editor and Windows PowerShell.
If you are a system administrator, you must know that the SMB or Server Message Block is one of the essential protocols required for various types of sharing, including files, printers, etc., over a shared network, e.g., office, business, etc.
On the other hand, NTLM or Windows New Technology LAN Manager allows users to authenticate users for outbound remote connections. An attacker can take advantage of or manipulate NTLM to authenticate him/her to attack your computer or even the entire network.
To prevent such attacks, Microsoft has included a new security measure, and here is how you can enable it.
Block NTLM attacks over SMB in Windows 11 using GPEDIT

To block NTLM attacks over SMB in Windows 11 using GPEDIT, follow these steps:
- Press Win+R to open the Run prompt.
- Type gpedit.msc and hit the Enter button.
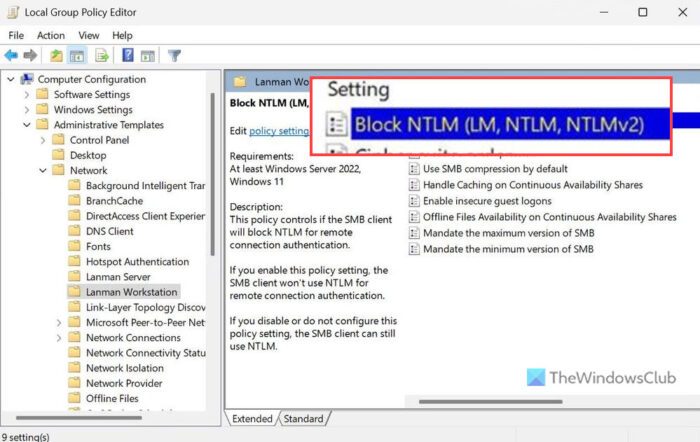
- Navigate to Lanman Workstation in Computer Configuration.
- Double-click on the Block NTLM (LM, NTLM, NTLMv2) setting.
- Choose the Enabled option.
- Click the OK button.
To learn more about these steps, continue reading.
First, you need to open the Local Group Policy Editor. For that, press Win+R to display the Run prompt, type gpedit.msc, and hit the Enter button.
Next, navigate to the following path:
Computer Configuration > Administrative Templates > Network > Lanman Workstation
Double-click on the Block NTLM (LM, NTLM, NTLMv2) setting and choose the Enabled option.
Click the OK button to save the change.
Read: Most important Group Policy settings for preventing Security Breaches
Block NTLM attacks over SMB in Windows 11 using PowerShell

To block NTLM attacks over SMB in Windows 11 using PowerShell, follow these steps:
- Press Win+X to open the menu.
- Select the Terminal (Admin) option.
- Click on the Yes button.
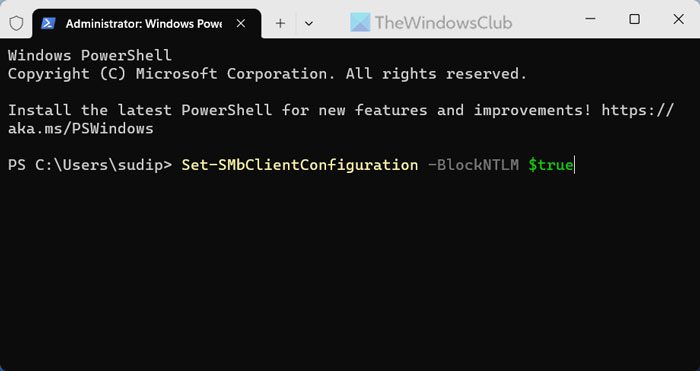
- Enter this command: Set-SMbClientConfiguration -BlockNTLM $true
Let’s check out these steps in detail.
To get started, you need to open the PowerShell with administrator privileges. For that, press Win+X and choose the Terminal (Admin) option. Next, click the Yes button on the UAC prompt.
After that, make sure you have a PowerShell instance opened in the Windows Terminal. If so, enter this command:
Set-SMbClientConfiguration -BlockNTLM $true
It is also possible to specify SMB NTLM blocking while mapping a drive. For that, you need to use this command:
New-SmbMapping -RemotePath \\server\share -BlockNTLM $true
That’s all! I hope this guide helps you.
Read: Why and how to disable SMB1 on Windows
How do I disable NTLMv1 in Windows 11?
To disable NTMLv1 in Windows 11, you need to use NTMLv2 only. For that, open the Local Group Policy Editor and navigate to this path: Computer Configuration > Windows Settings > Security Settings > Local Policies > Security Options. Double-click on the Network security: LAN Manager authentication level setting and choose the Send NTMLv2 response only. Refuse LM & NTLM option and click the OK button.
Does SMB use NTLM?
Yes, SMB or Server Message Block uses NTLM in Windows 11. NTLM is required to authenticate the user’s identity for outbound connections. It is mainly used when you try to share files, printers, or other devices or drives over a shared network in an office or some other place.
Leave a Reply