Booting up your PC using USB drives is useful. It allows you to reinstall your Windows, deal with easy system restores, and more. But what if bootable USB is not detected in Windows 11/10? This can be problematic as you can no longer reinstall or upgrade Windows. However, fixing this issue is easier than you might think, and below, we have discussed all the quick solutions.
Basic if the USB not detected in Windows
Before we talk about any solutions, there are some basic checks that you must go through. These are:
- Make sure you have a working USB Drive: First, ensure your USB drive is working correctly. If your PC does not detect it in the first place, you cannot boot with it. So plug in your USB drive, head to This PC, and see if you can spot the drive. If you can, you are good to go.
- Check if USB Drive is showing up in the Boot menu: Even if your USB drive shows up under This PC, it may not get detected in the BIOS. This usually happens if you have disabled USB boot in the BIOS.
- To check this, first boot your PC into the BIOS, usually by pressing the DEL key while booting up. Then go to the BOOT menu and check if you can see your drive. If you can, set the USB drive as your first boot priority, and you should be able to boot up using your USB.
- Use a different USB Port: Did you try using a different USB port? If you didn’t, then you must. Plug your USB stick into another USB port and check if you can see the drive under the This PC and Boot menu.
- Use another USB Drive: There might be a chance that your USB drive is at fault. So try changing the USB drive and see if it works for you.
Fix Bootable USB not detected in Windows 11/10
If the Bootable USB is not detected in Windows 11/10, take these steps to fix the issue:
- Change USB format to FAT32
- Enable Legacy Boot and disable Secure Boot
- Disable Fast Boot
- Recreate USB Bootable drive using the Windows Media Creation tool
Make sure to use an administrator account to execute these suggestions
1] Change USB format to FAT32
First, ensure your USB drive is formatted with the FAT32 file system. Why? Because it is one of the most widely supported file systems. As a result, you will enjoy a smooth installation experience with most operating systems. Also, formatting your USB drive to FAT32 increases the chance of your PC quickly detecting and interacting with it and helping you with the installation process.
To format your USB drive to FAT32, follow these steps:
- Go to File Explorer and Select This PC from the sidebar.
- Right-click on your USB stick and select Format.
- Next, from File System, select FAT32.
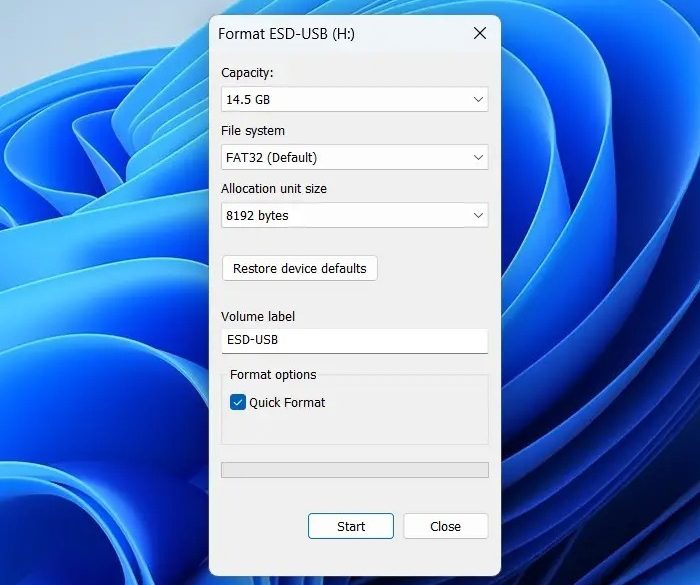
- Finally, click on the Start button to complete the Format.
Once you are done formatting your drive, you must make the drive bootable and proceed with OS installation.
2] Enable Legacy Boot and disable Secure Boot
Enabling Legacy Boot and disabling Secure Boot in the BIOS or UEFI settings can solve the booting problem. This is useful for specific older devices or operating systems that don’t support UEFI.
To get started, follow these steps:
- First, reboot your PC and enter into the BIOS.
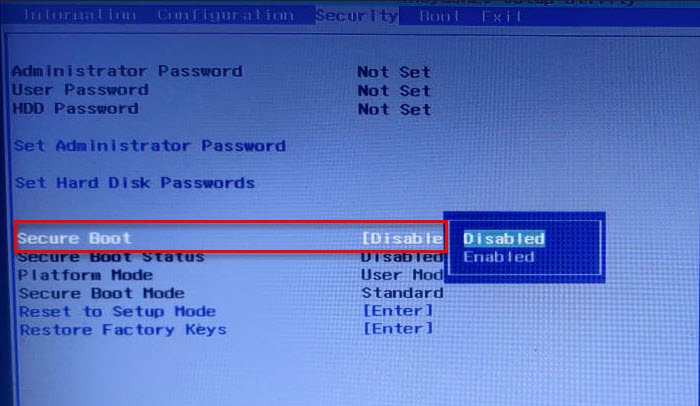
- Next, locate Secure boot options. It should be under security, boot security, or secure boot.
- Follow the screen steps to disable Secure Boot.
- Next, look for Boot, Boot Options, or Boot list options.
- From here, look if there is an option to allow you to switch to Legacy boot.
- Once done, save and exit from BIOS and see if you can boot up without issues.
3] Disable Fast Boot
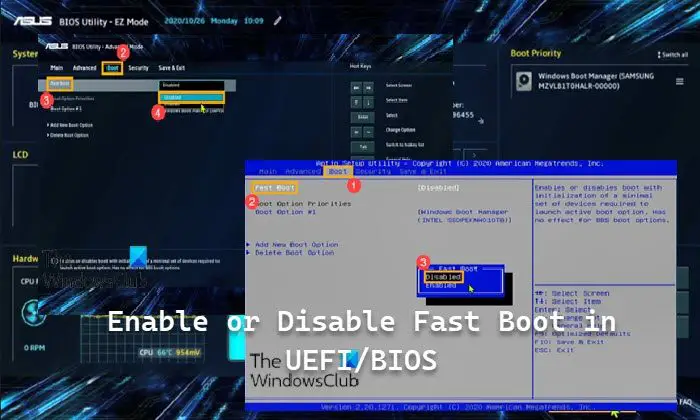
It would be best if you also tried disabling Fast boot. As in many computers, to improve the booting time, hardware detection-like features might be disabled. As a result, your PC can’t detect your USB drive while booting up, leading to a nonbootable state.
3] Recreate USB Bootable drive using Windows Media Creation tool
If you have used software like Rufus or others to create a bootable disk by flashing the ISO image into your USB stick, then you can consider using the Windows Media Creation tool.
It is the official Microsoft application that allows you to create a bootable media for installing Windows. It is free to download but requires an active internet connection.
To proceed with this, follow these steps:
- First, download the Windows Media creation tool and run the software.
- Next, accept the terms and conditions and select the language and edition.
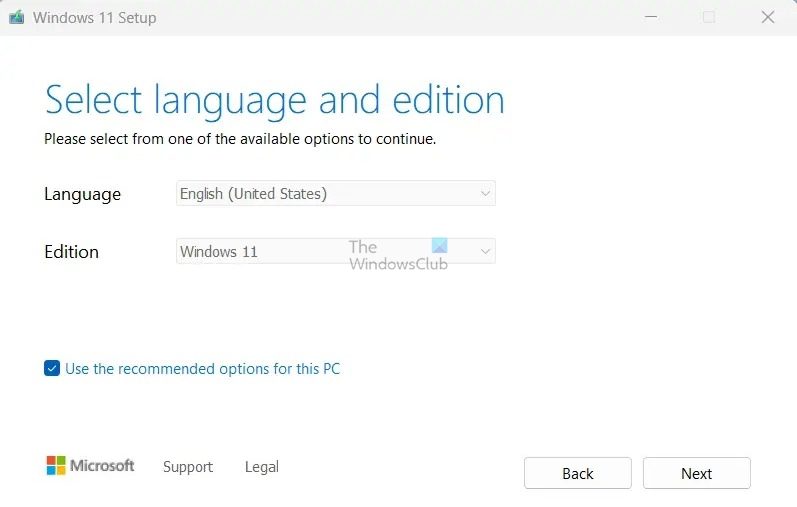
- Finally, select the USB flash drive and follow the onscreen steps to create your bootable drive.
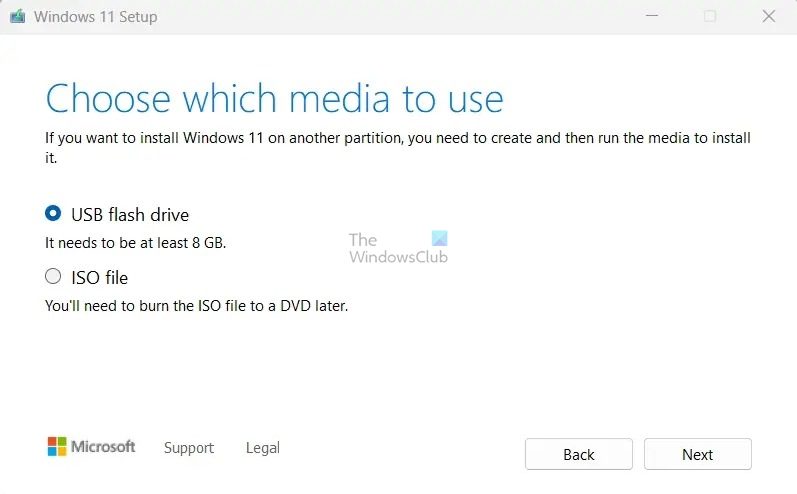
- Once done, use it to format your PC and see if it works.
If you still face any trouble while doing so, you can always go to your USB drive contents via File Manager and run the setup file to start with Windows installation.
Can Rufus make UEFI bootable USB?
Yes, Rufus can create UEFI bootable USB drives. While creating a bootable USB drive using Rufus, BIOS (or UEFI-CSM) is the only option available. As a result, you can effortlessly create a UEFI-compatible bootable drive.
How to boot from USB without BIOS?
Booting from USB without BIOS isn’t a straightforward process. However, if you are using a Windows computer, you can first go to Recovery Mode via Windows settings and boot up your PC using your USB drive. Apart from this, an alternative solution would be to use a plop boot manager.
Leave a Reply