The camera on Windows 11/10 usually works by default, but if your integrated Camera or Webcam is not working in Windows 11/10, then this troubleshooting guide will help you resolve the issue. To resolve it, we will look at the following options:
- Check Privacy settings.
- Check your Antivirus
- Check for an outdated webcam driver or outdated webcam
- Rollback webcam driver
- Switch to the built-in Windows UVC driver
- Remove & add webcam again
- Run Camera Troubleshooter
- Reset Camera settings to default.
Camera not working in Windows 11/10
Before we start, always check if the camera is plugged into the system. This applies only when you have an external camera.
1] Check Privacy settings
In Windows 11, open Settings > Privacy & features > Camera and toggle On Camera access.
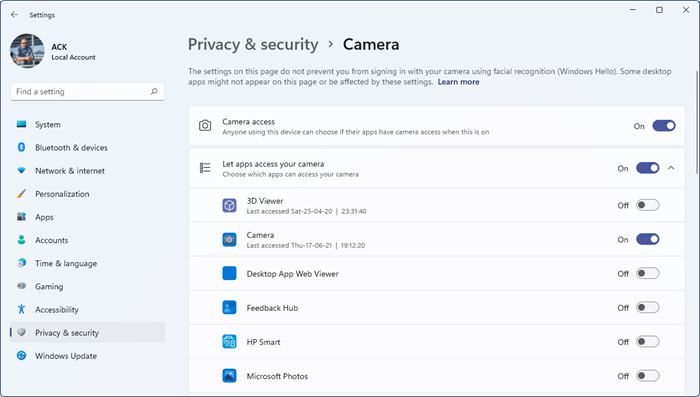
You can also control access for individual apps here.
Windows 10 has also improved and offers granular control when it comes to Privacy. Unless you give permission exclusively, nothing can access your camera. Windows 10 Feature updates disabled camera access, and some apps have lost the default access to the camera.
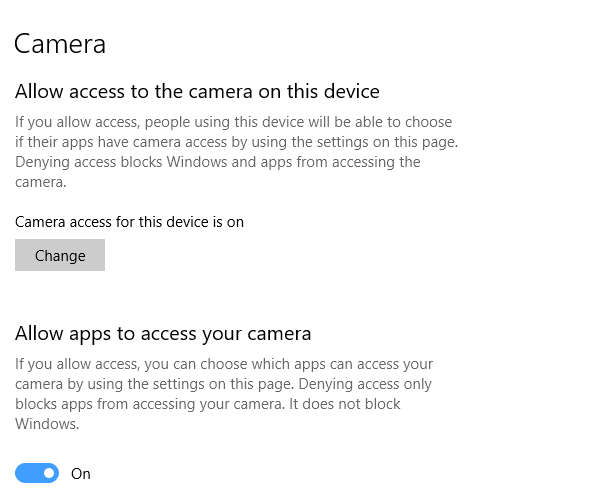
- Go to Settings > Privacy > Camera.
- Turn on. Allow apps to access your camera.
- If the option is grayed out, click on the button with option Change. It will change the status of camera access to on.
- Then toggle on the allow apps for the camera.
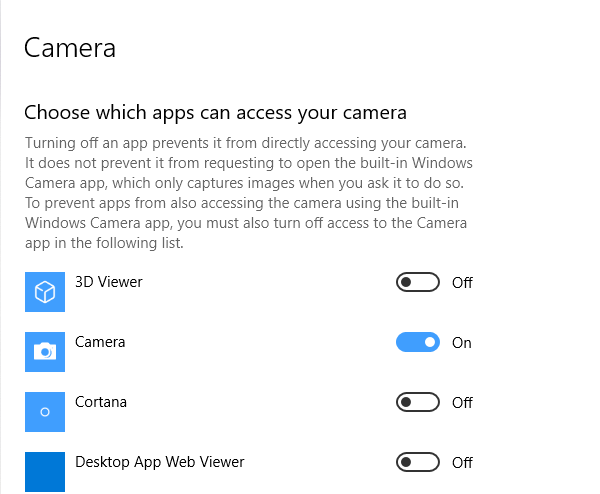
In Enterprise or Corporate networks, administrators disable camera access through policies. If that’s the case for your computer, ask the admin to enable the settings for you. Post this; you may have to give access to individual apps so they can use the camera.
Related: Webcam keeps turning off and on again.
2] Check your antivirus software
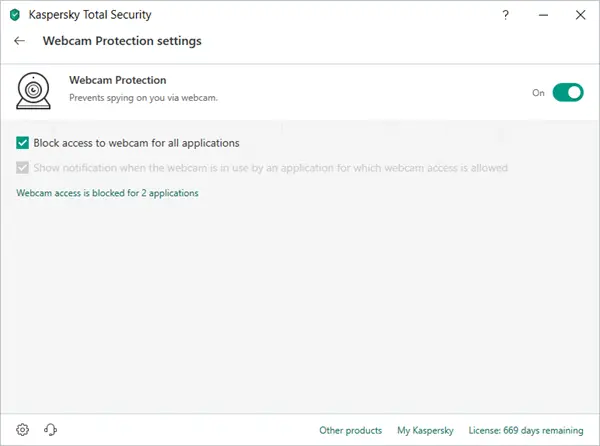
Some security suites for Windows computers block camera access. Check the software’s settings to see if you can unblock it.
Read: Camera missing or not showing in Device Manager.
3] Check for an outdated webcam driver or outdated webcam
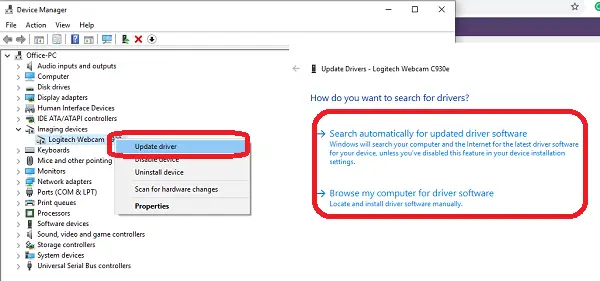
Usually, after a Windows feature update, the drivers become incompatible. You might have to update the camera driver either through the software or using Windows Update.
- Press WIN+X+M to open Device Manager.
- Under Imaging devices, find your camera listing.
- Right-click, and then choose to update driver.
- You can let Windows use the update system to find the latest driver. If you have already downloaded it, you can manually select it.
It is possible that your Webcam is very old and may not work with Windows 10 anymore. The best way to find out is to go through the camera’s Properties in the Device Manager. If a file with the name stream. sys is listed in the driver details button, then you need to replace your webcam with a new one.
Related: External webcam not detected in Windows
4] Rollback webcam driver
Here is another common scenario. An updated driver might not be compatible with your Windows. The only way to fix it is by installing an older version. Usually, if you had just updated Windows, you would get a rollback option, else you will need to download an older version and install it.
- Open Webcam properties in Device Manager, and switch to Driver Tab.
- Click on the Roll Back Driver, and then choose Yes.
- After the rollback is complete, restart your computer, and then try opening the Camera app again.
If the rollback option wasn’t available, follow the next step.
5] Switch to the built-in Windows UVC driver
Most available USB webcams are UVC (USB Video Class) compatible cameras. If your webcam is not working correctly, use the UVC driver and see.
- Open Device Manager and locate the webcam under Cameras or Imaging devices.
- Right-click the webcam device and select Update driver.
- Select Browse my computer for drivers.
- Select Let me pick from a list of available drivers on my computer.
- Select USB Video Device and then select Next.
Related: Webcam keeps freezing or crashing.
6] Remove & add webcam again
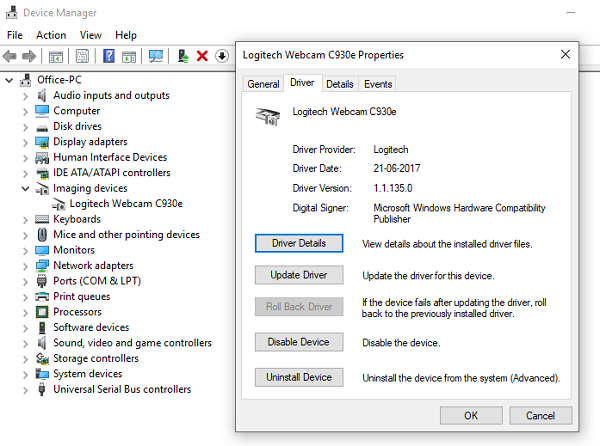
- Open Device Manager > Webcam > Properties. Switch to Driver tab, and click on the uninstall button.
- Choose to uninstall the driver software, and then click OK.
- Post this, select Scan for Hardware changes available with the Device Manager Action menu.
It should detect the camera, and then you can let Windows install the driver, or you can do it yourself.
Read: How to test Webcam? Is it working?
In case you open the Device Manager and do not see your camera listed, use the Scan for hardware changes option. It is possible that when you plugged in the camera, it failed to detect, and hence it’s not in the system.
Lenovo users may need to reinstall the EasyCamera driver. You may see its entry in the Control Panel. You can download the latest driver setup file from their website.
7] Run the Camera Troubleshooter
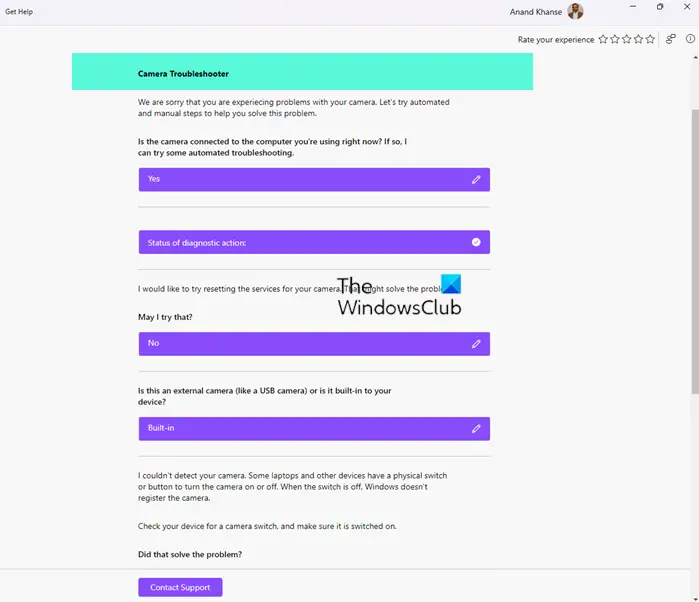
You can access it via Windows Settings Troubleshooters Page, Bluetooth & Devices settings or the Get Help app. Running the Windows Camera troubleshooter can diagnose and solve the problem quickly.
- Press the Windows key + I to open Settings.
- Click on System > Troubleshoot > Other Troubleshooters.
- Now scroll down and click on Run beside Camera.
- If any errors are found, Windows will automatically fix them.
To access it via Bluetooth & Devices settings:
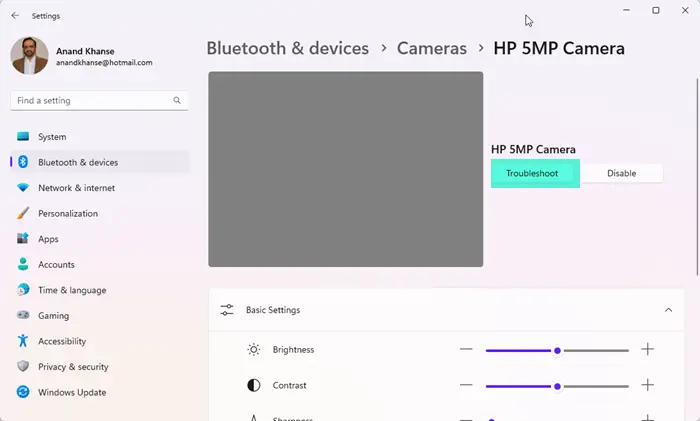
- Open Windows Settings > Bluetooth & devices
- Open Camera settings and select the camera
- Click on the Troubleshoot button.
You can also access it via Get Help app as follows:
- Open the Get Help app using the Search bar
- Search for Camera issues in the apps search bar
- The Camera Troubleshooter will open
- Answer the questions and follow the troubleshooting wizard for its solutions and see if they help you.
The Camera troubleshooter will Reset the services for your camera, Reset your camera, Update your camera drivers, Use the default Windows camera driver, etc.
8] Reset Camera settings to default
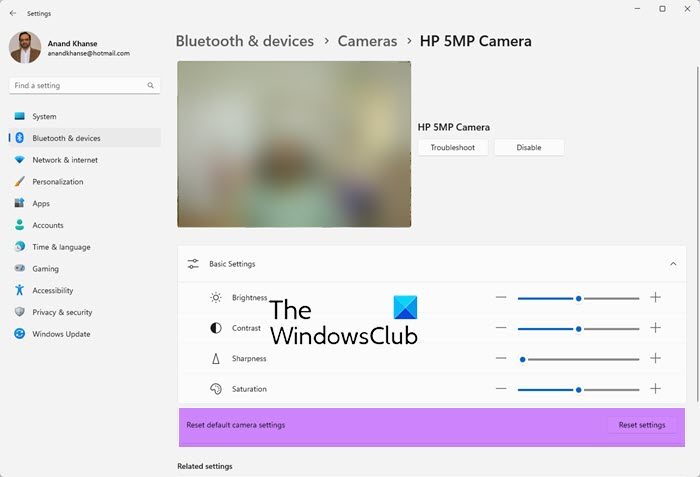
To reset your webcam settings to default:
- Press Win+I to open Settings
- Open Bluetooth and devices section
- Select Camera settings
- Here locate your Camera and click on it
- Finally, click on the Reset settings button against Reset default camera settings.
I hope this helps.
Why is my webcam not working on my PC?
First, check if webcam access has been turned on via Windows Settings. If that has been done and the camera is still not working, the cause could be drivers, hardware, privacy settings, or your security software blocking access.
How do I enable my webcam on Windows?
To turn on or enable webcam on your Windows PC, open Settings > Privacy & security > Camera. Now, turn on the toggle against Camera access. You can set individual permissions for different access then.
Camera not working after Windows Update
If your Camera is not working after the Windows Update, you should uninstall the problematic Windows Update and then hide the update.
If you have a Surface Pro or Book, check out these Surface Camera troubleshooting tips.