This post will help you if you cannot add a second Contact address for another domain to an Office 365 Shared mailbox. The shared mailbox feature in Office 365 helps send and receive emails from a single email account for multiple users. However, sometimes sharing the mailbox doesn’t accept mail addresses from a different domain. In this article, we check the probable causes that can lead to the situation and possible solutions to resolve the issue.
Reasons for the Shared mailbox issue
The possible causes of the shared mailbox not accepting a second contact are detailed below:
- Share Restrictions: Office 365 may have share restrictions in place that would limit the domains from being added to the contact addresses. Such settings are sometimes implemented to enhance security by blocking unauthorized access.
- Domain verification: Since the contact to be added belongs to another domain, Outlook 365 would need due verification to allow the same. Such measures aim to prevent unauthorized access, allowing only trusted domains to be added.
- Administrator Settings: Improper or incorrect admin settings in Office 365 can also contribute to the error in question.
- Shared mailbox permissions: Restrictions at the user level can also contribute to the problem where the concerned user doesn’t have the necessary privileges to add a contact from other domains.
Cannot add second Contact address for another domain Office 365 Shared mailbox
Follow these suggestions to fix the Office 365 Shared mailbox issue:
- Check for Name conflicts
- Reconfigure shared mailbox settings
- Check for Accepted Domains
You will need admin account permission and permissions to manage the shared mailbox.
Office 365 Shared mailbox doesn’t accept a second contact address for another domain
1] Check for Name conflicts
Outlook has two types of name objects: the Display name and the Name value. Display names are used for end-user identification on outgoing or incoming messages or emails. Name values, however, are used by the mail server as a server or network identifier to send or receive mail.
Microsoft currently enforces uniqueness in the name object as far as the mail server is concerned, and hence, ensuring uniqueness for the said criteria can also help resolve the issue.
In such cases, the sharing can also be done using the Windows PowerShell with the second contact along with ensuring uniqueness in the name:
- Open Windows PowerShell as an Administrator.
- Type and execute the below-mentioned command on the PowerShell Terminal
New-Mailbox -Name [email protected] -PrimarySmtpAddress [email protected] -Shared
In the above command:
- New Mailbox: This represents the command for creating a new mailbox.
- Name: Sets the name of the mailbox as [email protected], which would be the unique identifier for the mailbox.
- PrimarySmtpAddress: To specify the primary mail address.
- Shared: It is used to specify that the new mailbox being created is shared.

Alternatively, for creating a new shared email through the Outlook application:
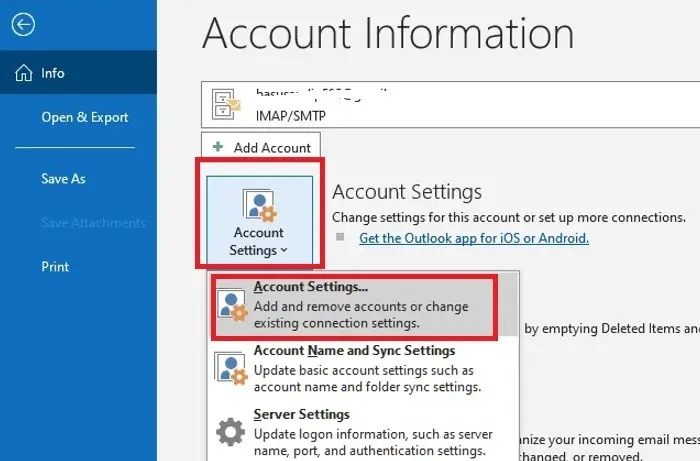
- Open Outlook and click on File > Account Settings > Account Settings.
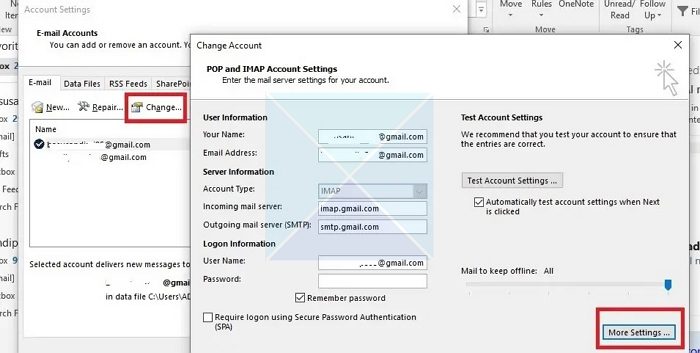
- On the next window, click the Change option and More Settings.
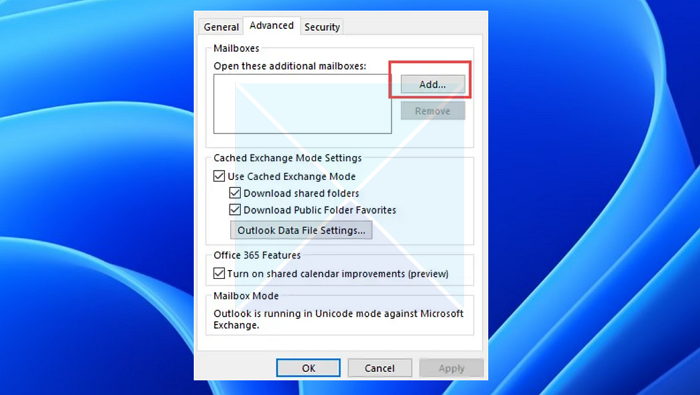
- Click on Advanced > Add to enter the details of the new email to be added and shared, and then click OK.
2] Reconfigure shared mailbox settings
Possible lapses in the configuration of the shared mailbox settings could also lead to the error mentioned above. Hence, reconfiguring the same from scratch can also effectively negate the error. The following process can be executed to reconfigure the shared mailbox settings:
Delete and Add Shared Mailbox Settings
Delete and Add the shared mailbox can bring it back to sync, thereby resolving any possible connection or synchronization issue that might have led to the problem.
Shared Email Deletion from the Outlook Application
- Open Outlook.
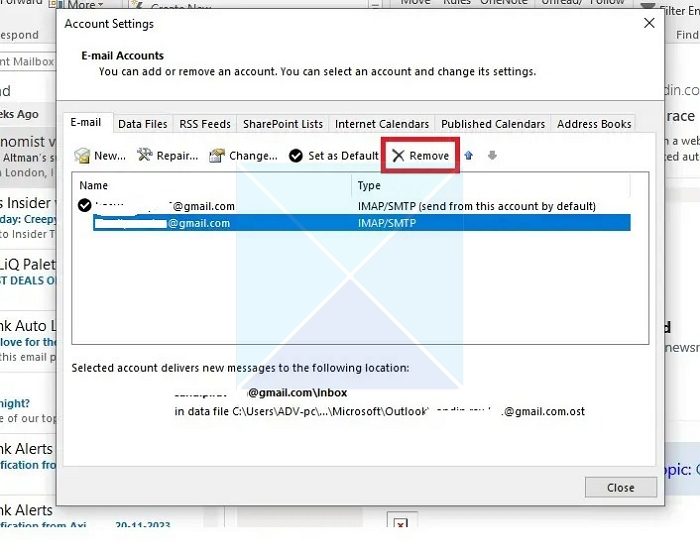
- Click on File > Account Settings > Account Settings.
- Select the shared mailbox and click Remove.
Delete Shared Mailbox using PowerShell
To remove a shared mailbox in Outlook through the PowerShell cmdlet enter the following command:
Remove –Mailbox –Identity "[email protected]"
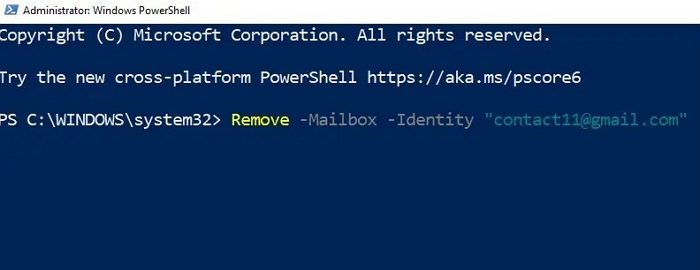
The above command will remove the mailbox named or identified as [email protected].
Once the shared mailbox is removed, the steps mentioned in Check for Name conflicts can be followed to add the new mailbox.
3] Check for Accepted Domains
Another crucial step towards resolving the error involves checking the domain of the shared email to be added as the second contact. Accepted domains define the email addresses a mailbox can use or add as a contact in the shared mailbox list.
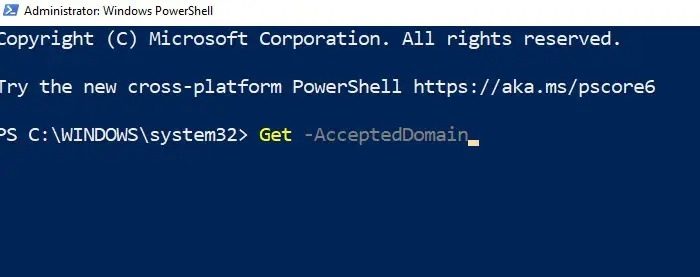
If the domain of the contact to be added is not one of the accepted ones, Outlook may not allow the addition. To check for the list of accepted domains, the below-mentioned command can be entered in the PowerShell prompt:
Get –AcceptedDomain
I hope the post helped and that you resolved the Office 365 Shared mailbox issue not accepting a second contact address for another domain.
Read: Troubleshoot problems while setting up custom domain email with Outlook
Can a shared mailbox send emails externally?
A shared mailbox can only be accessed by people within your organization and not by those with external email addresses such as Gmail or Yahoo Mail.
What is the difference between a shared mailbox and a shared email account?
Instead of giving out the login details for one account, you can create a shared mailbox by assigning an email inbox with its own unique email address and then inviting specific users to access it. The email address linked to the shared mailbox is not associated with a single dedicated user account.