Some users cannot delete a section in OneNote. According to them, the deleted sections keep reappearing. If you encounter such a problem in OneNote, use the solutions provided in this article.

Cannot delete a section in OneNote
If you cannot delete a OneNote section in OneNote or the deleted sections keep reappearing, use the following suggestions to fix this issue:
- Sign out and sign back in
- Put your notebooks to manual sync
- Try to delete the section online
- Delete the section from your hard drive (if applicable)
- Delete the section from the Recycle Bin
- Clear OneNote cache
- Repair OneNote
- Uninstall and reinstall OneNote
- Try this workaround
All these fixes are explained in detail below:
1] Sign out and sign back in
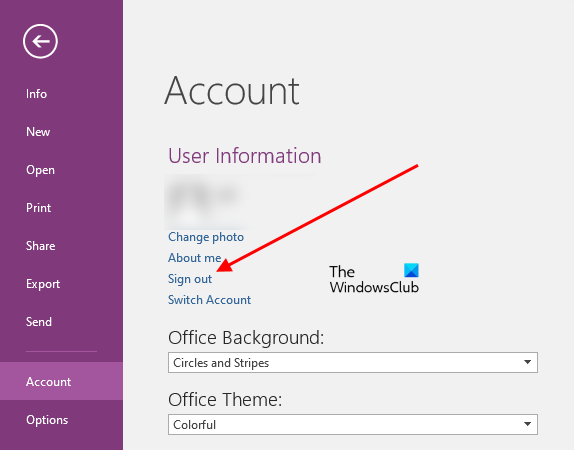
The first step is to sign out and sign back in. Open OneNote, click on your profile icon at the top right side, and select Sign Out. Restart OneNote and sign back in with the same Microsoft account. Now, check if you can delete the section.
2] Put your notebooks to manual sync
Put your notebooks to manual sync, then check if you can delete the section. The following steps will help you with that:
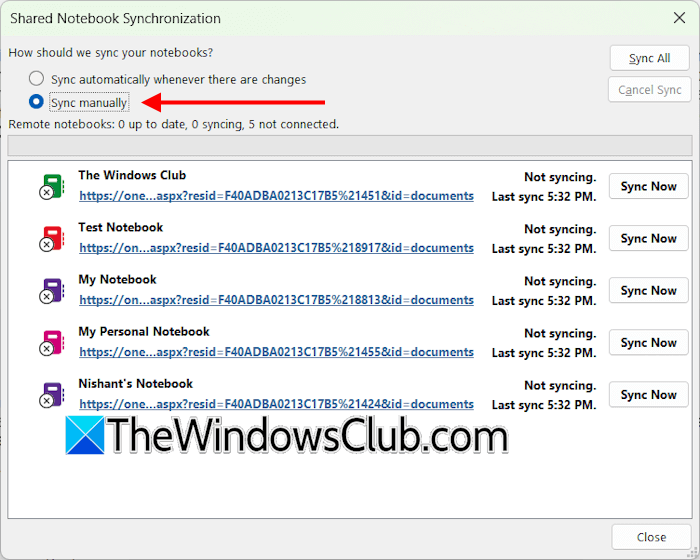
- Open OneNote.
- Go to File > View Sync Status.
- A new window will appear. Select Sync manually.
- Click Close.
Now, check if you can delete the section. If this works, you can revert the changes to allow OneNote to sync all your notebooks automatically.
3] Try to delete the section online
If you still cannot delete a section in OneNote or the deleted sections keep reappearing in OneNote, try to delete the section online.
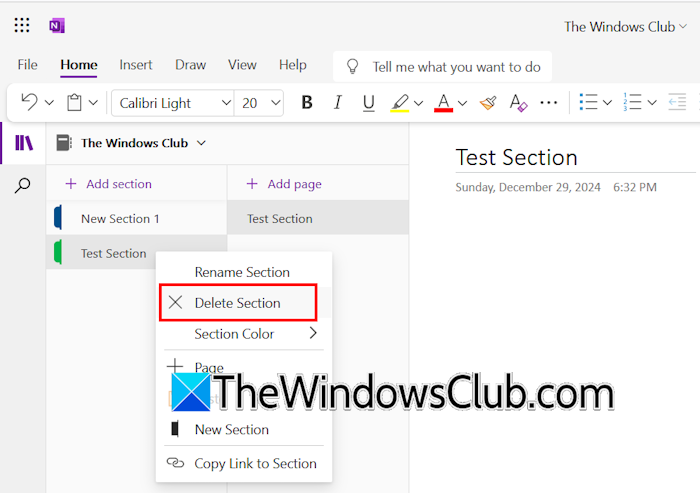
The following steps will guide you on this:
- Open your web browser and go to OneNote for the Web.
- Sign in with the same Microsoft account.
- Open the notebook whose section you want to delete.
- Now, right-click the section you want to delete and select the Delete Section.
Now, open OneNote and let it sync automatically. The sync process will take some time. If the section is not deleted, sync the notebook manually. The section should now disappear from OneNote.
4] Delete the section from your hard drive (if applicable)
By default, all OneNote notebooks are saved on the cloud. You can view them in OneDrive by signing in to your Microsoft account. If you want, you can save a OneNote notebook at another location on your hard drive. This solution is applicable if you have saved the notebook on your hard drive locally.
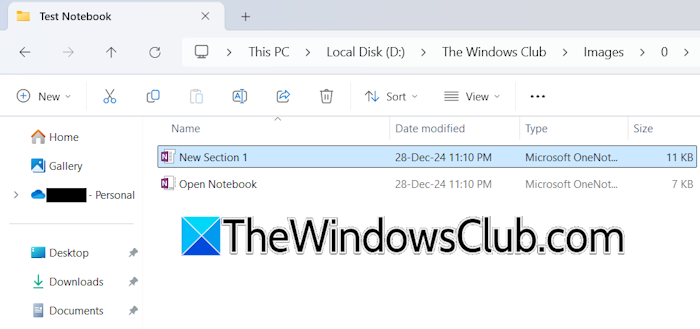
First, close OneNote. Now, go to the directory where you have saved the notebook. Open the folder of your notebook. You will see all the sections there. Select the section and delete it.
5] Delete the section from the Recycle Bin
When you delete a section in OneNote, it goes to the Recycle Bin, which allows you to restore the deleted section (if you have deleted it by mistake). If the deleted section keeps reappearing, delete it from the Recycle Bin.
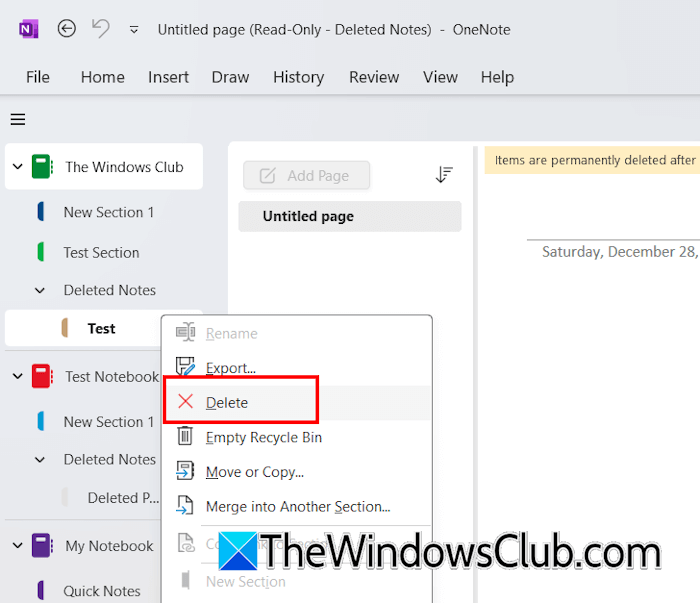
The following steps will guide you on this:
- Open OneNote.
- Select the notebook and select History > Notebook Recycle Bin.
- Now, OneNote will open a new section with the name Deleted Notes. This new section shows all the deleted sections.
- Right-click on the section that keeps appearing and select Delete.
You can also empty the Recycle Bin. Before this, restore all the important sections from the Recycle Bin.
6] Clear OneNote cache
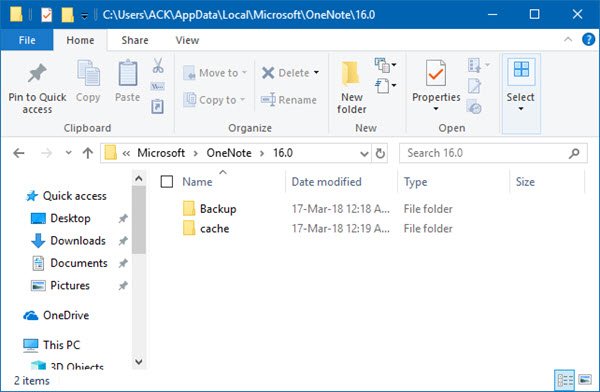
You can also try clearing the OneNote cache and see if it helps. For this, you have to delete the cache inside the OneNote folder located on your C drive.
7] Repair OneNote
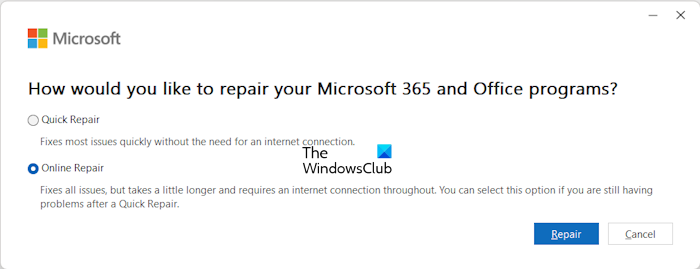
The problem may be occurring due to corrupted Office files. I suggest you repair OneNote. Open Windows 11/10 Settings and go to Apps > Installed Apps. Find OneNote in the list of installed apps. Click on the three dots next to it and select Modify. Now, click Online Repair.
8] Uninstall and reinstall OneNote
Uninstalling and reinstalling OneNote can also help fix this issue. You can install OneNote from the Microsoft Store.
9] Try this workaround
If the issue still persists, try this workaround.
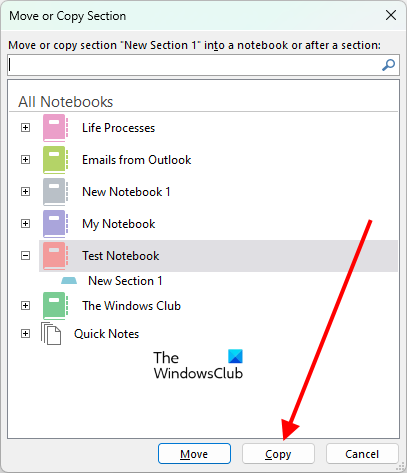
- Create a new empty notebook in OneNote with another name.
- Now, copy the sections from the previous notebook one by one to the new notebook. Do not copy the problematic section.
- After copying all the sections, you can delete the old notebook.
To copy a section, right-click on it and select Move or Copy. Now, select the new notebook and click Copy.
How do I permanently delete a section in OneNote?
To permanently delete a section in OneNote, right-click on it and select Delete. This will move the section to the Recycle Bin. Now, to delete that section permanently, you have to delete it from the Recycle Bin.
How do I undo deleting a section on OneNote?
When you delete a section in OneNote, it is moved to the Recycle Bin. If you want to undo that deletion, you can restore it from the Recycle Bin. Open the Recycle Bin, right-click on the deleted section, and select Move or Copy. Now, move the section to your notebook.
Read next: OneNote Sections or Pages disappeared.
Leave a Reply