If when you run the Add-AppxPackage command to reinstall, reset, or re-register an app on your Windows 11 or Windows 10 computer, and you get an output stating Cannot find path C:\AppxManifest.xml because it does not exist, then this post is intended to help you. In this post, we provide the most applicable solutions to this issue.
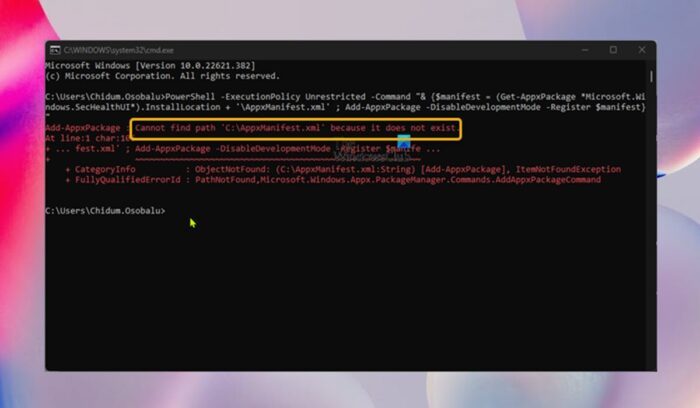
You may encounter this error due to the following main reasons.
- Corrupt user account
- Corrupted Microsoft Store app/cache
- Incorrect or insufficient permissions for the WindowsApps folder
Cannot find path C:\AppxManifest.xml because it does not exist
If you receive the error message Cannot find path C:\AppxManifest.xml because it does not exist when you try to reset or reinstall an app using the Add-AppxPackage command on your Windows 11/10 device, you can apply any of the listed solutions below in no particular order and see what works for you to resolve the issue on your system.
- Initial checklist
- Configure permissions on the WindowsApps folder
- Create a new User Account
- Reset/Re-register Microsoft Store
- Reset PC
Let’s see a brief description of each of the solutions outlined above.
1] Initial checklist
Before you proceed with the solutions below to resolve the Cannot find path C:\AppxManifest.xml because it does not exist error you have encountered on your computer, as a quick solution, or rather workaround, provided you do not have a specific preference running the Add-AppxPackage PowerShell cmdlet, you could reset the app via Settings if you received the error while resetting the app. If you received the error while trying to install, reinstall re-register an app, you can get the app directly from the Microsoft Store app after you must have uninstalled the app as the case may be. Another route you can go is to use the Winget command-line utility to download/install apps from Microsoft Store on your Windows 11/10 device. In addition, you can run the Windows Store Apps Troubleshooter and see if that helps.
Read: PowerShell Get-Appxpackage Not working or Access Denied
2] Configure permissions on the WindowsApps folder
You’re likely to encounter the issue at hand if the user permissions of the WindowsApps folder are not properly configured. In this case, to see if the issue will be resolved you can assign full control permission to the WindowsApps folder or you can take ownership of the folder. To perform this task, do the following:
- Press the Windows key + R to invoke the Run dialog.
- In the Run dialog box, type the environment variable below and hit Enter to open the Program Files directory.
%programfiles%
- At the location, right-click on the WindowsApps folder. If you don’t see the folder, you’ll need to show hidden files/folders.
- Choose Properties from the context menu.
- In the Properties sheet, click the Security tab.
- In the Security tab, at the bottom, click on the Advanced button.
- In the Advanced Security Settings for WindowsApps window that opens, click on the Change link for Owner.
- In the Select User or Group dialog that pops up, click on the Advanced button.
- In the next window, click on the Find Now button.
- Double-click on your username from the Search result section.
- Apply your changes.
- Next, checkmark the Replace Owner on Subcontainers and Objects option.
- Apply your changes and again right-click on the WindowsApps folder.
- Select Properties and make sure your user account, All Application Packages, and System accounts are assigned full control of the WindowsApps folder.
- Restart your computer when done.
Read: How to perform WindowsApps Folder Cleanup in Windows 11/10
3] Create a new User Account
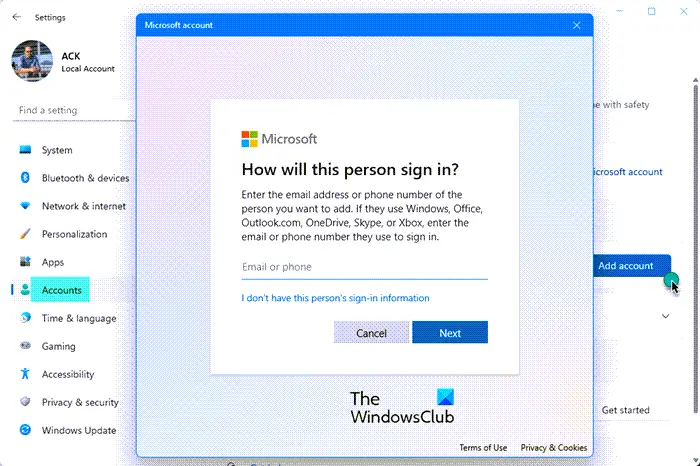
If the issue is due to a corrupt user account, you can repair the corrupt user profile and see if the issue is resolved. Otherwise, you will need to create a new user account.
Do the following:
-
Back up the user profile data files on the old user account:
-
In the Folder Options dialog, in the View tab, look under Advanced settings, and set the following settings:
- Show hidden files, folders, and drives button needs to be selected.
- Hide extensions for known file types needs to be unchecked.
- Hide protected operating system files (Recommended) needs to be unchecked.
-
In File Explorer, locate the
C:\Users\Old_Usernamefolder, where C is the drive that Windows is installed on, and Old_Username is the name of the profile you want to back up. -
Select and copy all of the files and folders in this folder, except for the following files:
- NtUser.dat
- NtUser.ini
- NtUser.log (or if it does not exist, instead exclude the two log files called ntuser.dat.log1 and ntuser.dat.log2)
-
Paste the files to a backup location of your choosing. You can retrieve your old user account profile from this backup location if needed – but keep in mind that the files that were under
C:\Users\<Old_Username>\AppData\Local\Packageswere likely corrupted, and there may be other files corrupted as well.
-
Sign out of the old user account. You can transfer your files/data to the new user profile before you delete the old profile. If everything is working properly, you can delete the old account/profile.
4] Reset/Re-register Microsoft Store
For this solution, you need to reset the Microsoft Store using the Settings app or the wsreset.exe command. Remember that when you complete this action, the Windows Store’s cache files will all be deleted. Your sign-in information and any app data will be permanently removed from your device.
To reset Microsoft Store via the Settings app on your Windows 11 device, do the following:
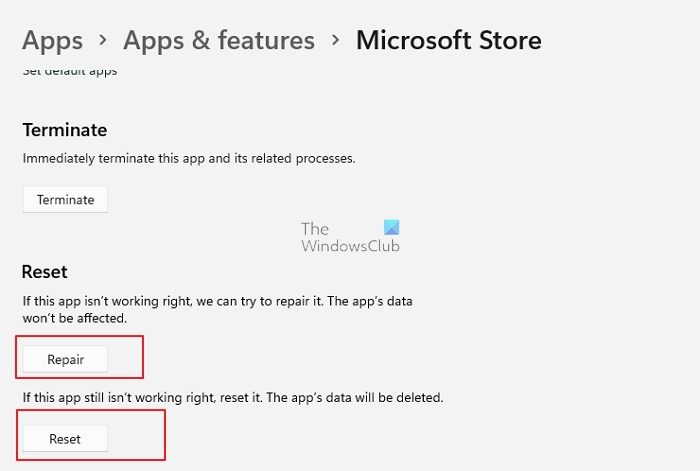
- Open the Settings app.
- Click on Apps > Apps & Features.
- Scroll down to Microsoft Store on the list.
- Click on the ellipsis (three dots) button.
- Select Advanced Options.
- Scroll down and click Reset.
- Exit the Settings app when done.
To reset Microsoft Store via the Settings app on your Windows 10 device, do the following:
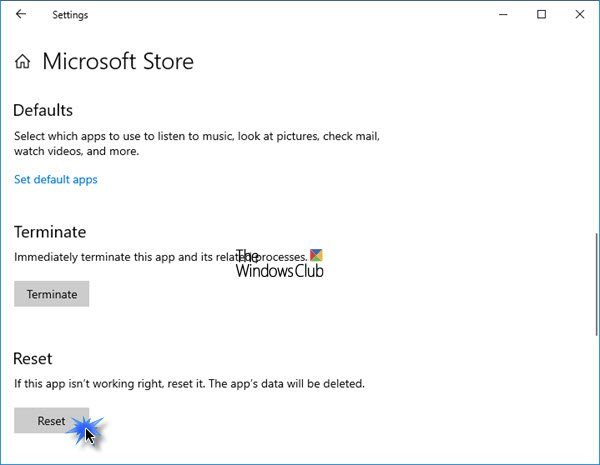
- Open Settings.
- Click Apps > Apps and features.
- Search for or scroll to find Microsoft Store.
- Next, click on the entry once to expand its options.
- Now, click the Advanced options link.
- In the page that opens, scroll down and click the Reset button.
- Exit the Settings app when done.
If the reset didn’t help with the issue in view, you can re-register the Microsoft Store app by following these steps:
- Press the Windows key + X to open the Power User Menu.
- Tap A on the keyboard to launch PowerShell (Windows Terminal) in admin/elevated mode.
- In the PowerShell console, copy and paste the command below and hit Enter.
Get-AppxPackage -allusers Microsoft.WindowsStore | Foreach {Add-AppxPackage -DisableDevelopmentMode -Register “$($_.InstallLocation)\\AppXManifest.xml”}
- Once the command executes, exit Windows Terminal.
- Restart your computer.
On boot, repeat the action that triggered the error. If the error persists, try the next solution.
5] Reset PC
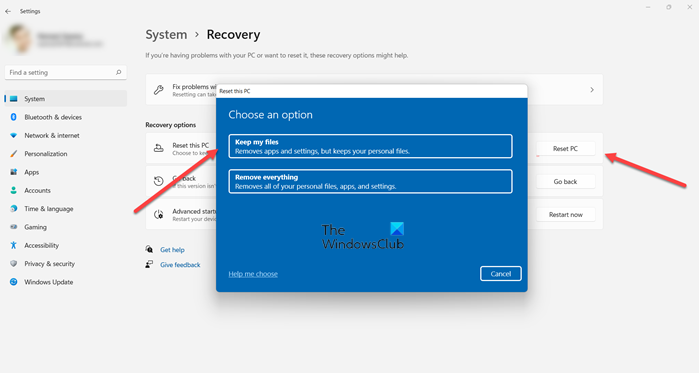
If the issue persists after you have exhausted all other suggestions in this post, then it’s likely the issue is caused by system corruption that has broken most of the Windows installation components thereby affecting normal app and system functionality. In this case, the most applicable solution is to reset Windows 11/10. In the unlikely or likely event, the issue persists after the PC reset, you can perform an in-place upgrade repair.
Read: Fix Package could not be registered on Windows 11/10
Hopefully, this post helps you!
Also read: Add-AppxPackage Deployment failed with HRESULT 0x80073CFF
What is AppxManifest?
The package.appxmanifest is an XML-style file that developers use to configure the details of an app, such as publisher information, logos, processor architectures, etc. To open an Appxmanifest package, you can use Microsoft Visual Studio to open the file with the XML (Text) Editor.
How do I fix AppxManifest.XML?
Typically, you may get the appxmanifest.xml errors because of a corrupt or missing Windows-associated file, sometimes due to malware infection. In this case, obtaining a fresh healthy copy of your XML file will most likely resolve the problem.