Screen captures, also termed screenshots or snapshots, are very useful for explaining something. There are numerous screen-capturing tools available on the web, but today, we will learn about the Kalmuri Screen Capture tool. This tool not only lets you take screenshots with a single tap but also has a feature of screen recording. While we can easily take a screenshot with the PrtSc button on our PCs/Laptops, using such third-party tools certainly brings in some extra features.
Kalmuri Screen Capture Tool for PC
Kalmuri is very simple freeware that helps you capture and record screen images. The tool comes in a small portable file, and the interface is also pretty user-friendly.
Just download the zip file, extract it, and it’s ready to use. All it has is a tiny window, which you can put in your system tray if you often need to use it. Select the preferred option and press the hotkey; your screenshot is automatically saved in the desired folder.
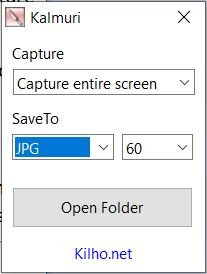
The PrtSc button on your keyboard is the default hotkey for Kalmuri, but you can change it according to your preference. With Kalmuri, you can capture the entire screen, a specific region, the currently active window, Windows control, and a web browser.
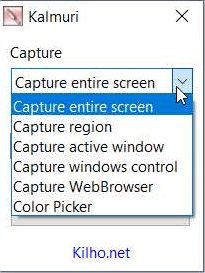
You can:
- Capture entire screen– takes the screenshot of the entire screen open
- Capture Region– you can take the screenshot of any specific region from the screen. The tool makes a default 480×360 window when you select ‘capture region’ and you can then resize as per your requirement.
- Capture active window– The tool captures the window in front of all other open windows if you select this option.
- Capture Windows Control– A dotted box shows the selected area to capture if you select this option.
- Capture Web Browser– This opens a new tab in Internet Explorer.
- There is also an option of Color Picker.
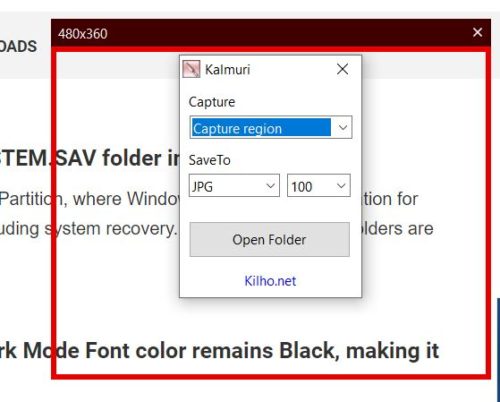
Just select the option and press the hotkey, and the screenshot will be saved in your Kalmuri folder. The tool makes a shutter sound while taking snapshots. It saves snapshots in regular formats like PNG, JPG, GIF, and BMP image formats. You can also copy the snapshot to the clipboard, upload it directly to Imgbox, or send it to the connected printer.
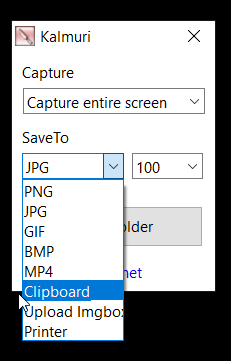
Record Screen using Kalmuri
Select MP4 and press the hotkey to start recording your screen. The MP4 file will also be saved in the same folder.
Initially, the screen recording wasn’t working for me and I was getting the error “Error FFMPeg.exe not found”. FFmpeg is an open-source multimedia project made for handling audio, video, and other multimedia streams. So I downloaded and installed FFMPeg from their official website and then I could record my screen using Kalmuri.
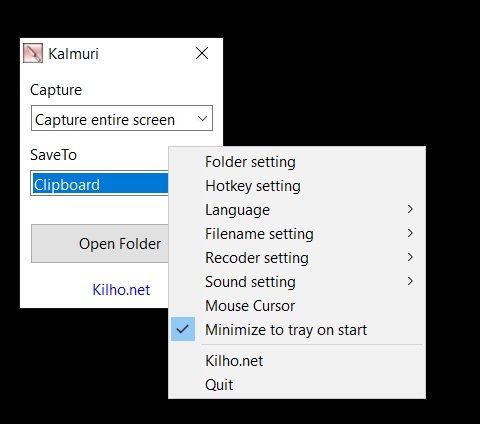
To adjust the settings of Kalmuri, just take your cursor on the main window and right-click. From here you can change the folder you want to save your screenshots in, change the Hotkey from PrtSc to any other key, change the language, filename, etc.
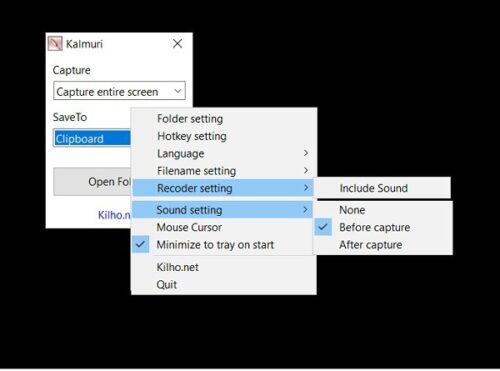
From the Recorder setting, you can adjust whether to record your screen with or without sound and adjust the Sound Settings. Check the Mouse Cursor option from the dropdown if you want to show the cursor in your screenshots.
You can download this tool here. I am sure that you will enjoy using this simple, easy-to-use screen capture and recorder software.
Leave a Reply