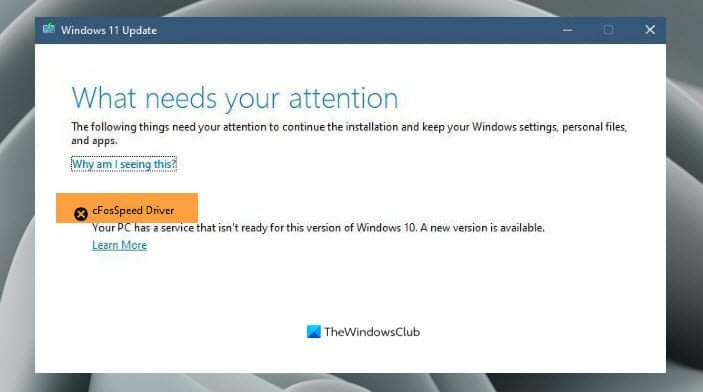
A Windows 11 issue you may encounter on your device when you try to upgrade to Windows 11 is, the cFosSpeed Driver preventing Windows 11 installation. In this post, we will provide the most suitable solutions affected PC users can apply to easily resolve the issue and successfully complete the Windows 11 update installation.

What is cFosSpeed Driver?
cFosSpeed is a program integrated into the existing internet connection to optimize data transfer and speed with Traffic Shaping and Prioritization on some PCs that ship with ASUS, GIGABYTE, ASRock, and MSI motherboards.
Is cFosSpeed safe?
The cFosSpeed.exe is a safe and legitimate file and is a known process referred to as cFosSpeed Window. The cFosSpeed software is developed by and belongs to cFos Software GmbH. This software when installed is commonly stored in C:\Program Files directory in Windows.
Fix cFosSpeed Driver preventing Windows 11 installation
If you are unable to complete a Windows 11 upgrade installation on your computer due to the cFosSpeed driver, you can try our recommended solutions in the order presented below to resolve the issue.
- Upgrade in Clean Boot state
- Update cFosSpeed Driver
- Uninstall cFosSpeed Driver
- Perform Hardware Clean Boot
- Clean Install Windows 11
Let’s take a look at the description of the process involved concerning each of the listed solutions.
cFosSpeed Driver blocking Windows 11 upgrade
1] Upgrade in Clean Boot state
Essentially, when you clean boot a system, the Windows 11/10 OS will start by using a minimal set of drivers and startup programs to help eliminate software conflicts that may occur when installing a program, updating a program, or running a program.
This driver in question is a third-party driver, and also, as indicated on the message prompt your PC has a service that isn’t ready for this version of Windows; you can as your first troubleshooting step to fix the issue on your device, perform a Clean Boot of your system and then rerun the Windows 11 upgrade operation in that state.
Try the next solution if the issue isn’t resolved.
2] Update cFosSpeed Driver
Here again, as indicated on the message prompt that your PC has a service that isn’t ready for this version of Windows 10, and a new version is available – you can resolve the issue by updating the cFosSpeed driver currently installed on your device, then reboot the computer and retry the Windows 11 upgrade operation.
To update the cFosSpeed driver currently installed on your Windows device, you can download and install the latest version of the cFosSpeed software. However, suppose the cFosSpeed stable version didn’t install a compatible driver and the issue in hand isn’t resolved. In that case, you can try downloading and installing the beta version of the software from the cFosSpeed download page.
For most MSI computers or systems with MSI motherboards, downloading and installing the MSI Dragon Center app will automatically install Windows 11 compatible cFosSpeed driver.
3] Uninstall cFosSpeed Driver
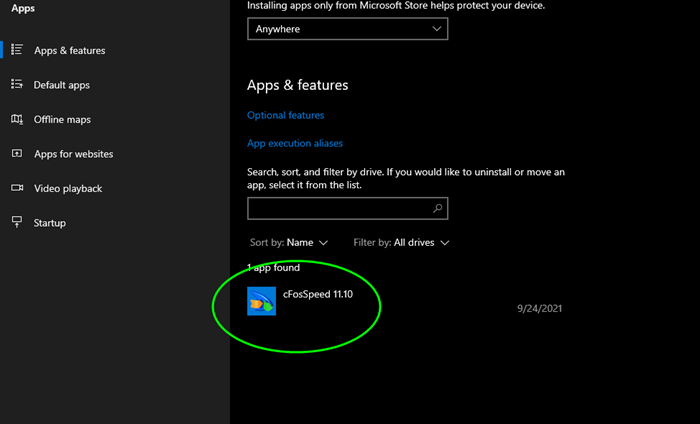
If updating the cFosSpeed driver didn’t resolve the issue, you can uninstall the driver altogether from the computer.

Open Settings > Select Apps > Apps & features > Select cFosSpeed you want to uninstall and click on the Uninstall button that appears. The driver will be uninstalled.
Alternatively, you can do the following:
- Press Windows key + E to open File Explorer.
- In File Explorer, navigate to the directory path below:
C:\Program Files
- In Program Files folder, search for and open the Lan Manager folder.
- In the Lan Manager folder, search for the unins001.exe file.
- Double-click on the executable file to uninstall the cFosSpeed driver installation files.
- Exit File Explorer when done.
- Restart your PC.
On boot, check for Windows 11 update and see if you can upgrade the device without the issue in hand. Otherwise, proceed with the next solution.
Alternatively, you can uninstall cFosSpeed from Network Properties. Here’s how:
- Press Windows key + R to invoke the Run dialog.
- In the Run dialog box, type ncpa.cpl and hit Enter to open Network Connections.
- Next, right-click on the active network adapter.
- Select Properties.
- In the network adapter Properties sheet, search for and select the cFosSpeed for faster internet connections (NDIS 6) entry.
- Click Uninstall button.
- Click Yes on the confirmation prompt to proceed.
- Reboot PC when the uninstall completes.
4] Perform Hardware Clean Boot
As this driver is related to the network adapter hardware installed on your computer, you can fix the problem at hand by performing Hardware Clean Boot and then trying the Windows 11 upgrade again.
If this doesn’t work, proceed with the next solution.
5] Clean Install Windows 11
Keep in mind that after you perform any of the 4 tasks above, you can perform an in-place upgrade to get Windows 11 up and running on the device. However, in the case none of the solutions worked, you can back up your files and clean install Windows 11 on the computer.
Hope this helps!
Related post: A current driver on your PC may be better than the driver we’re trying to install
Is cFosSpeed compatible with Windows 11?
Yes, the cFosSpeed driver is compatible with Windows 11. However, some users claimed they failed to install Windows 11 or upgrade to Windows 11 due to having a specific driver. If you encounter the same problem, removing the driver first before you try to reinstall Windows 11 is recommended.
How do I remove cFosSpeed from Windows 11?
There are three ways to remove cFosSpeed from Windows 11. First, you can use the Control Panel to do the job. Second, you can use the Windows Settings panel. Third, you can use a third-party application to remove it completely from your system.
Leave a Reply