By default, the Windows 11 or Windows 10 Clock is set at the 12-hour format, which has been the case since its inception. Most users are quite content with the default setting henceforth; they do not need to make any changes. However, for those who prefer to have the 24-hour format clock on your taskbar, you may be wondering if it is possible to get what you want. Additionally, some users might be seeing the 24-hour clock but prefer the 12-hour instead.
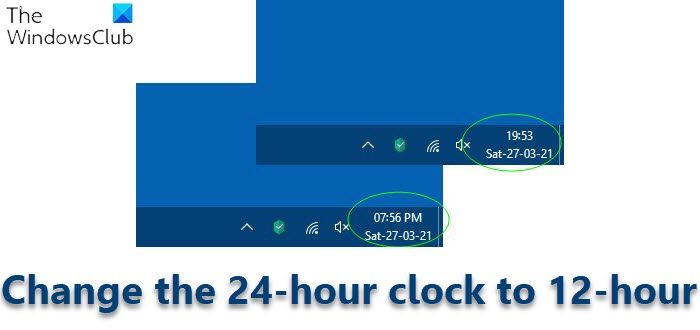
How to change 24-hour clock to 12-hour in Windows 11/10
The big question right now, then, is how do we switch between the two formats. Well, there are two ways to do this – using Settings or the ControlPanel. Whichever option you choose to go with, the results will always be the same.
How to change time format in Windows 10
- Open the Windows 10 Settings app
- Select Time and Language settings
- Go to Date & Time section
- Click on Date, time, and regional formatting link
- Click on Change date formats link
- Change the Date format from 12-hour to 24-hour
Let us discuss this from a more detailed perspective.
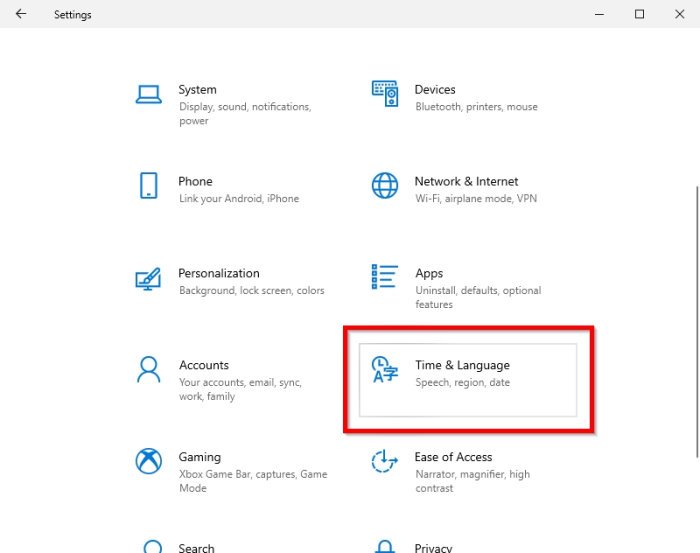
The first thing you will need to do here is to open the Settings app found in Windows 10 promptly. We can do this by clicking on the Windows key + I.
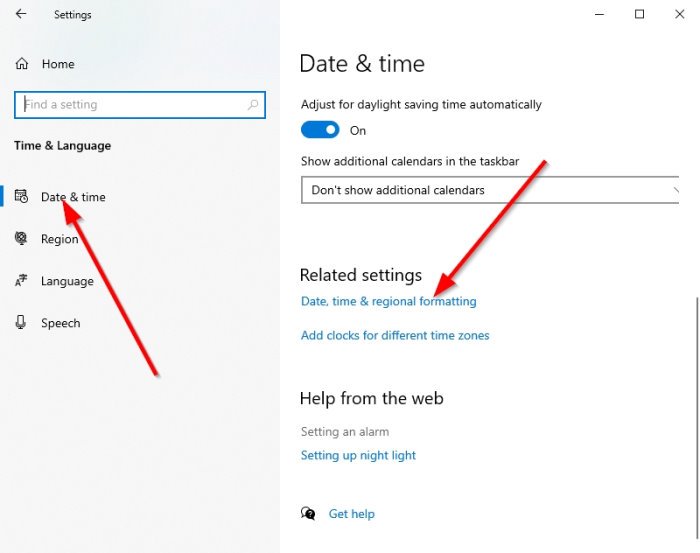
The next step is to navigate to Time & Language, then select Date & Time.
From there, please click on Date, time, and regional formatting. A new section should appear right away.
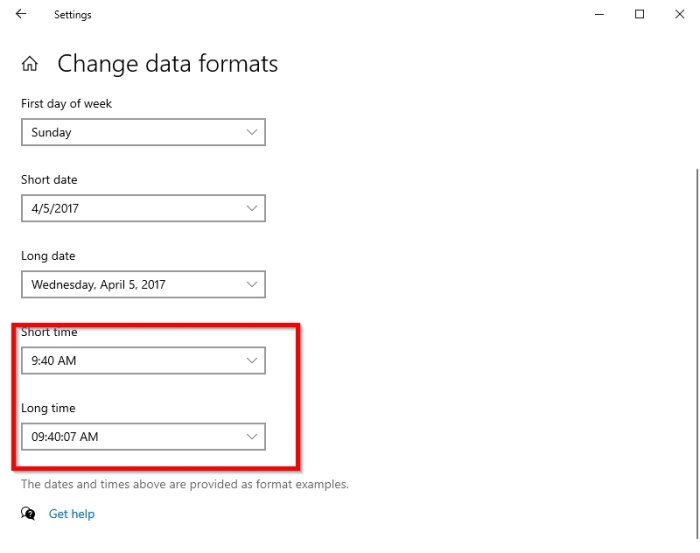
Go on ahead after its appearance and select Change data formats.
Scroll down until you’ve come across Short time and Long time.
In each, if you want to change things to the 24-hour clock, be sure the option with the 0 at the beginning.
Read: Show Full or Abbreviated Date and Time in System Tray.
How to change time format in Windows 11
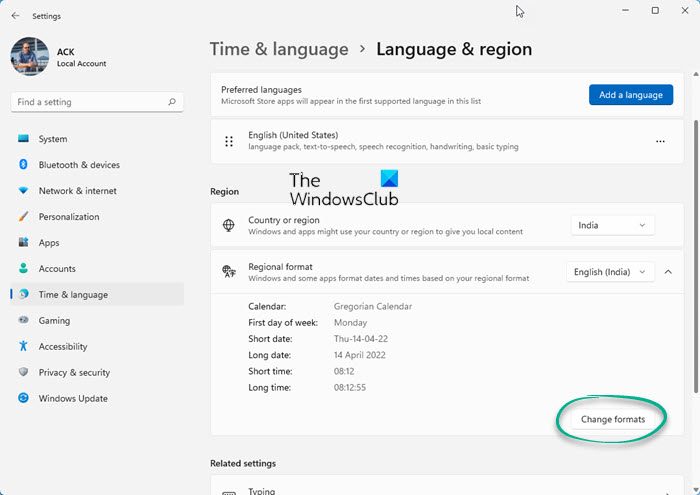
To change the 24-hour clock to 12-hour in Windows 11, do the following:
- Open Windows 11 Settings
- Select Time and Language settings
- Click on Language and Region
- Open Regional format
- Click on Change formats button
- Change the Date format from 12-hour to 24-hour
- Set the Short/Long time as per your preference.
- For instance, if your choose 09.40 or 9.40, it will be 24-hour, and if you choose 09.40 AM it will be 12-hour format.
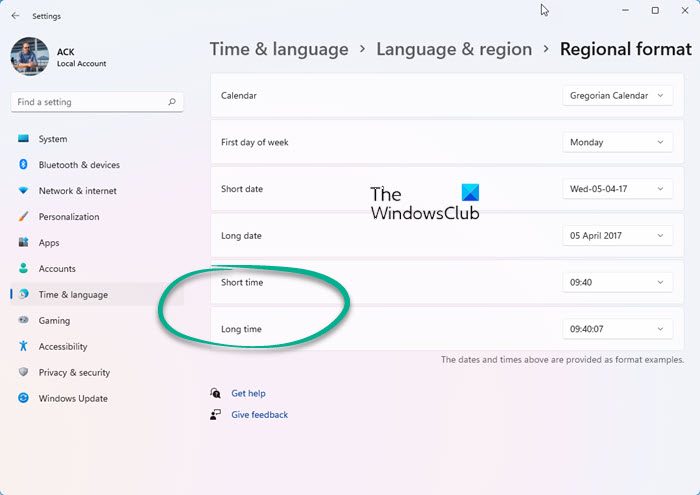
I hope this works for you.
Change date from 12-hour to 24-hour from the Control Panel
For us old-school Windows users, we still prefer to use the Control Panel for everything where possible. And that includes changing the time and date, so let’s talk about how to make the relevant adjustments from there.
- First, open the Control Panel the navigate directly to Clock and Region.
- After that, select Change date, time, or numbers formats under Region.
- Go to Additional settings > Time,
- From that section, make the relevant changes under Time Formats
- Complete the process by hitting OK.
That’s it.
Now read: How to change Lock Screen Clock format on Windows.
Leave a Reply