Microsoft PowerPoint is a powerful presentation program that offers a variety of features and tools. In this post, however, we will learn how to customize and format the background of a PowerPoint slide. The default background color of the PowerPoint slide is white. But sometimes, you might want to change it to make your presentation look more attractive. Let us see how to do it.
How to change Background in PowerPoint
To customize and format the background in Microsoft PowerPoint:
- Open PowerPoint
- Navigate to the Design tab
- Go to the Customize group
- Click on Format Background option
- Select one of the four Fill options.
Once here, you can do the needful. Let us look at this procedure in detail now.
Open PowerPoint and select the layout that you want for the slide. In this case, I have changed the layout of the slide to Blank. Once that is done, go to the Design tab and under the Customize group, click on Format Background option.

A new pop-up window will open to the right side of the slide.
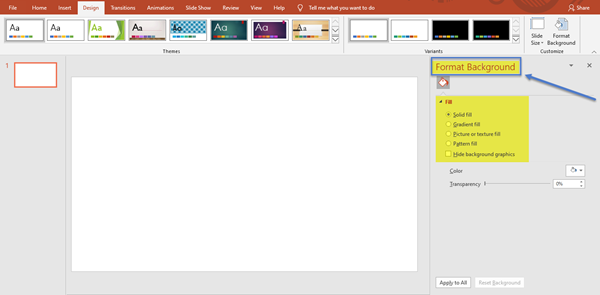
You will four Fill options such as-
- Solid fill
- Gradient fill
- Picture or Texture fill
- Pattern fill
At the end of these options, you will also see a check box for the Hide Background Graphics.
1] Solid Fill
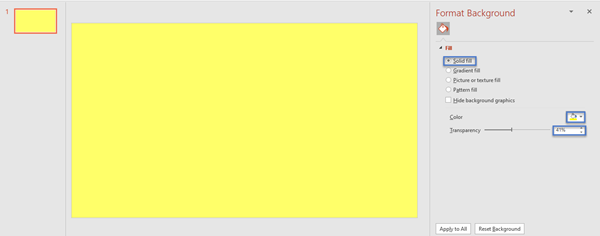
The Solid fill feature fills the entire background with the selected color as an even single color. You can also increase or decrease the level of transparency. Enter the percentage value or slide left or right on the scale to adjust or change the transparency. In the image below, I have selected the color yellow with a transparency of 41%.
2] Gradient Fill
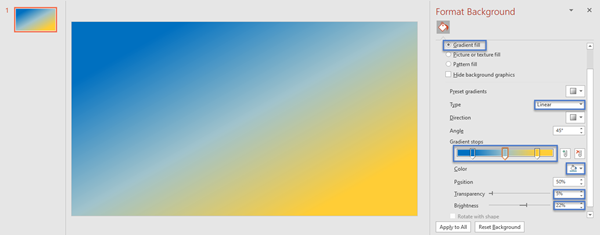
Gradient fill helps you add a number of gradients or progression of colors to the background. Choose the color for the fill, the number of gradient stops, type, direction, and angle of the gradient. You can add a gradient stop as well as remove a gradient stop. You can also adjust the transparency and the brightness according to your liking. There are pre-set gradients available too. In the example below, I have selected the color blue with three gradient stops, with type Linear, 5% transparency, and 22% brightness.
3] Picture or Texture Fill
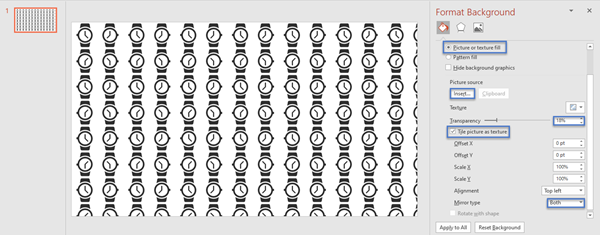
As the name suggests, you can either add a picture or a texture as the background fill. Click on Insert under Picture source to insert pictures from your computer or online; or icons from the icon collection. Once you have done that, adjust the transparency and choose the desired options for alignment and mirror type. You can also tile a picture or icon as texture to give it an effect. Under the Texture drop-down menu, you will find a variety of texture options to choose from. Here, I have selected the ‘watch’ icon from the Apparels category and tiled it as texture, with 18% transparency and mirror type as both horizontal and vertical.
4] Pattern Fill
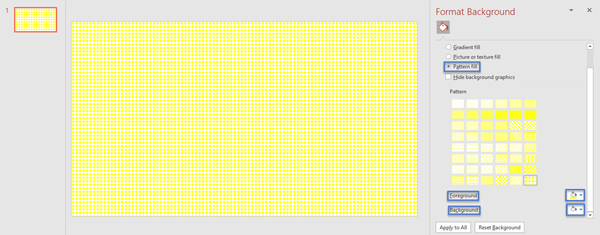
To customize the Pattern fill, select the foreground color, background color, and type of pattern from the given options. Different patterns are available, such as horizontal stripes, vertical stripes, diagonal stripes, wave, zig-zag, dotted diamond grid, sphere, small grid, large grid, and so on. Here, I have customized the pattern filled with the solid diamond grid pattern, with the foreground color as yellow and the background color as white.
Once the background fill is ready, click on the Apply to All option to apply the changes to all the slides. If you need to change the background fill, click on the Reset Background option.
So, isn’t it simple? Do try this out the next time you use PowerPoint. Follow these simple steps to make your presentation look absolutely attractive and amazing!
Leave a Reply