A new computer with a pre-loaded operating system comes with a default name which consists of your PC build and model etc. While we don’t often need to check our computer name, it appears when we connect our PC to some other machine. Users often change their computer’s name to something nice or interesting. In this post, we will learn about how to change your computer name in Windows 11/10.
Change computer name in Windows 11/10
There are two ways of doing this:
- Modern Windows Settings
- Classic Control Panel
You will need admin permission for both of these methods. The PC is also restarted in this process.
Via Settings

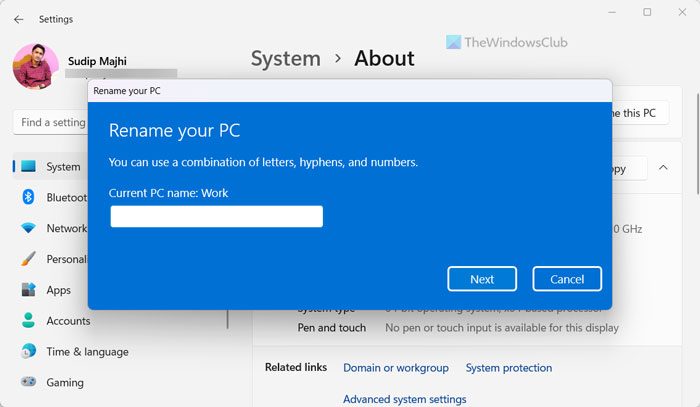
If you are using Windows 11, follow these steps to rename your PC:
- Press Win+I to open Windows Settings.
- Go to System > About.
- Click on the Rename this PC button.
- Enter the new name of the PC.
- Click the Next button.
- Click the Apply button.
- Restart your computer.
However, if you are using Windows 10, follow these steps:

While it has always been straightforward to rename your computer via Control Panel, Windows 10 lets you change your PC’s name right from the PC Settings.
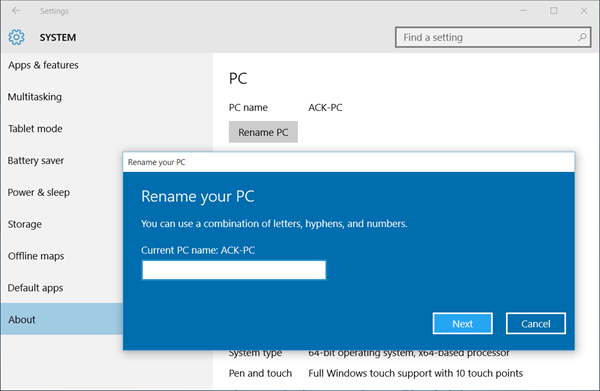
Press Win+I to open your Windows 10 Settings and go to System Settings.
Click on ‘About,’ and you will see a tab saying. “Rename PC”
Click on the tab, and there you are. You can now change your PC’s name to whatever you want and click on the Next button. You need to Restart your PC to get the changes saved.
Well, this was a fast and straightforward method to change your PC’s name, but if you want to follow the old process, you can also do it via system settings in the control panel.
Via Control Panel
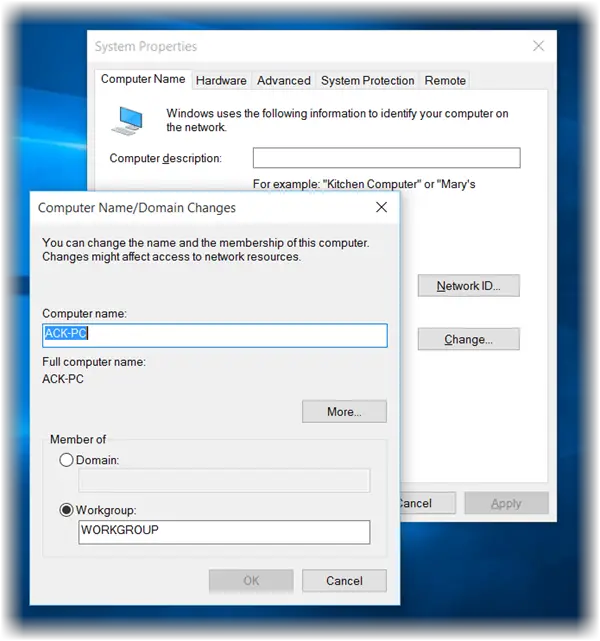
Press Win+R and type Sysdm.cpl to open the System Settings via Control Panel. This will open a dialog box displaying your System Properties like Computer Name, Hardware devices installed on your PC, Advanced settings like PC performance and recovery, System Protection, System Restore settings, and Remote assistance.

You can also see a button stating, ‘To rename this computer, click Change.’ Click on Change, fill in the name you want and click on OK. While changing the Computer Name, the pop-up also allows you to change the Workgroup of your PC. Make the desired changes and click on OK.
You can use this Control Panel method to change the computer name in Windows 8/7.
Windows 11: If you are using Windows 11 read – How to Rename PC in Windows 11.
Changes will take effect only after you restart your computer.
How do I change the owner name on my computer?
To change the owner name on your computer, you need to use the Windows Settings panel. Open Windows Settings and go to System > About. Then, click the Rename this PC button and enter the desired name. Next, click the Next button, apply the change and restart your computer.
How to change PC name using CMD?
In order to use the Command Prompt or CMD to change your PC name, you need to use the WMIC parameter. First, open the Command Prompt or the CMD instance in Windows Terminal with administrator privilege. Then, enter this command after changing the original names: WMIC computersystem where caption=’old-name’ rename new-name. Once done, close the windows and restart your computer.
Hope it helped.
Thanks for sharing! Useful !
wmic computersystem where name=”%computername%” call rename name=”MyName”