This post will show you how to change the Drive letter in Windows 11/10. For each hard drive partition, a letter like C, D, E, etc., is assigned automatically. If you want to change or rename some drive letter, then you can try any of the simple options covered in this post.
How to change drive letter in Windows 11/10
There are 5 different ways covered in this post to change or rename a drive letter in Windows 11/10. These are:
- Using Command Prompt
- Disk Management
- PowerShell
- Registry Editor
- Drive Letter Changer software.
1] Using Command Prompt
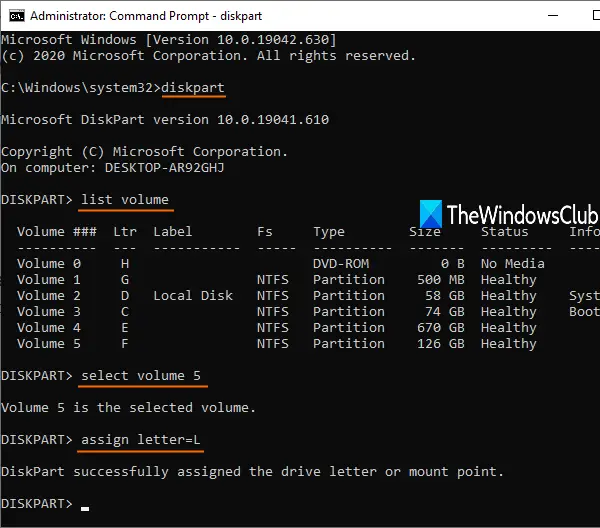
Follow these steps to change a drive letter using CMD or Command Prompt window:
- Run Command Prompt as an administrator
- Type
diskpartcommand and hit the enter key - Execute
list volumecommand to see the list of all hard drives including their volume numbers and letters - Run
select volume 5command. Replace 5 with any other volume number for which you want to change the drive letter - Execute
assign letter=Lcommand. Here again, replace L with any other alphabet.
This will change the drive letter immediately.
If the Drive letter is missing or hidden, then you can try some easy options to fix such an issue and then see the newly assigned letter.
2] Using Disk Management
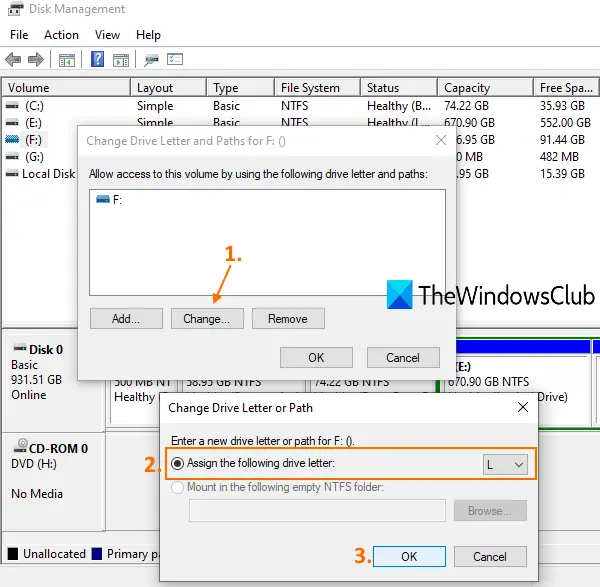
Type diskmgmt in the Search box and use the Enter key.
In the Disk Management window, the list of all volumes or drives, volume type, capacity, free space, etc., are visible. Right-click on a volume and use Change Drive Letters and Paths option.
A small box appears. Here, use the Change button, and another box will open. Now you can select the new letter using the drop-down menu and press the OK button.
Finally, confirm the change using the Yes button.
Read: How to Show Drive Letters first before Drive Names.
3] Using PowerShell
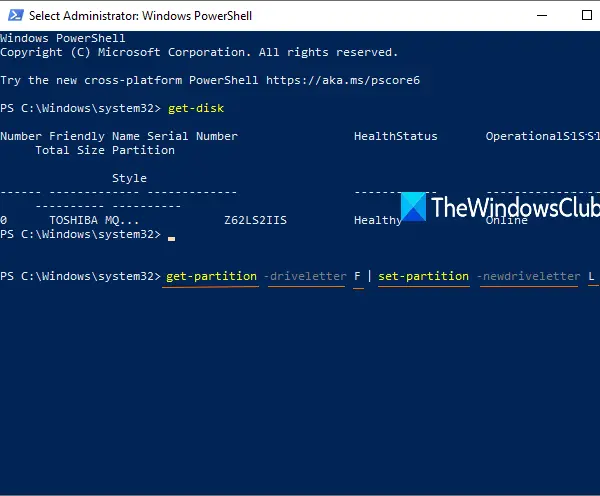
This option is also useful to change drive letters, but it doesn’t show volume numbers and letters. So, you first need to check which drive letter you want to change. After that, use these steps:
- Run elevated PowerShell window
- Now execute this command:
Get-partition -driveletter F | set-partition -newdriveletter L
Make sure to replace F and L with your actual drive letter and new drive letter.
4] Using Registry Editor
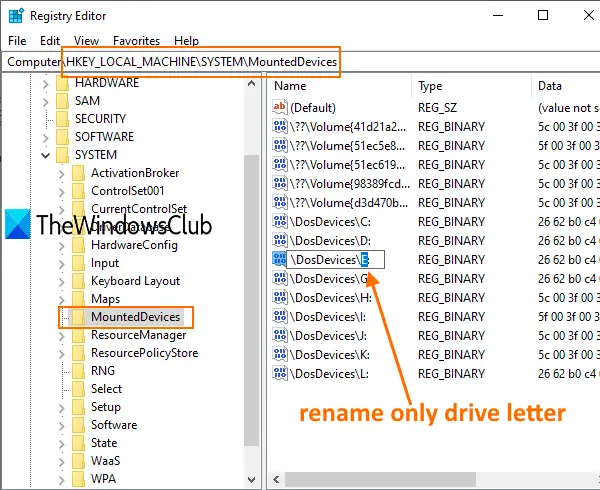
This method requires a PC reboot after applying the changes. The steps are:
Launch Registry Editor by typing regedit in the Search box.
Go to MountedDevices Registry key. Its path is:
HKEY_LOCAL_MACHINE\SYSTEM\MountedDevices
On the right section, you will see DWORD values like \DosDevices\D: for all the hard drives along with drive letters. Right-click on a value and use the Rename option.
You need to only rename the drive letter with a new letter and leave everything as it is. For example, change \DosDevices\D: with \DosDevices\L: and save it.
5] Using Drive Letter Changer software
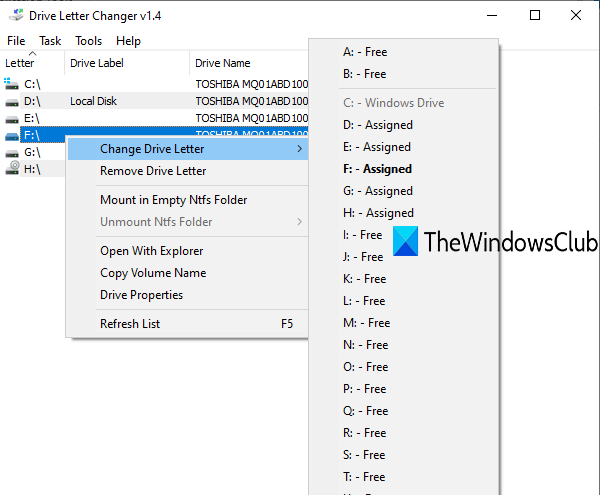
Drive Letter Changer is a free and portable tool. If you want to try some freeware to change drive letters in Windows 10, then this tool is nice. This tool also shows which letters are already assigned to other hard drives and which letters are available or free.
Grab this tool and execute its EXE file to launch its interface. It will show the list of all the drives. Select a drive and it will show the Change drive letter menu. Access that menu and the list of assigned and free drive letters will be visible to you. Select a letter and confirm your action using the Yes button to change the drive letter.
You can also use this tool to directly open the Disk Management window, Restart File Explorer, etc.
Hope these ways will help you easily change drive letters in Windows 11/10.
Related read: How to change Drive Icons in Windows.
How do I change my C drive to D drive?
To change your C drive to D drive, open “Disk Management” via Control Panel or by typing it into the Start menu. Right-click the C drive, select “Change Drive Letter and Paths,” choose “Change,” and assign D as the new letter. Restart your PC for the changes to take effect.
How do I change the drive name in Windows 11?
To change the drive name in Windows 11, open File Explorer, right-click on the drive you wish to rename, and select “Properties.” In the Properties window, enter the new name in the “General” tab and click “OK” or “Apply” to save your changes. This process updates the drive label visible in File Explorer. Alternatively, when the Context menu opens, select More options and then click on Rename.
Leave a Reply