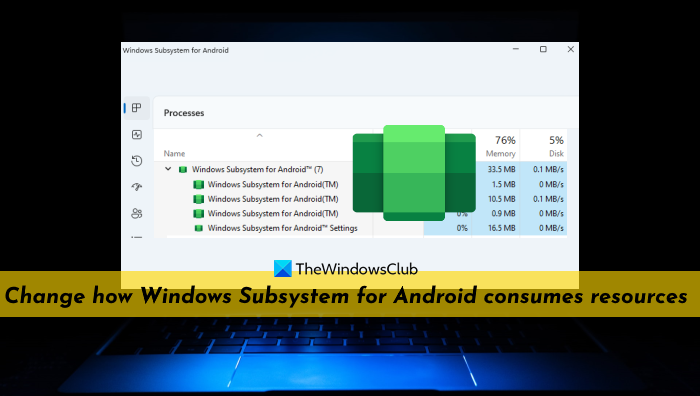
Windows Subsystem for Android (WSA) helps to run Android apps available in Amazon Appstore (with over 50K apps) on a Windows 11 device. Earlier limited to the US, the platform now supports more countries and regions including the UK, Canada, Italy, Japan, Germany, France, etc. While the default settings for WSA might work for some users, it may not be suitable for many users especially when it comes to using system resources (like Memory). But thankfully, there is a way to change how Windows Subsystem for Android consumes resources on a Windows 11 PC, and this post will help you with that.

There are two ways the Windows Subsystem for Android can use the system resources for mobile apps in Windows 11 OS. These are:
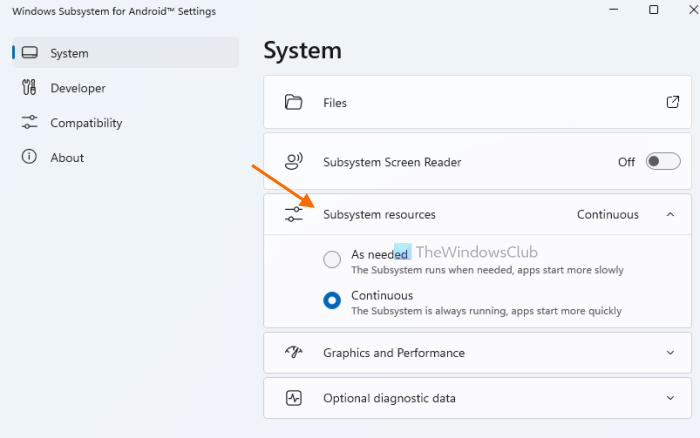
- As needed: This is the default setting. With this setting enabled, WSA is opened when needed. Hence, it uses system resources only when mobile apps are in use on your system. The apps may take a bit longer to start
- Continuous: With this setting, you can keep Windows Subsystem for Android open in the background to always be ready for opening the mobile apps. As WSA is always running, system resources are always in use (even if there is no mobile app opened). This setting helps to start apps quickly.
If you find that the default setting for Subsystem resources is not optimal or WSA uses system resources unnecessarily, then you can switch to a different setting.
Before you proceed further, install Windows Subsystem for Android if you haven’t already. A minimum of 8GB RAM is required and 16GB RAM is recommended to run Windows Subsystem for Android. In addition to that, the Virtual Machine Platform setting must be enabled on your Windows 11 system. If your system doesn’t meet the minimum RAM and other device requirements, then it won’t run.
Change how Windows Subsystem for Android consumes resources

The steps to change how Windows Subsystem for Android consumes resources in Windows 11 are as follows:
- Press the Start button to open the Start menu
- Click on All apps
- Scroll down the list of available apps
- Click on the Windows Subsystem for Android Settings
- The Settings window will open with the System section
- Click on the drop-down icon available for Subsystem resources
- Select the Continuous option if you want to keep the Subsystem always running. If your system has enough memory and it doesn’t affect the performance of other applications, you can select this setting. Or else, keep the As needed option selected.
That’s it!
Change Memory Allocation for WSA
In the latest version, you can configure how much memory to assign for Android apps on Windows 11
- Open Windows Subsystem for Android
- Click on System > Memory and performance
- Choose the memory allocation – 2GB, 6GB, or 16GB
- Turn off the Turn off Windows Subsystem for Android setting.
On the restart, your system will assign the amount of memory you have specified.
Assign custom memory allocation for WSA
In the latest version, you can set a custom memory size for WSA, use these steps:
- Open Windows Subsystem for Android
- Click on System > Memory and performance
- Choose Custom in the Memory Allocation setting
- Write the amount of RAM to assign for WSA and click Apply.
- Turn off the Turn off Windows Subsystem for Android setting.
On restart, your system will assign the custom memory you have specified.
Related: How to sideload Android apps using WSA on Windows 11
Other important settings for Windows Subsystem for Android

Apart from changing the Subsystem resources setting, there are some other important settings for WSA that you can customize as per your needs. These are:
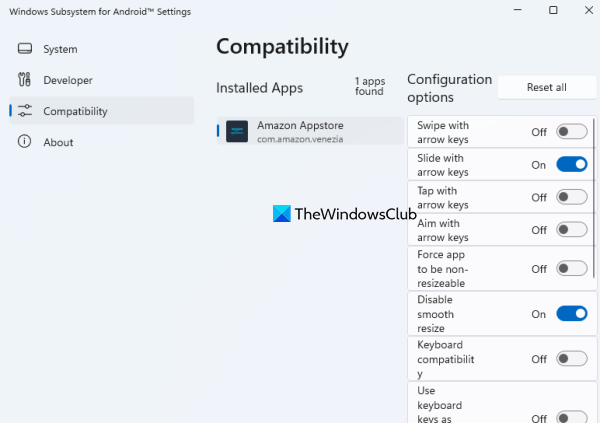
- Enable/disable smooth resize for installed apps, toggle keyboard compatibility, use keyboard keys as Gamepad buttons, tap with arrow keys, aim with arrow keys, and use other available configuration options for installed apps. Access the Compatibility section of the Windows Subsystem for Android Settings app to use such options. You can also reset all the configured options at once with the Reset all button
- Files: This is a very useful option present under the System section that helps to access saved files (say images, documents, video files, etc.) from your mobile apps. You can also save a copy of a file to your Windows 11 PC using the Open with right-click menu and selecting the Using Windows default option
- Graphics and Performance: This setting helps to select GPU for Android apps. By default, the Dynamic option is set that uses GPU that Windows is currently using
- Turn on the Advanced networking to connect Android apps to other devices on the same network
- Turn on the Developer mode, etc.
If you find that WSA is not running as expected after changing some settings, you can always reset the Windows Subsystem for Android to default.
How do I fix Windows Subsystem on Android?
If apps won’t install or keep crashing, then restart the Subsystem using the Windows Subsystem for Android Settings app and try again. You need to press the Turn off button available under the System section of that app to do this. On the other hand, if you are unable to start Windows Subsystem for Android on your Windows 11 system, then first access the Windows Features using the Search box. After that, enable or turn on Hyper-V, the Virtual Machine Platform, and Windows Hypervisor Platform, and restart your system.
Read next: Windows Subsystem for Android vs BlueStacks.