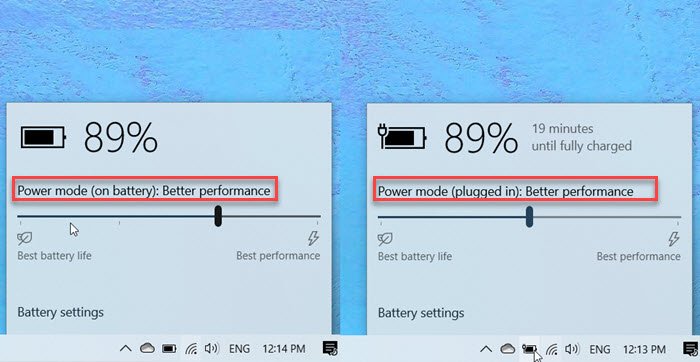
Windows 10 offers a built-in Power mode control, available when you click on the battery icon on the system tray. It’s a slider that can instantly push the computer between Best battery life, Better performance, and Best performance. This setting can also be changed using the powercfg command. This guide will show how you can change the Power configuration for performance using PowerCFG in Windows.
Change Power configuration for performance using PowerCFG

These commands can be executed on an elevated Command Prompt or Power Shell. When on Power or AC, there are three modes available in the slider—Better Battery Life, Balanced, and Best performance.
powercfg /setactive 961CC777-2547-4F9D-8174-7D86181b8A7A #Better Battery Life
powercfg /setactive 381B4222-F694-41F0-9685-FF5BB260DF2E #Balanced
powercfg /setactive DED574B5-45A0-4F42-8737-46345C09C238 #Best Performance
However, when on DC or battery, you have four modes—
- Best Performance,
- Better Performance,
- Better Battery, and
- Best Battery Life.
While the first three remain exactly as when plugged in, the additional scheme here is Battery Saver. In this mode, Windows features are disabled, throttled, or behave differently. Screen brightness is also reduced.
While the battery slider is readily available, using the powercfg command will be handy for power users. You can choose to create a batch file and keep it ready on the desktop. You can even add a shortcut to it and run it instantly.
Switch to the best performance mode if you are on battery but want solid performance. At times, when you are using a heavy application, a balanced approach may not work, and since balanced or lower modes throttle the processor, it becomes necessary.
Make sure to use them wisely as it will impact the battery life in the long run.
Read: Change Wireless Adapter power-saving mode using PowerCFG tool.
Leave a Reply