In Windows 10 Search box, a default text Type here to search is visible. While some users are OK with that, others want to replace that text. If you also want the same, then you can change this default text with a custom text of your choice. You can either add your own name or any other text you want. Thankfully, there is a built-in way to do so. In this post, we will help you change the Search box text with the help of the Registry Editor.

Before using this Registry tweak, you should backup Registry Editor. If something goes wrong, it can come in handy.
Change Search box text using Registry Editor
Here are the steps to change Search box text in Windows 10 from Type here to search to any other using Registry Editor:
- Open Registry Editor
- Access SearchBoxText Registry key
- Access Value name String value
- Change Value data text with custom text
- Restart File Explorer.
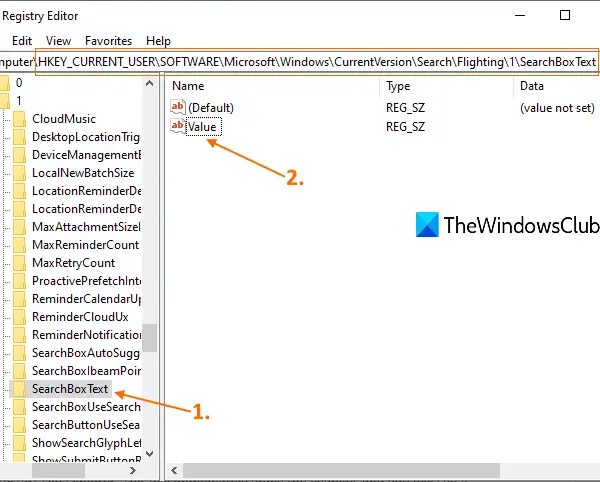
In this first step, you need to open Registry Editor. When the Registry Editor window is opened, navigate to the following key:
HKEY_CURRENT_USER\SOFTWARE\Microsoft\Windows\CurrentVersion\Search\Flighting\1\SearchBoxText

On the right-hand side, you will see a Value name String value, as visible in the above screenshot. Double-click on that value.
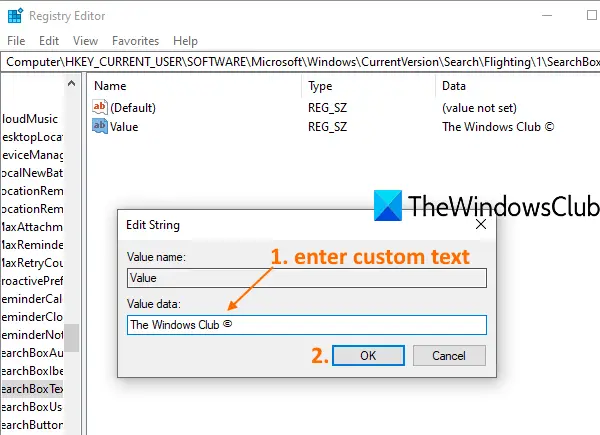
You will see a box popup. There, the default text is visible in the Value data. Replace that default text with a text of your choice.

Once done, exit the Registry.
Finally, you need to restart File Explorer. This will immediately apply the changes and you will see a new text in the Search box of Windows 10.
You can repeat the above steps to return the default text or add another text.
I hope you like this trick.
Leave a Reply